WooCommerce gives you the ability to create, manage, and sell both physical and digital products on your online store. However, while WooCommerce does give you a lot of options, there are other plugins you need to add to give your online store more functionality. One of these is WooCommerce extra product options, which will help you boost sales if used correctly.
Why Add Extra Product Options?
When you have a lot of different products that require different options to be labeled for customers, you need a solution that can easily handle this. Instead of trying to code in a bunch of different options, using a solid plugin to help you add these options to a product page is more ideal.
When we talk about extra product options, what exactly do we mean? Well, this can vary. But WooCommerce options text boxes, check boxes, radio buttons, emails fields, and date fields all come into play.
During the setup of WooCommerce, you already have the ability to add things like multiple colors, sizes, and pricing. So different product add ons in WooCommerce like this are important. This gives you the ability to really add anything you want to the product page and gives you a set of improved product options to entice potential customers.
Let’s take a look at how to easily add WooCommerce extra product options to a product page on your website.
Extra Product Options for WooCommerce

There is a fantastic plugin called Extra Product Options for WooCommerce. This plugin gives you the ability to easily add custom product fields. These fields include:
- Text Fields
- Radio Buttons
- Checkboxes
- Text Area Fields
- Hidden Fields
- Select
- Number
- Telephone
- Password
You can also choose a validation for the product fields from a predefined list. All the extra product options you add in the admin section of your website will automatically appear on your product pages based on the rules and layout you have configured in the settings.
Install and Activate WooCommerce Extra Product Options
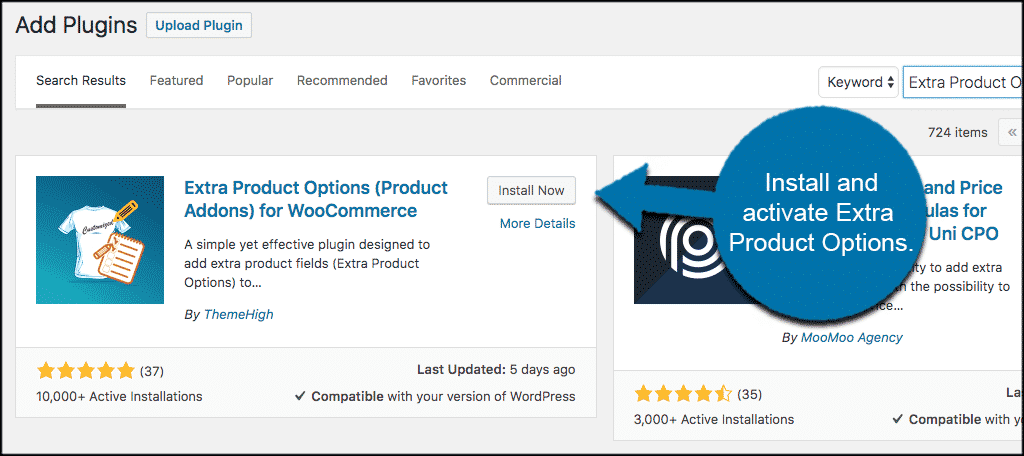
In order to get improved product options for WooCommerce, you need to install and activate the plugin. You can do this from the plugin’s page of your WordPress admin area.
Once the plugin has been installed and activated, click on Products > Extra Product Option on the left menu in your admin.
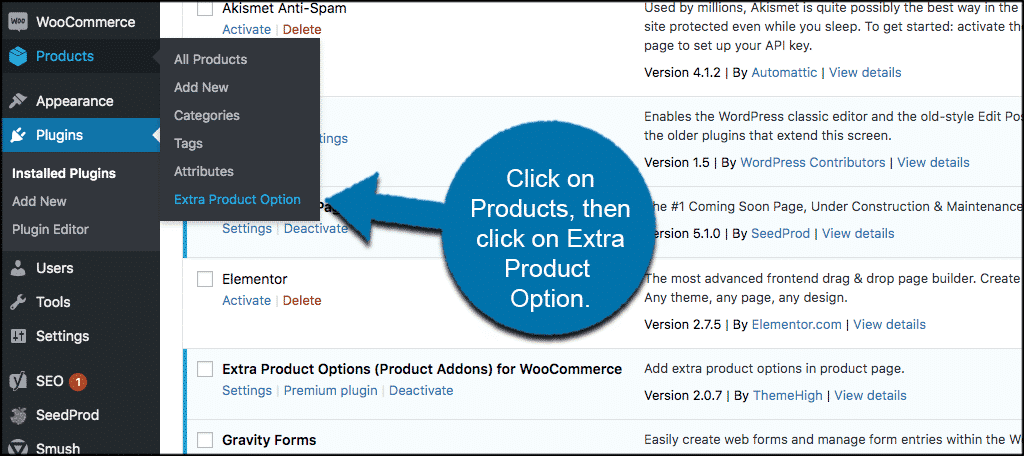
This will take you to the configuration area for the plugin and allow you to start adding WooCommerce extra product options.
Adding WooCommerce Options
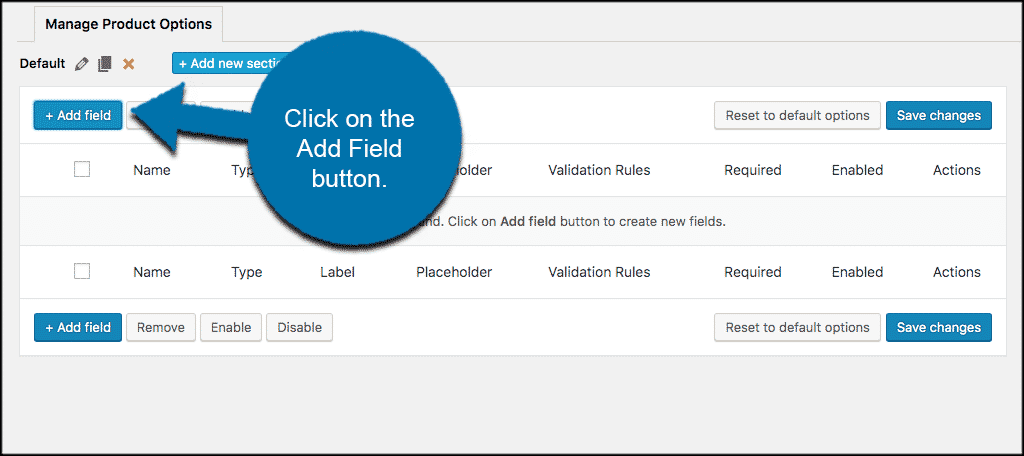
Now that you are in the configuration area for the plugin, let’s take a look at how to add some extra product options. Click on the “Add Field” button to add your first field and give your customers a new product option.
You will see a popup box appear. Inside this box are all the configuration options for adding extra product options to your WooCommerce product pages.
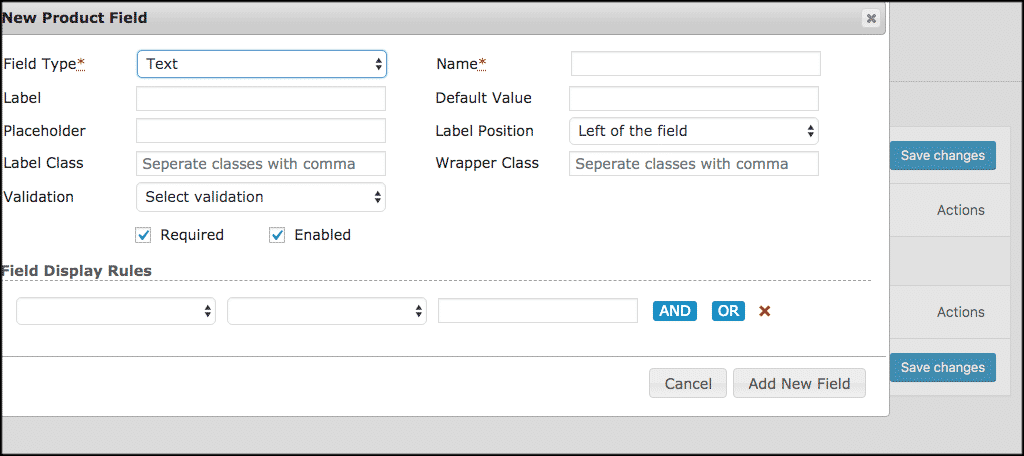
The way you configure these options and the field you choose to add is up to you. However, first, select a “Field Type” option from the dropdown box.
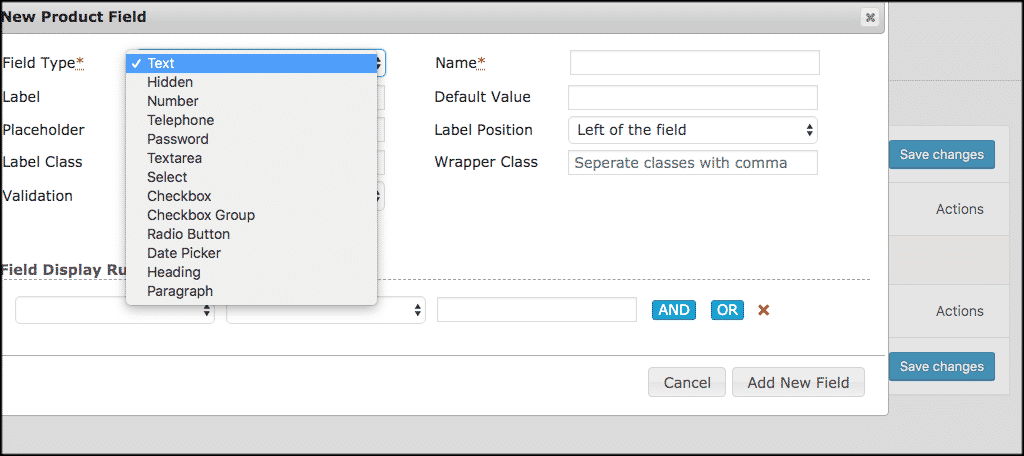
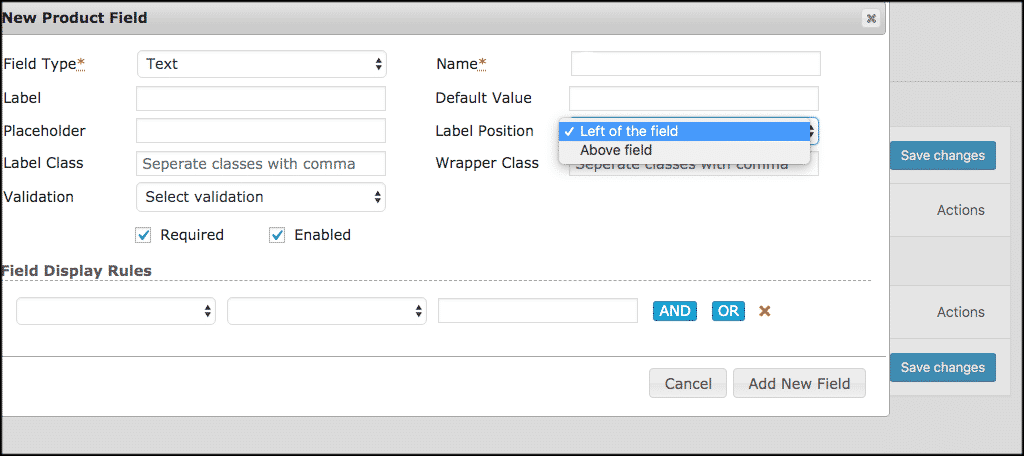
The rest of the available options will pop up based on the field type you choose. For this example, we will stick with the text field. Give it a name and then choose a label position.
Now go ahead and choose your field display rules. This is where you choose to show your field, how it appears, and what products it displays on.
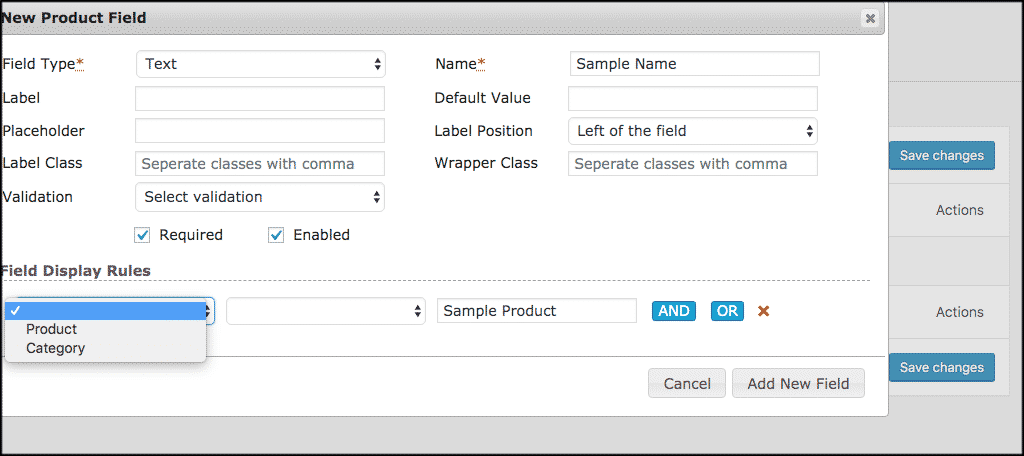
Fill out all three boxes.
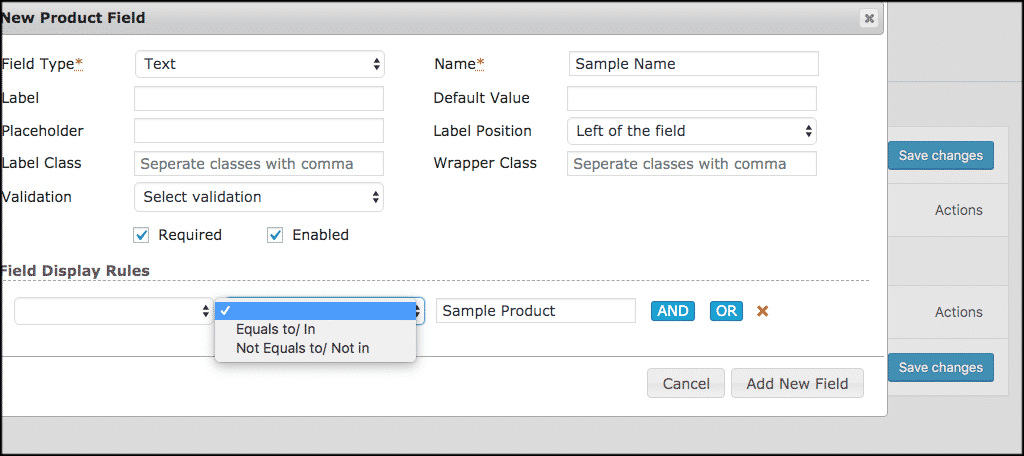
Click the “Add New Field” button when you are finished and you will see that a field for WooCommerce extra product options has now been added.
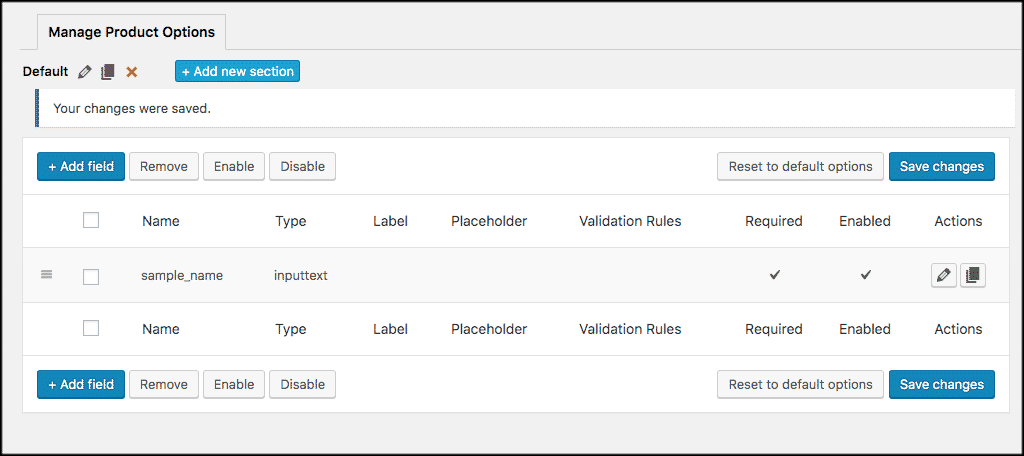
That’s it! You have successfully added WooCommerce extra product options for your online store customers.
Final Thoughts
Adding improved product options to your online store is a fantastic way to engage your customers better and also add various fields to product pages. There are different ways to accomplish this, but I feel using the Extra Product Options for WooCommerce plugin is the easiest and most effective way. This is one of many ways to drive and boost sales on your WooCommerce website.
Have you ever tried using this plugin? Do you prefer another method when it comes to extra product options?
