Hostels are very popular with travelers these days. Places around the world give you access to amenities that you wouldn’t always find in a hotel. You can go about booking a hostel on several well-known travel sites.
That being said, what if you wanted to create your own hostel booking website? These types of pop-up hostel online sites have become increasingly popular.
While many will use affiliate links to help customers make a booking for a hostel, you can actually create a booking website on your own. Let’s take a look at the tools needed to do this and how the setup works.
Why Create a Hostel Booking Website
If you are a travel agent for a third party company and already have a hotel booking website in place, then it makes sense to also add one for hostels. These types of websites are good money makers and if done right can lead to a solid source of income for you.
Giving people the ability of booking a hostel through a smaller site with lower add-on fees is always attractive to travelers. Furthermore, this will help build your reputation in the travel and booking industry.
If you have your own a hostel available for rent online, then you can build your own website. This will take out the third-party middle man and all their fees, allowing you to make more money and cater to the exact people you want booking your hostel.
In order to give people the ability to book a hostel from your website, you need to find a plugin that will allow this function. Sure, you can try and code the entire thing yourself from top to bottom, but this will take a long time and can be very expensive.
Booking a hostel is easy if you have the right tool. I found a great plugin to help you with this. Let’s take a look at it.
Hostel Plugin
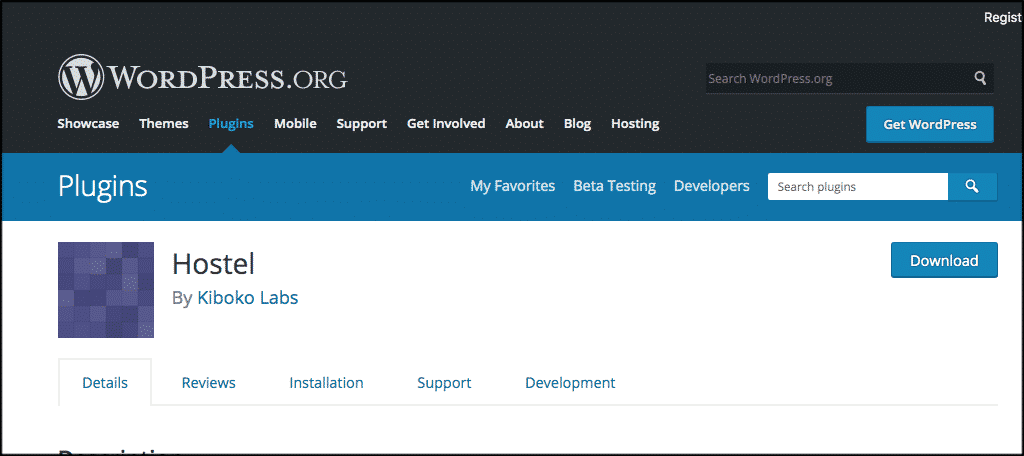
The Hostel plugin is an online booking system that will allow you to easily create a booking website. Booking a hostel is easier than ever for your users when this plugin is implemented correctly.
The plugin has an easy to use back-end management system that can be set up entirely from your WordPress admin dashboard. Hostel allows you to publish booking forms, room calendars, and room lists using a variety of shortcodes that can be put on any post or page you want.
The plugin is lightweight and can be used on any WordPress theme you are running. There is also a pro version of the plugin available if you want more features. That being said, the free version is packed with several great functions. Some of the main ones include:
- Manage your booking and payment gateways.
- Easily manage all email notifications in the back-end.
- Display rooms, beds, prices, and more.
If you have unavailable dates because you are gone or just don’t want to rent, then those can be added and managed. - Process payments, contact customers.
- List rooms using shortcodes based on your settings.
- Synchronize using iCal with other online booking systems.
- The plugin is mobile-friendly.
All-in-all, the Hostel plugin makes booking simple and easy while giving you the ability to do it all from your own website.
Let’s take a look at how to install, activate, and set the plugin up for use.
Install and Activate Hostel Plugin
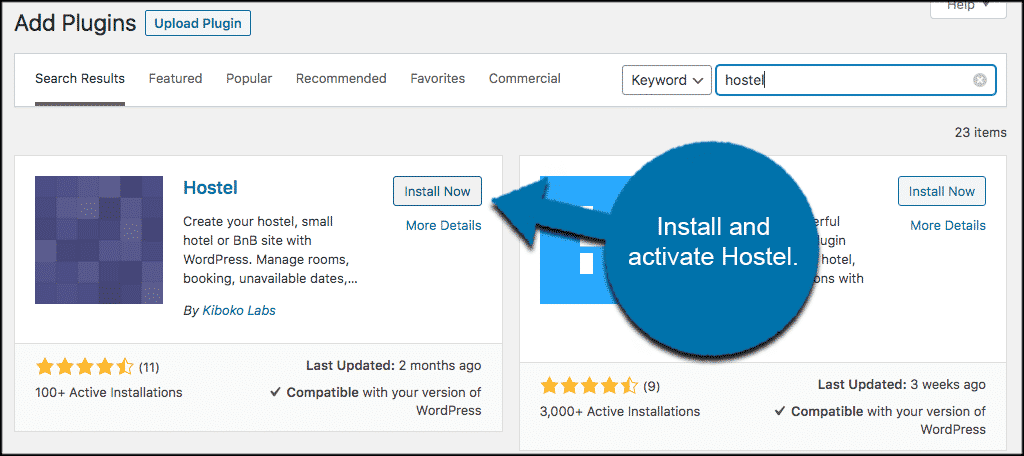
When your hostel is online, it makes it easy for people to book. In order to do this, you first need to install and activate the Hostel plugin. You can do this from your WordPress admin dashboard. Simply go to the plugins page in the back-end and search the name.
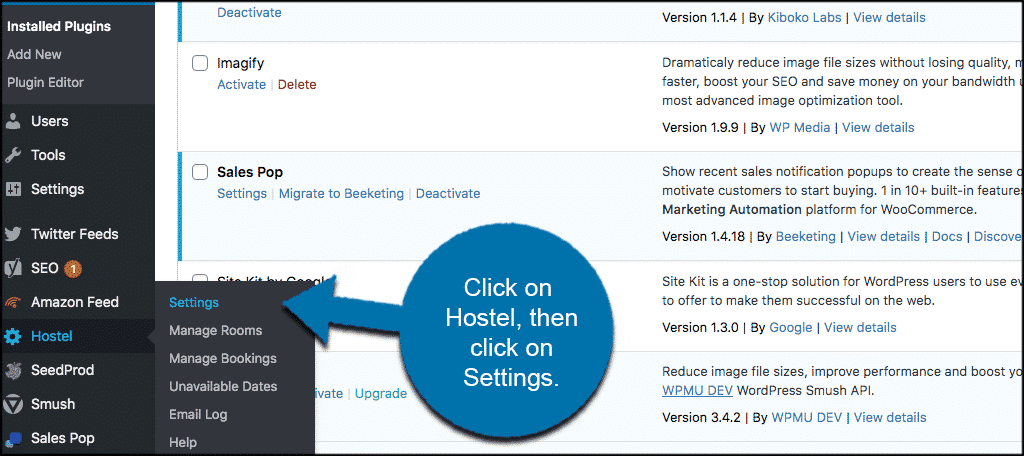
Once the plugin has been activated, you will see that a “Hostel” menu item has been automatically created in the left side menu of your admin area. Click on Hostel > Settings to access the main configuration page.
Now, let’s go over the settings together and get the plugin going.
Settings for Booking a Hostel
When you get to the main settings page for the Hostel plugin, you will see that it is just one page with a few sections. Basically, you have three main sections here. You can set up the actual settings for the hostel or hostels you have, mess with date picker and localization, and then setup admin roles how you feel.
The first part of the plugin lets you pick and choose the following:
- Currency
- Booking Mode
- Minimum Stay
- Room Booking in Advance
- Limit Bookings
- Emails
- SQL Error Reports
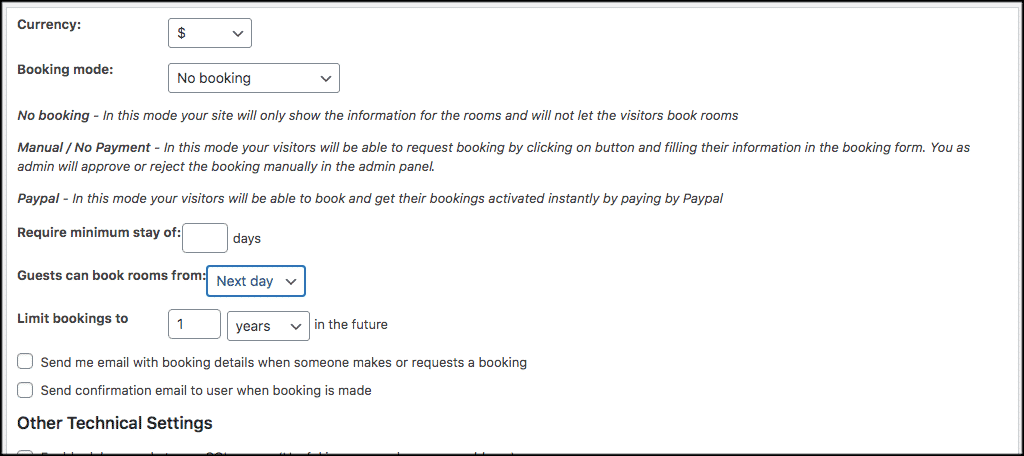
Go ahead and set all those up how you want for your particular website.
The next two sections deal with localization and administration control. Go ahead and set those options up how you feel is best based on who you want to have access and who you want to be able to control settings.
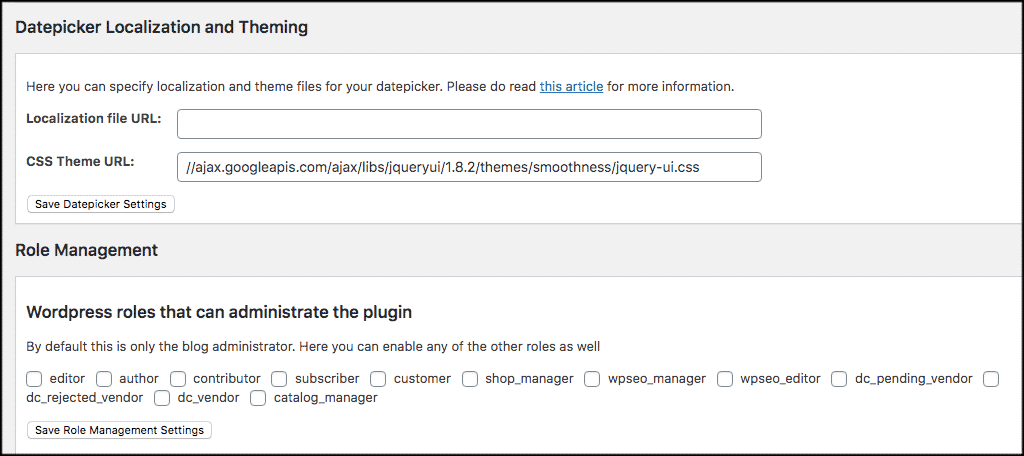
Once these settings are filled out and complete, your shortcodes will display based on your choices. From here, you need to go add a room or manage other areas of the plugin.
Manage Rooms
When booking a hostel, people need to see the rooms and room information. Your next step is to go to the “Manage Rooms” tab and either update your already existing rooms or start adding everything you have.
Click on the “Manage Rooms” link located under the main Hostel tab in your left side menu to access this area.
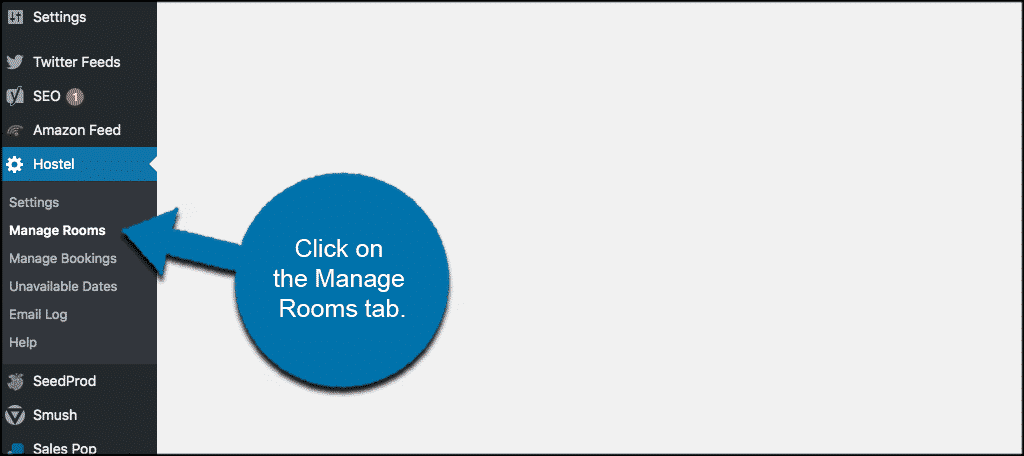
If you don’t have any rooms already in the system or haven’t imported anything, then click on the “Click here to add room” link and add your first room.
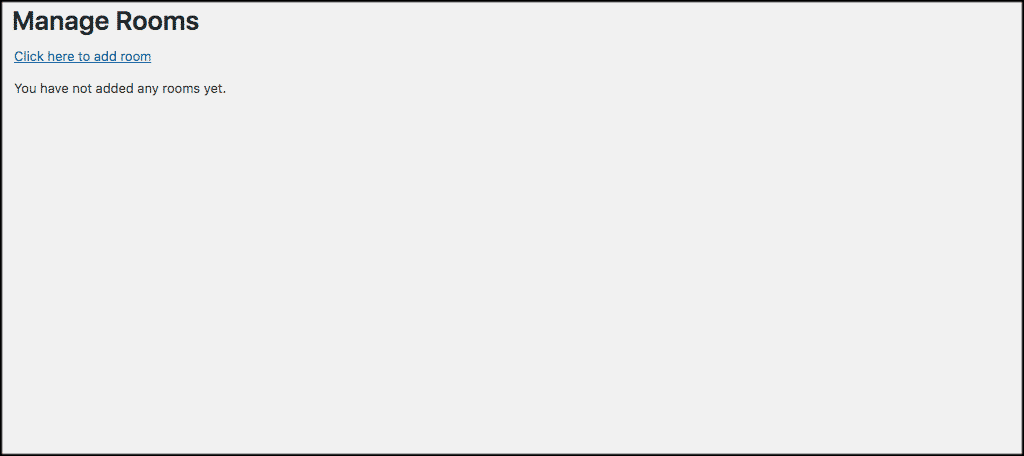
A dropdown screen will appear. Simply add in all the info needed to add a room. You can also use the editor to add more information. Add media, descriptions, beds, room, types, and don’t forget to give your room a title.
When you are finished, click on the “Save Room Details” button and your first room will be ready to roll. You can add as many rooms as you want. They will all display using shortcodes on any post or page you put them on.
Manage Bookings
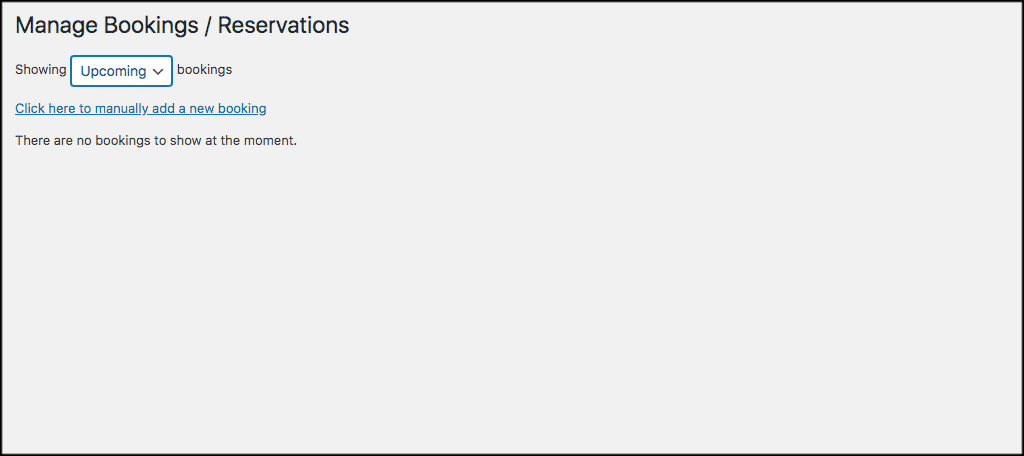
Click on the “Manage Bookings’ tab to go and manage all your bookings.
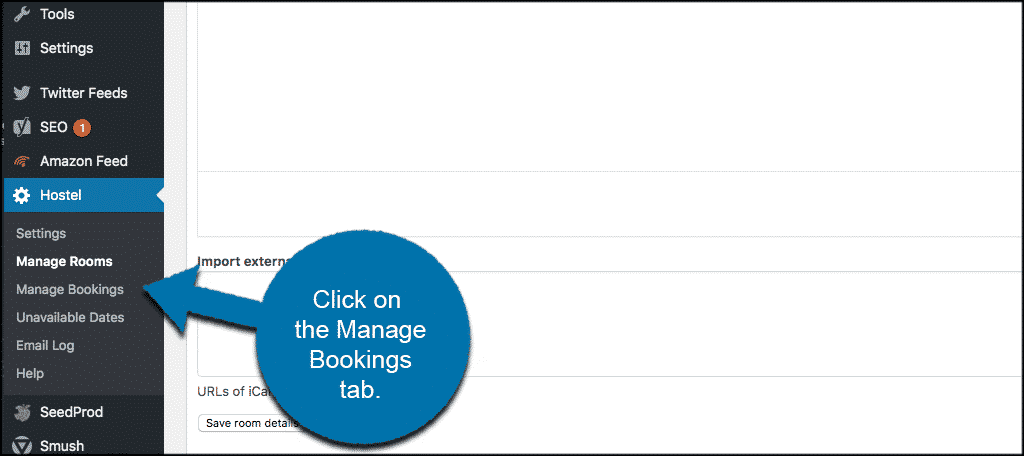
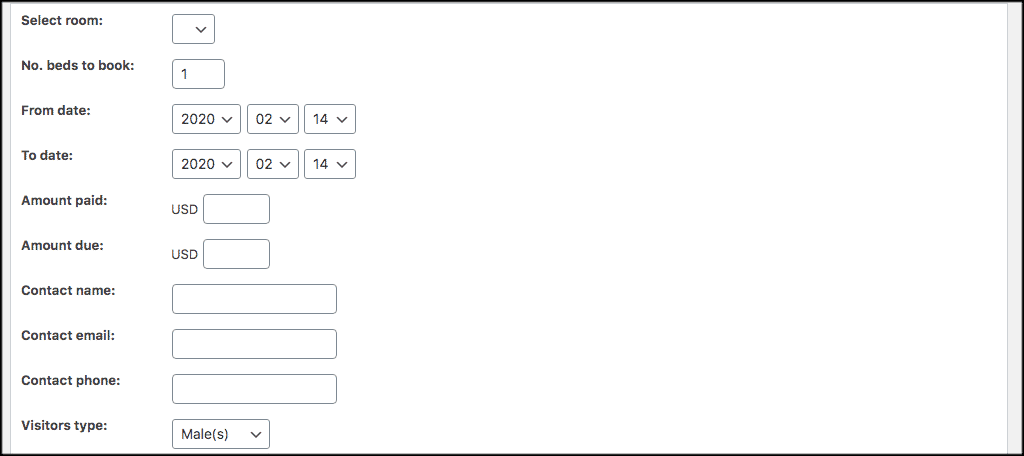
If no bookings are available, the page will be blank. However, you can also add a booking manually here. This is important if booking a hostel automatically online is not available. People can contact you and you can add the booking manually.
Go ahead and put in all the relevant information needed to manually add a booking to your hostel website. The system will send an email to the client and you can get it all in place.
Note: You can also manage unavailable dates and check your entire email log by clicking on the relevant tabs.
That’s it! Booking a hostel from your own site is complete and you should be up and running. Simply put the shortcodes into the post or page you want items to display and you are all set.
Final Thoughts
Booking a hostel can be a tedious process sometimes. That being said, if you use the Hostel plugin and allow people to make a booking from your own website, the process is much faster and easier for everyone involved.
Have you used the Hostel plugin to create a booking website? Do you prefer to upgrade to the pro version that allows for more capability?
