Are you looking to integrate your WordPress website with X, the platform previously known as Twitter? You can do so in a multitude of way like creating an automatic Twitter post every time you publish something in WordPress.
Doing so can be a great boon for traffic as you can get a lot more people to see when you have a post go live.
And with the right plugin it is possible to create a tweet every time you publish a post in WordPress. This can save you a lot of time when starting out and get more eyes on your content, so it’s two birds with a single stone.
Today, I will demonstrate how to automatically tweet every time you post on WordPress with the XPoster plugin.
Why Enable Auto Twitter Posts for WordPress?
It has become standard practice for every website to have a social media presence across multiple platforms. The typical three include Facebook, Instagram, and X (Twitter). However, actually managing this can take up a lot of time.
Especially if you are not using a tool that allows you to post on all of them at once.
Sadly, these tools mostly cost a premium, and this is an expense that many new sites cannot afford, but with the library of plugins available in WordPress, it is possible to get the same effect with the right plugin.
Doing so can help grow your website organically as one user may share your posts with friends and family. Or it could just end up going viral with the right marketing approach. There’s no downside to doing this, so it’s pure profit if it works.
Creating an Automatic Twitter Post from WordPress
This tutorial will focus on the XPoster plugin (formerly WP to Twitter). Essentially, you just need to connect the X API to the plugin and every time you publish a post, the plugin will create an automatic tweet on X.
Now, if you keep up with social media news, you will know that Elon Musk changed the rules of the X API, and it now costs money for developers to use. And while this is true, you can still send out 50 Tweets a day using the API for free.
Unless you are creating more than 50 posts a day, this will be more than enough for most blogs. Overall, the process is quite simple, and the payoff can be massive if you can build up a large following.
Step 1: Installing XPoster
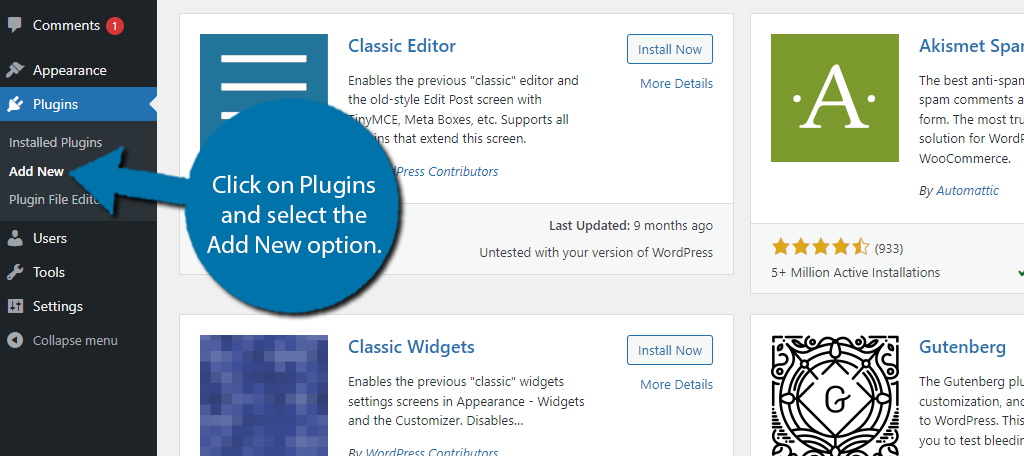
Let’s start off by clicking on Plugins and selecting the Add New option on the left-hand admin panel.
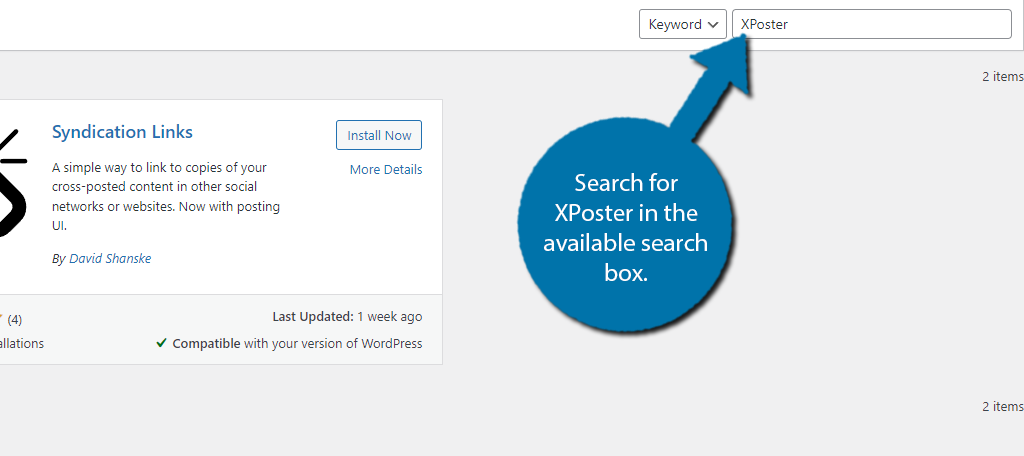
Search for XPoster in the available search box. This will pull up additional plugins that you may find helpful.
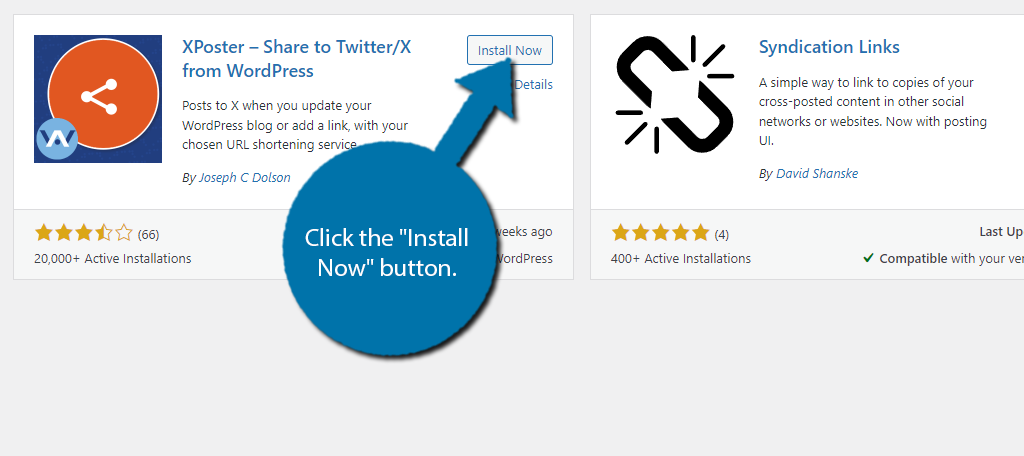
Find the XPoster plugin and click the “Install Now” button and activate the plugin for use.
Step 2: Obtain the API Key for X (Twitter)
The plugin itself is quite simple and really just requires you to link it to the X API where it will then be able to automate posts every time you release something new on WordPress. It is worth pointing out that you do need a mobile number attached to your X account.
This is required for API access among other things. The good news is that the plugin does a terrific job of explaining the process step-by-step. Thus, everything you need to know is laid out for your viewing pleasure.
Note: If you already have an API key ready to use, skip to step 3.
On the left-hand admin panel, click on XPoster. This will pull up the main settings page for the plugin.
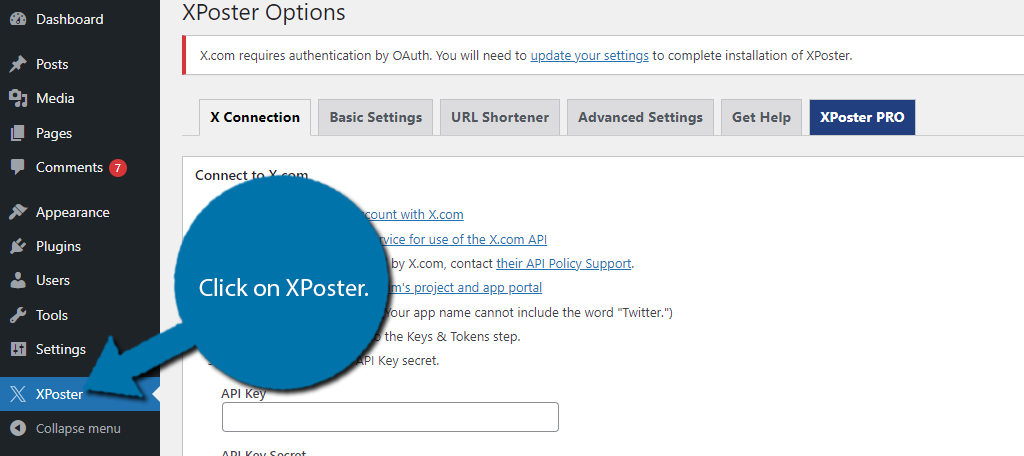
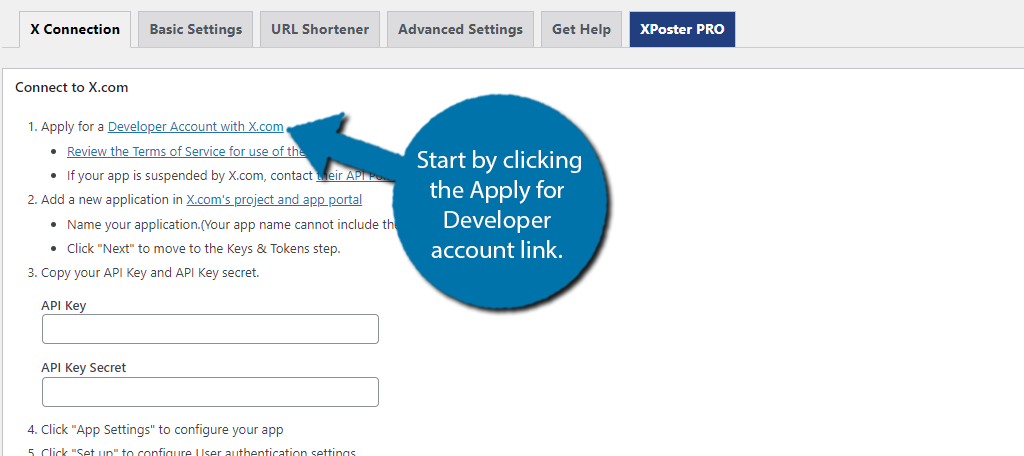
This page is broken up into multiple tabs, but we will just stick to the first tab, X Connections, for now. It contains the instructions to link the plugin to your X Developer account by entering the API Keys. Start by clicking the Apply for Developer account link.
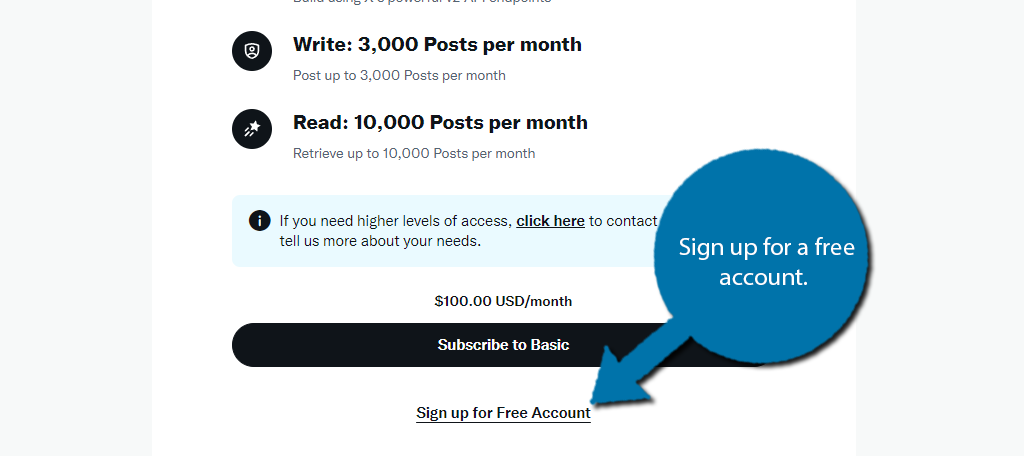
This will prompt you to sign in to your X account if you have not already. From here, you will see the developer plans offered by X. These include the Pro plan for $5,000 and Basic for $1,000. Ignore these and click on the Sign Up For Free Account at the bottom.
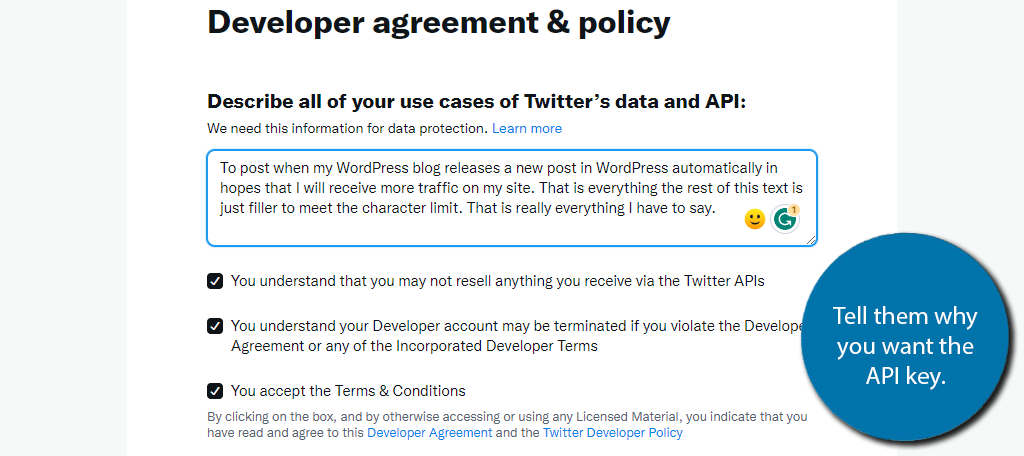
You will now be prompted to explain why you want the API access on X. This response must be 250 characters and you must agree to all of the terms and conditions. Submit it once everything is filled in.
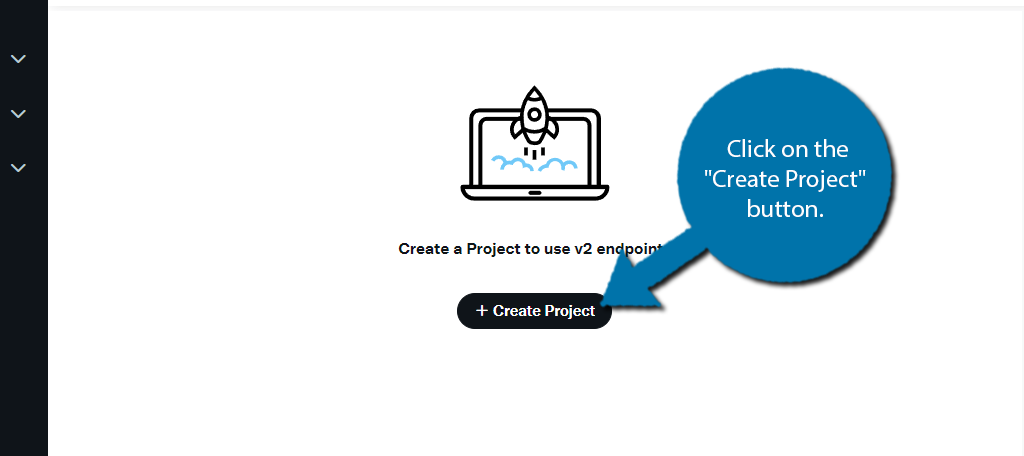
This will bring you to the developer dashboard. click on the “Create Project” button.
Enter a Project name and click on the “Next” button. Now, select a Use Case from the drop-down list and continue.
Enter a short description of this project and continue to the final step. This should allow you to create a new app.
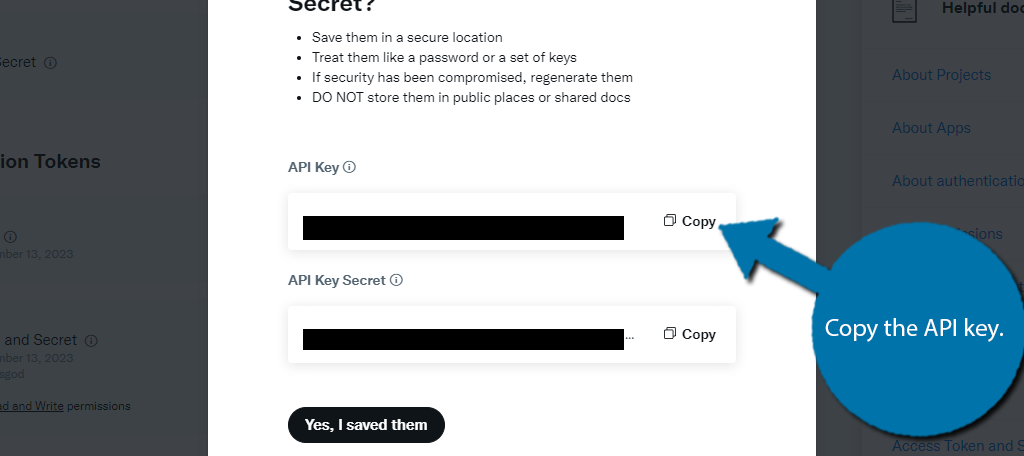
Once everything is complete, access the tokens section and here you can find and copy the API key.
Step 3: Link Your X Account
Now that we have the API key, all we need to do to link your X developer account and WordPress is to enter the API key into the plugin settings. And configure a few settings. Paste the API key into the appropriate text box.
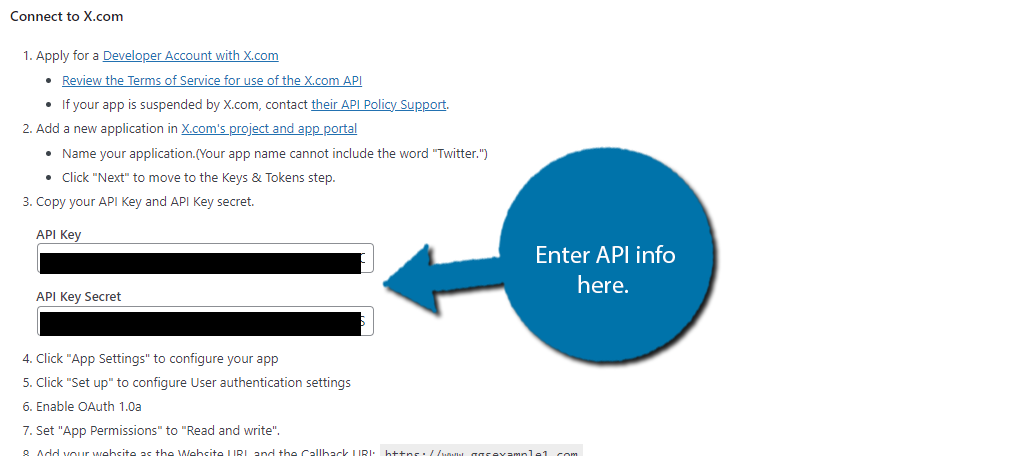
Now we need to configure the app we made for X. Click on the Settings tab in the X developer section. Then locate the User authentication settings and click on the “Edit” button.

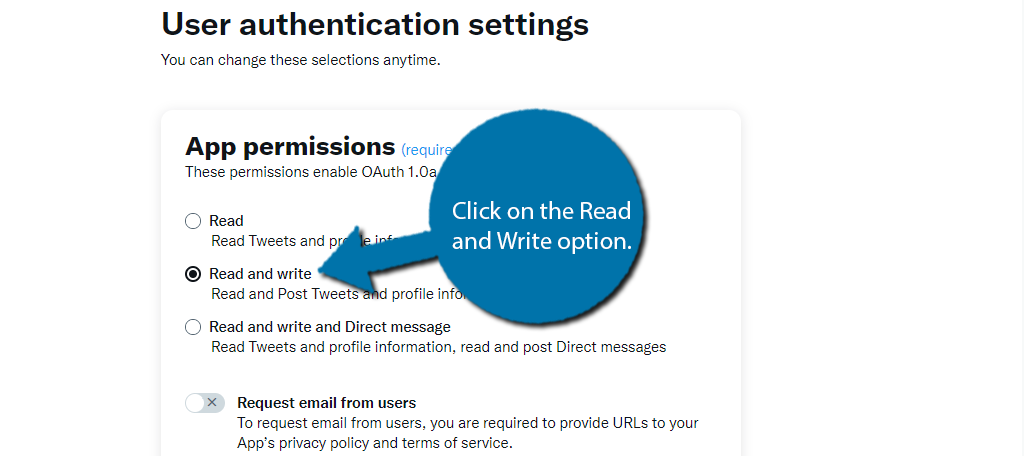
The first option is for the App Permissions. Make sure it is set to “Read and write” or else the plugin will not be able to post.
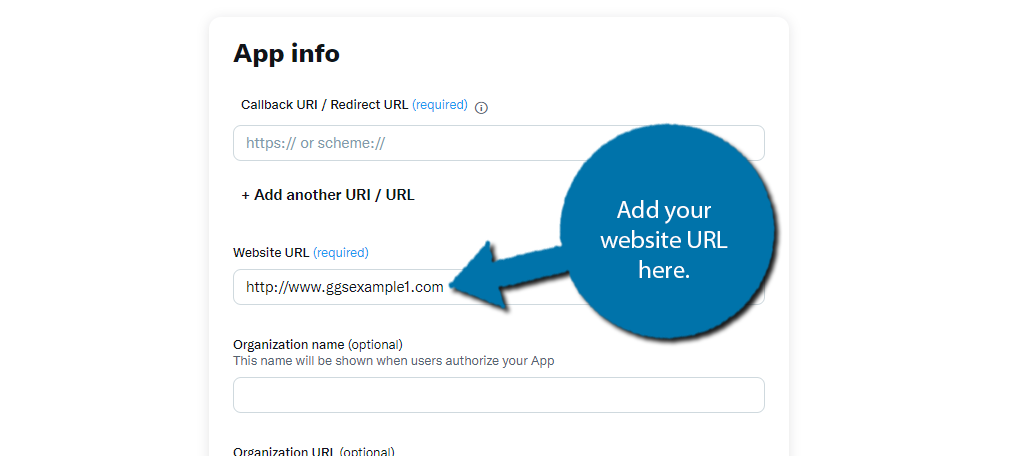
Scroll down to the App Info section and add your website URL to the appropriate text box.
Scroll down to the bottom and save the changes you made.
Now, go back to the Tokens section. Generate and copy the Access Token and Bearer Token. Paste them into WordPress and click on the “Connect to X.com” button.
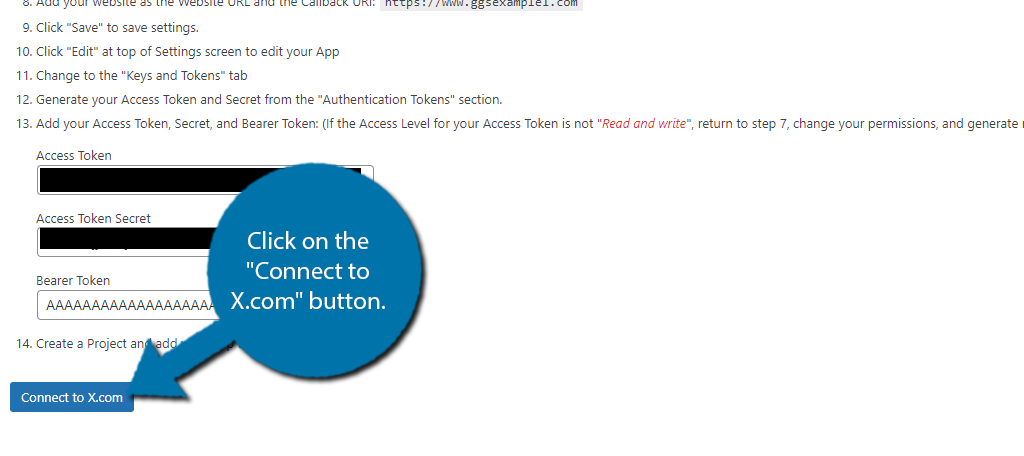
And now your WordPress site is linked with X.
Step 4: Setting Up XPoster
Next, you need to set up the plugin. This is how to set the template message that is posted on X whenever you publish a post.
Click on the Basic Settings tab. On this tab, you can set up when a Tweet is created and what it will say.
There are two tabs. One is for when you publish a new post and the other is for when you publish a new page. They are completely identical settings-wise. Simply edit the default message in the text box to customize what it says.
Note: There is also an option to create a tweet when you edit a post. This is off by default and probably for the best.
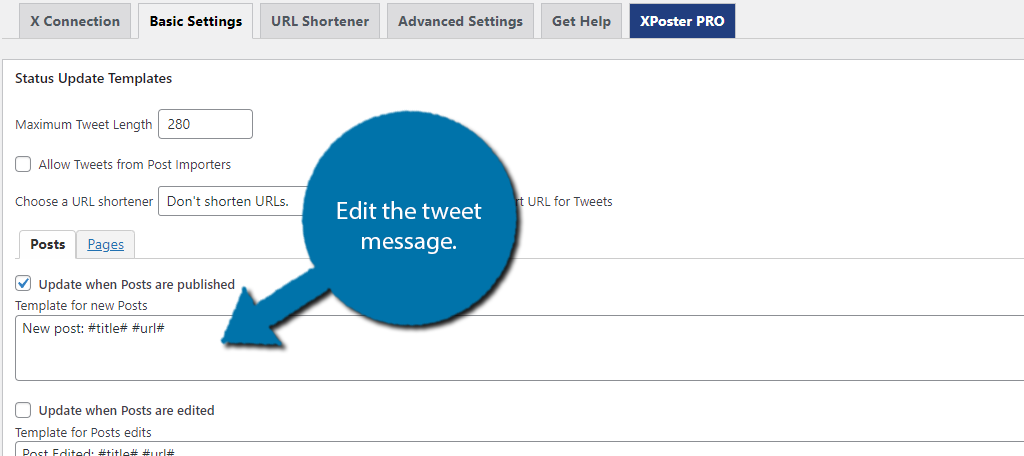
Save the changes and you’re good to go. There are some more options in the Advanced Settings tab. Most notable is the ability to include a tag, but I’ll leave these options to you as they are quite specific to your site’s needs and SEO strategy.
Congratulations on learning how to create an automatic Twitter post every time you publish in WordPress.
Automatic Twitter Post FAQ
No. Users are less likely to follow an account that just consists of automatic tweets concerning posts. In fact, users are smart enough to actively avoid these types of accounts as they are quite boring to receive notifications about.
Absolutely! Each platform has a different way of showing content off to users, and one may be better for your content than another. Not to mention not every user that uses X uses Facebook, thus there are more potential eyes on your content.
The API limits you to 50 free posts per day, and honestly, you should only be using maybe one to three per day for this purpose. With maybe the exception of a news site, anything beyond this is just too much and can annoy users.
While it will post a link to your X account, it is obviously an automated tweet. You really do need to make it more enticing and match your website. For instance, a news site may want to change the message to “Breaking News:” to entice users.
Well, that really depends on the type of website you are running. For example, an environmental blog, posting images that relate to the environment is a great option, or relinking posts from other authorities on the matter.
Absolutely! There is no shortage of plugins that allow for automatic Twitter posting in WordPress. One such is the WP to Buffer plugin that not only supports X but also Facebook and LinkedIn.
Yes. Adding a personal touch to each post on Twitter is much better than reading an automated post about WordPress posts. It helps the tweet stand out, which can help it gain more traction from user sharing.
Send Out an Automatic Twitter Post Today
As you can see, it is actually not that difficult to send out an automatic Twitter post every time you publish new content in WordPress. The XPoster plugin is quite simple to use and since it is free, there is no excuse not to.
With that said, it is important to avoid a key turn-off for most users; spam. It is very easy for users to consider your automatic posts as spam if they are too frequent and are the only type of post your account produces.
As such, you need to actually create real tweets that engage your followers and make them value following your account. If not, they are sure to follow other accounts instead.
How often do you send an automatic Twitter post from WordPress? Do you use a different plugin to do this?


Thanks a lot for help
You’re welcome.