If you use a lot of images on your website, you’ll understand it can be hard to browse your media library. By default, the media library is sorted by the newest upload first, which can make reusing images a hassle.
However, you can make it much easier by creating media library categories to help sort your images. Unfortunately, this isn’t a built-in feature of WordPress. But like most things, there is a plugin that can do this for you.
Today, I will demonstrate how to use the Media Library Categories plugin to do just that.
Why Add Media Library Categories in WordPress
When your media library gets too large, it’s like trying to find a needle in a haystack. That is unless you remember what you named the file originally.
However, by adding categories to your media library, you can easily sort your images, assuming you set the categories for every image.
Normally, when you are not sure if you uploaded an image to WordPress, you don’t think twice about re-uploading the image. However, you should reconsider not duplicating files.
Uploading duplicates of images is a big waste of space and adds to the clutter in your media library. More importantly, you have a limited amount of room for your website. If you use too much, you will have to pay for more storage in most cases.
Thus, making the most out of your space is essential.
Reusing Images
There has been somewhat of a misconception in reusing images.
It is perfectly okay with search engines if you reuse images. In fact, Google has even come out and said it is fine.
However, many website owners prefer not to reuse images because it is repetitive and some even feel it cheapens the visitor’s experience.
So, how should you approach reusing images in WordPress?
Well, it’s completely up to you. Personally, I would try to use different images whenever possible. But sometimes, the same image just works, especially if you haven’t used it in a long time. We also live in the age of memes, and reusing them is perfectly acceptable.
Installing Media Library Categories
The Media Library Categories plugin is exactly what it sounds like. It allows you to add categories to the content in the media library. The plugin allows you to use bulk action to do this, which is completely necessary if you have hundreds or thousands of images to sort.
It also allows you to create your own categories or use the ones you have already created in WordPress. Luckily, the plugin is extremely easy to use, so let’s get right into it.
Click on Plugins and select the Add New option on the left-hand admin panel.
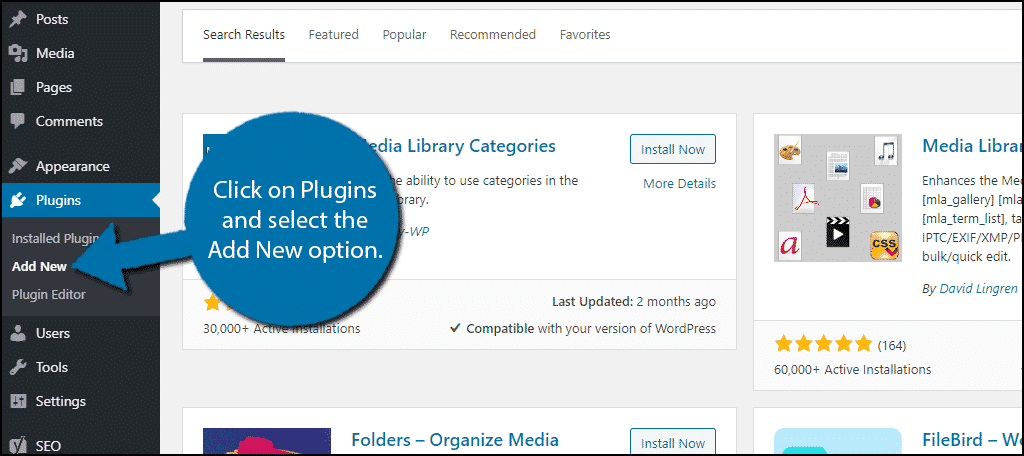
Search for Media Library Categories in the available search box. This will pull up additional plugins that you may find helpful.
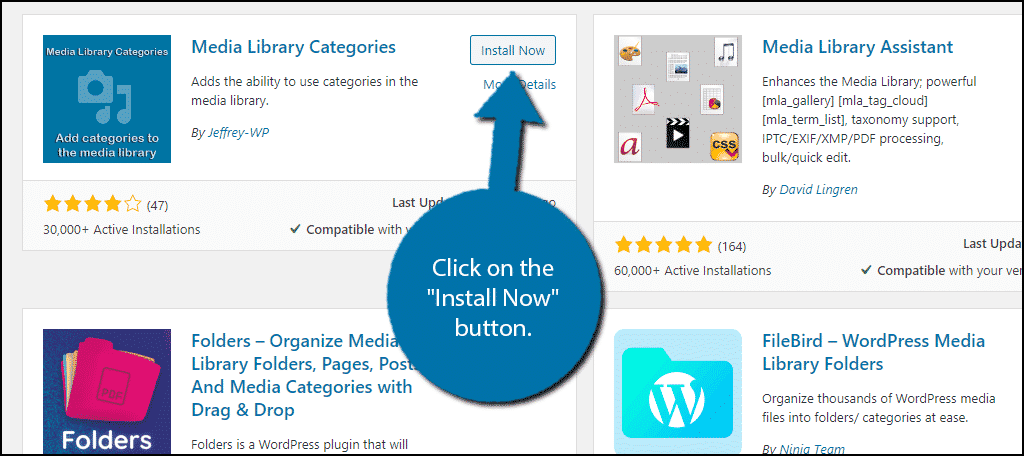
Scroll down until you find the Media Library Categories plugin and click on the “Install Now” button and activate the plugin for use.
Setting Up
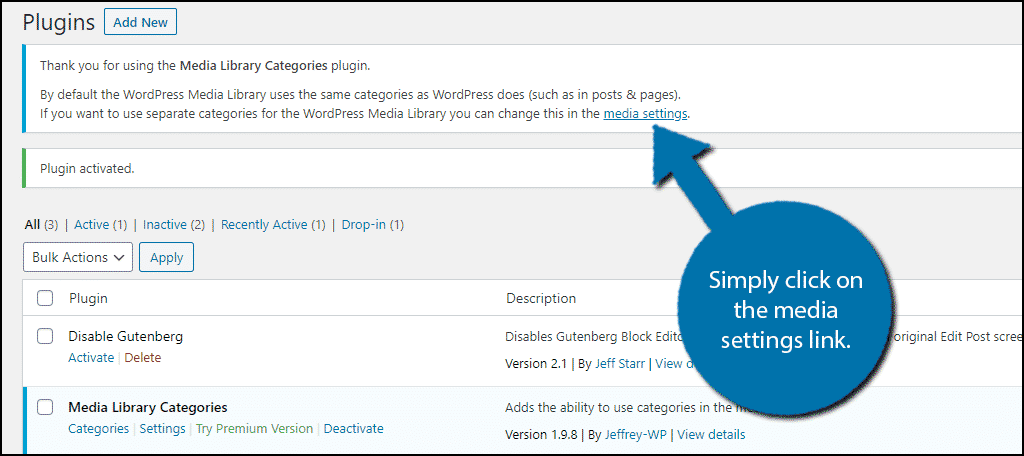
Upon installing the plugin, you should see a message at the top of your screen. It explains that by default, the plugin uses the categories you have already created in WordPress. If this is what you’re hoping for, great. If not, don’t worry you can change this.
Simply click on the media settings link. Alternatively, you can click on Settings and select the Media option to get to the same location.
You should see a Media Library Categories section. In it, there is a custom taxonomy slug text box. Simply enter the category name that you wish to add.
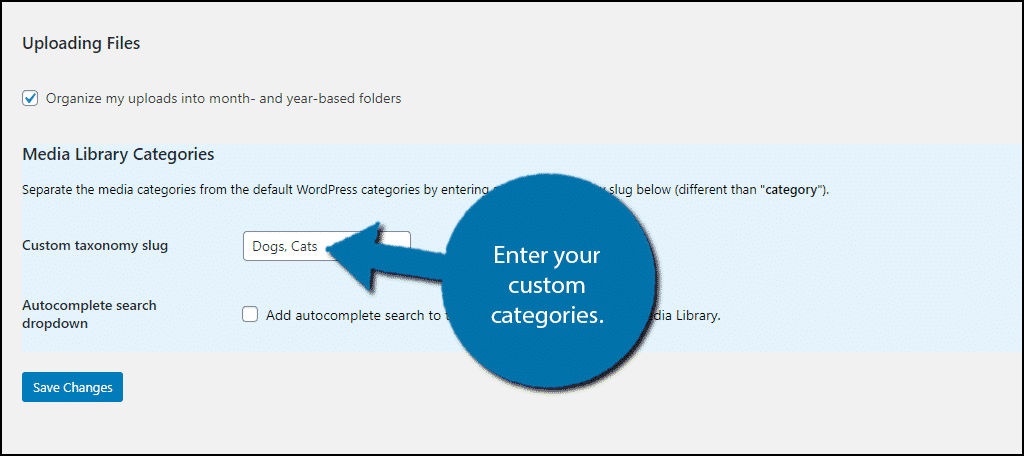
There is also an autocomplete search dropdown option you may want to toggle on. When you are done, click on the “Save Changes” button.
Adding WordPress Media Library Categories
On the left-hand admin panel click on Media and select the Categories option.
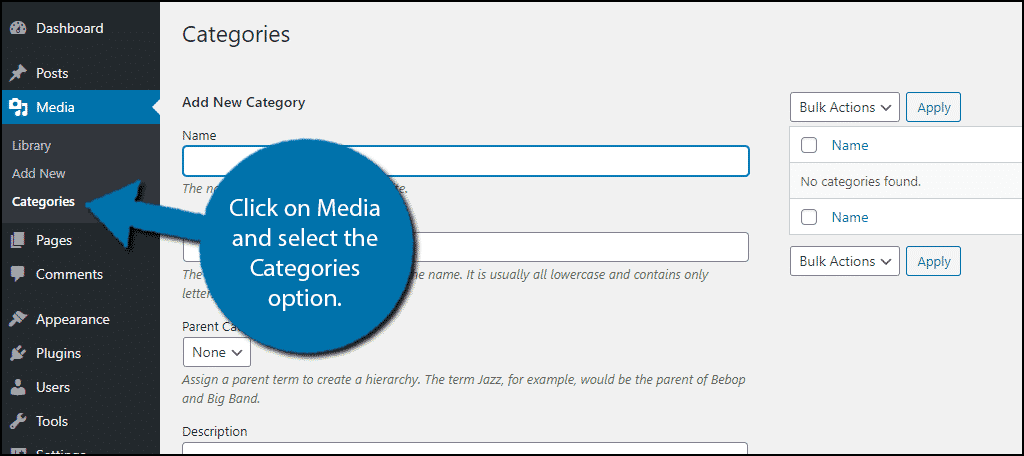
Note: If you decided to not change the media setting, you will see a list of your current WordPress categories. You can skip this step if that is the case since your categories are already in place.
Enter the name, slug, and description of the category you wish to create. Click on the “Add New Category” button when you are done.
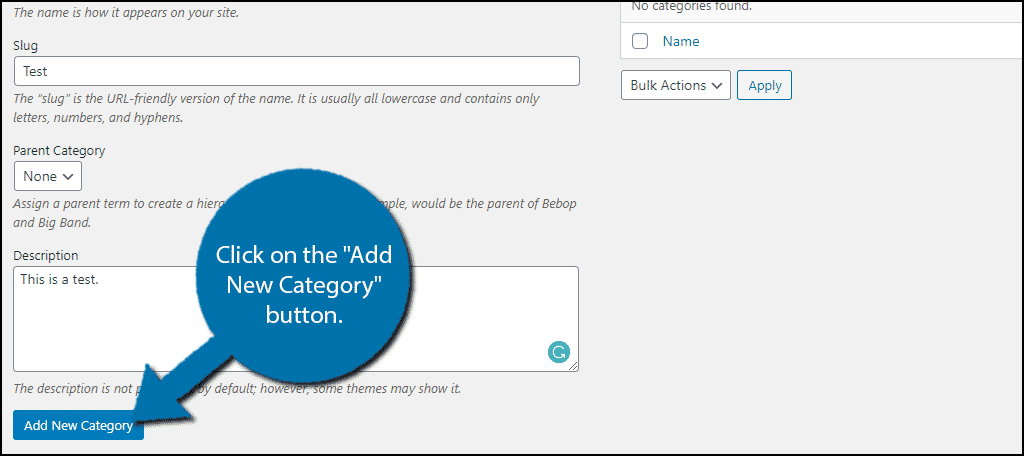
Repeat this step for as many categories as you need. You can view, delete, or edit all of your categories on the right-hand side. Once your categories are in place, click on the Library option.
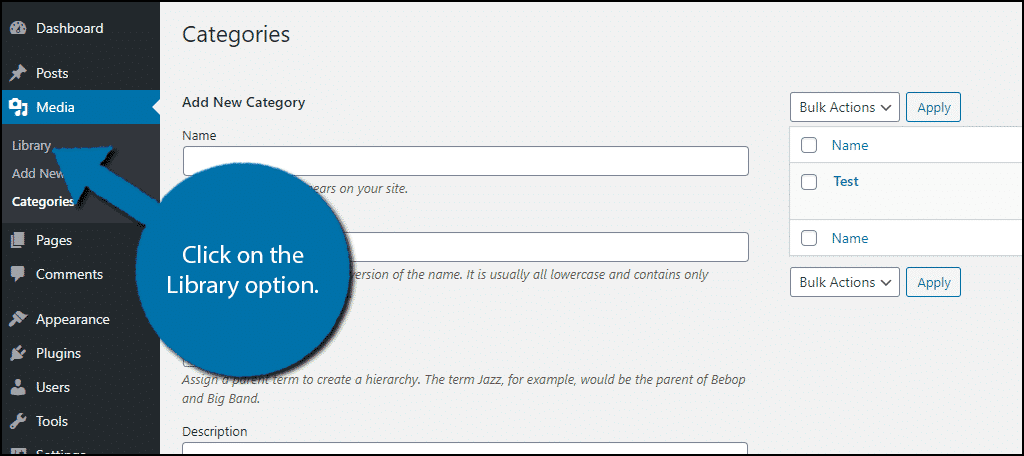
You should now be viewing all of your WordPress images. Simply select all of the images you want to add to a specific category. Once selected, click on Bulk Actions and select the Add: (Your Category) option. Click on the “Apply” button to save the changes.
Note: In my case, my category is Test. Thus, I see Add: Test.
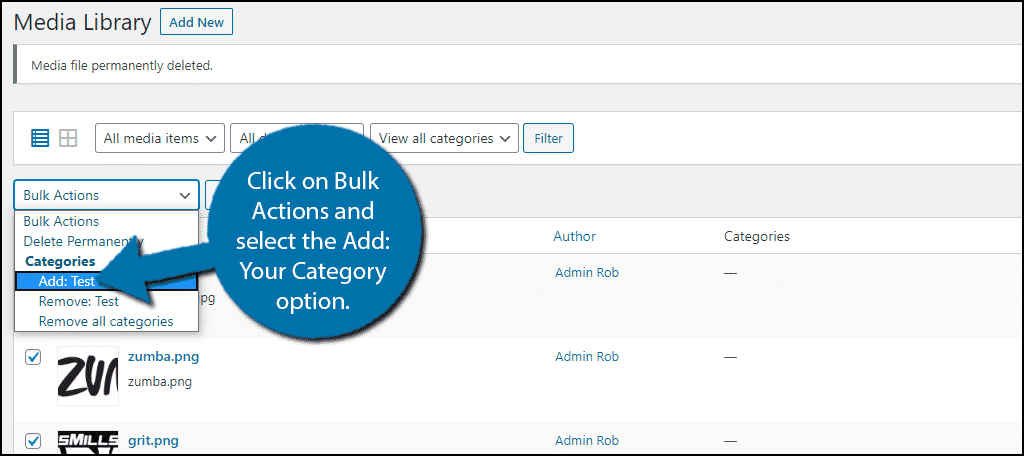
Repeat this for all of your images. It may take quite a bit of time if you are trying to organize a large media library into more compact categories.
You can use categories as a filter to find specific images. To do so, click on the view all categories option and select the category you want. Click on the “Filter” button to apply.
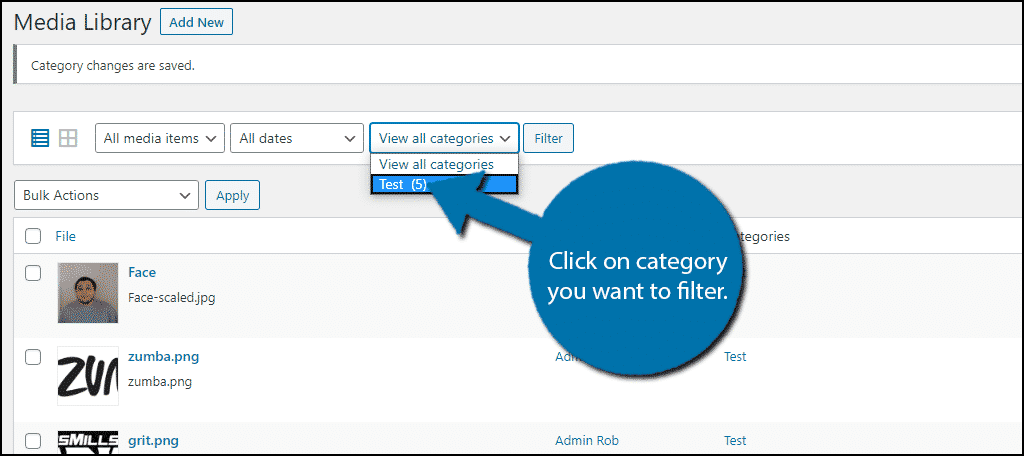
You can use the same steps to remove an image from a category by selecting the Remove: Your Category option.
Congratulations on setting up the Media Library Categories plugin. This should make finding images much easier in a larger media library.
The Name Search is Pretty Useful
By default, WordPress allows you to search for images by name. In theory, this should be enough for any web developer. However, the issue comes from strange names and how long it has been.
For example, if I named an image of a cat, dog, it isn’t very helpful. In fact, it is extremely confusing. You should try to name images better so they are more easily recognizable.
The bigger issue is if you do not remember the name, but know the image you want.
If you cannot remember the name of the image, you can actually just go to the post or page that contains the image. Right-click on the image and you will find the name or you can copy the file’s URL, which should have the filename.
However, if you don’t know the name of the image and what post it is on, you are pretty much out of luck. At this point, reuploading the image is your only option.
Also, keep in mind, you should consider cleaning your media library out. Odds are if you have deleted a page or post in the past, those images are still taking up space. This can help reduce the clutter.
Organization is Critical for Success
I can assure you that your ability to organize your content for yourself is just as important as making it easily accessible for your visitors. When you spend extra time trying to find something, you are not spending time actually creating content or getting work done.
At the end of the day, efficiency is really important.
Optimizing your work routine can end up shaving hours worth of work each week if done right. Simple things like creating templates, schedules, and categories can really make a difference.
Did you create custom categories for your images or use the WordPress ones? Do you think media library categories should be a default feature in WordPress?

Hi, I do think that this should be a feature in WordPress. However, when using this plugin, I do NOT get any Bulk Actions dropdown, which was the reason that I installed it. I followed your steps and I can add media categories to individual media items, but not to a selection.
Any ideas why?
I’m not sure, to be honest. We have the Bulk Actions tab on our test site. One possibility is perhaps you don’t have the proper permissions for the function. Other than that, you may have to contact the plugin developer. Most developers are quite responsive in the WordPress.org forums.