It’s likely that your website host is making periodic backups of your site and database files. But if those backups aren’t available to you, you can make your own backups using MySQL workbench and save them to your computer, either for development purposes or just peace of mind.
Making local backups of MySQL databases is quick and easy once you have the proper tool configured. This tutorial uses MySQL Workbench 8.0 CE. Details in future versions may differ, but the basic workflow should be the same.
You can download MySQL Workbench here. You’ll have to create an Oracle account to download, but the account is free.
Configuring MySQL Workbench to Connect to Your Database
The first step in making a backup with MySQL Workbench is to connect to the database you want to back up.
Most commercial hosts will block outside database connections by default, so you may have to add your home IP address to a remote access list. Check with your host to see what their requirements are. If your hosting account uses cPanel, you can set up a remote connection in Databases > Remote MySQL.
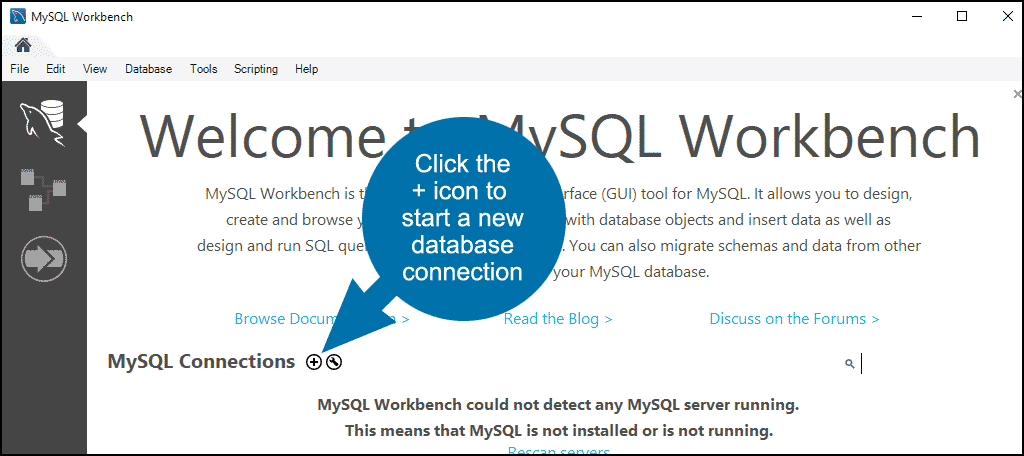
Click the + icon to start a new database connection.
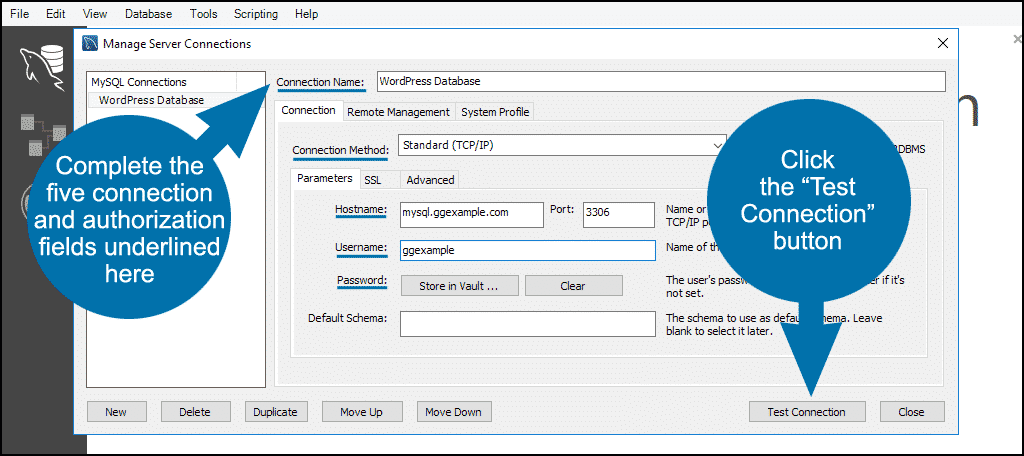
A “Manage Server Connections” window will open. Complete the five connection and authorization fields underlined below.
- Give the connection a name.
- Choose “Standard (TCP/IP) as the “Connection Method” (SSH connection configuration is also available if your host requires it).
- Enter the MySQL server hostname or IP address.
- Enter your MySQL database username.
- Click the “Store in Vault…” button to enter your database password (if you don’t want to store the password, skip this field).
Click the “Test Connection” button.
If you get a “Cannot Connect to Database Server” error, check your entries in the connection fields.
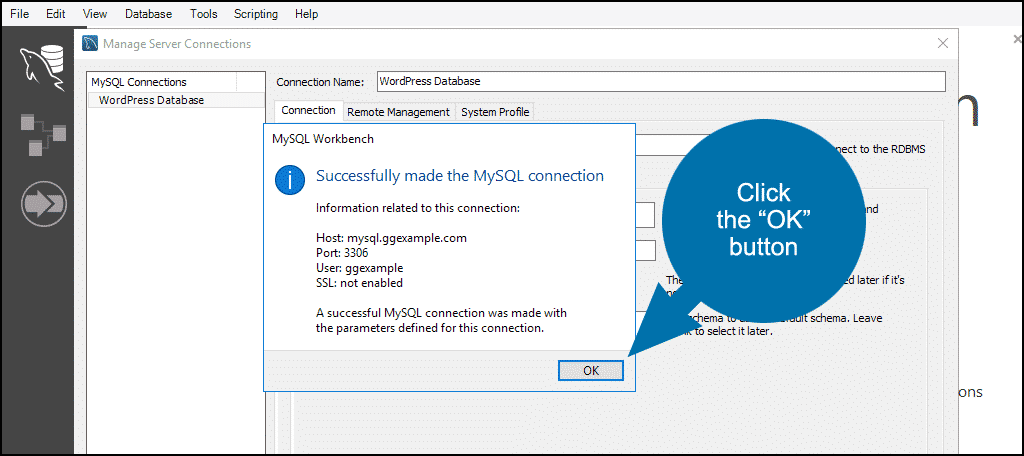
If everything is correct, you’ll see the successful connection box. Click the “OK” button.
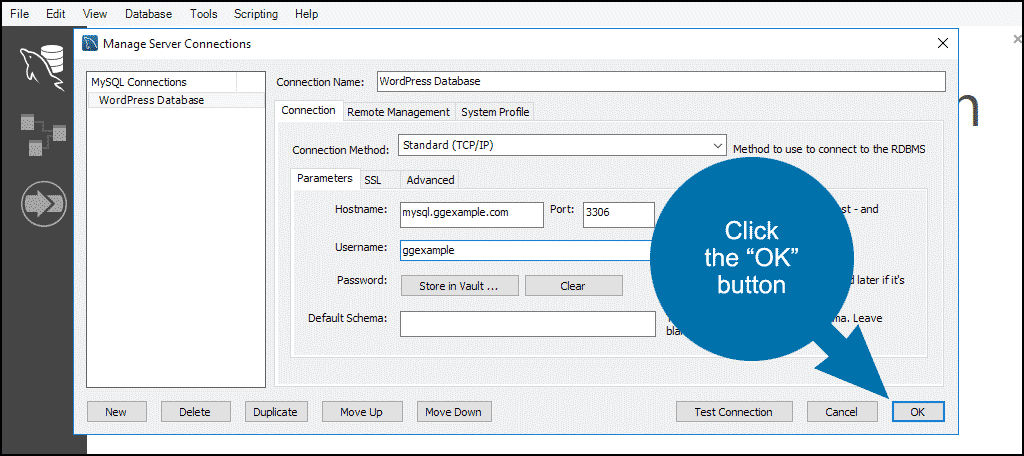
Click the “OK” button to close the connection test window.
Configuring MySQL Workbench to Back up (Export) Your Database
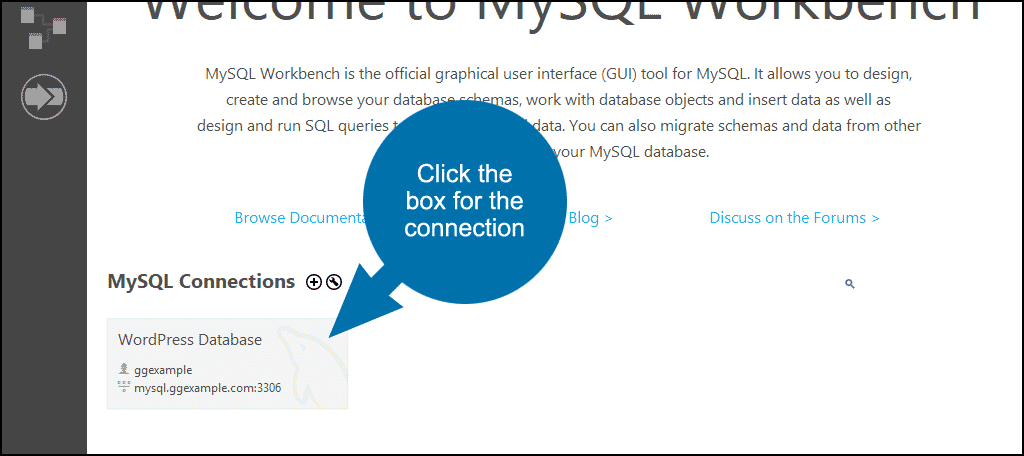
Click the box for the database connection that you just set up.
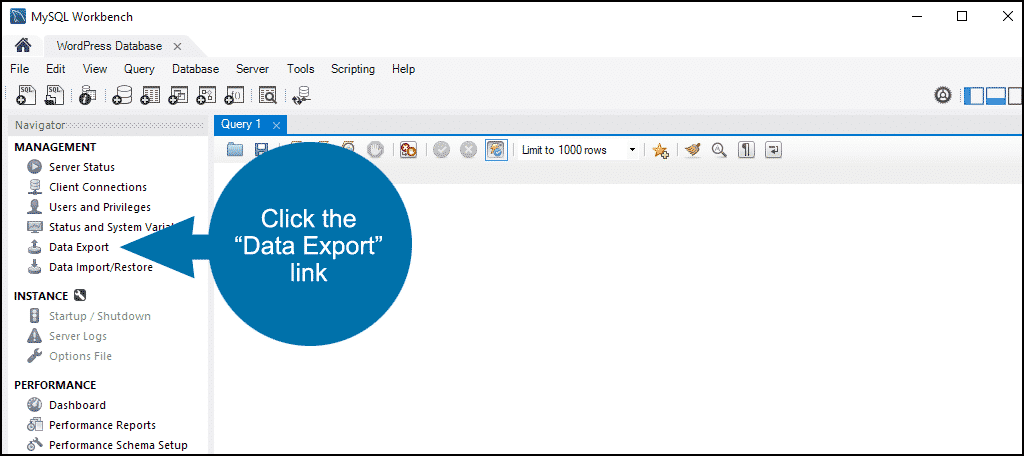
Click the “Data Export” link.
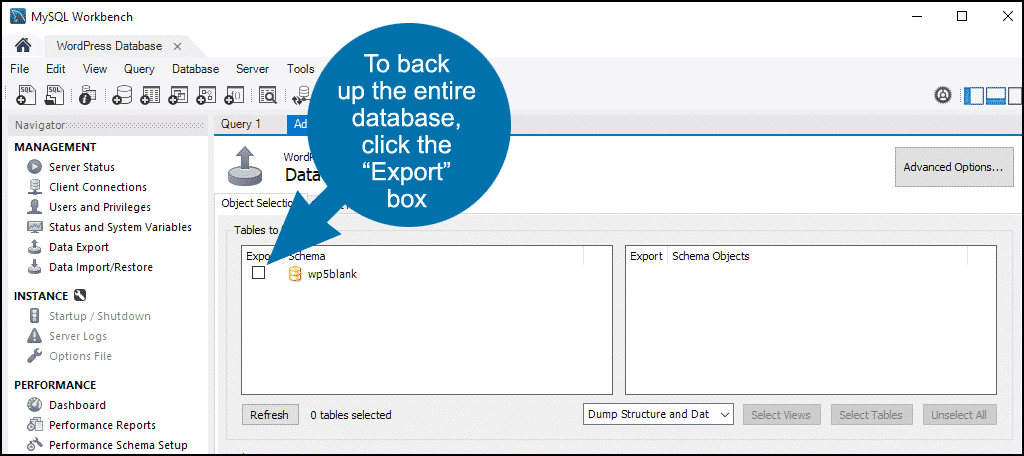
To back up the entire database, click the “Export” box in the “Tables to Export” window.
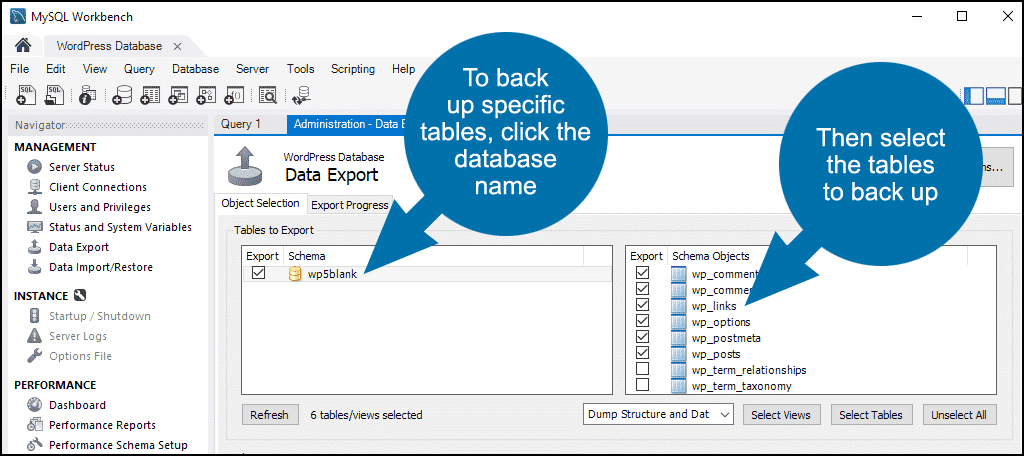
To back up specific tables, click the database name, then select the table you wish to back up.
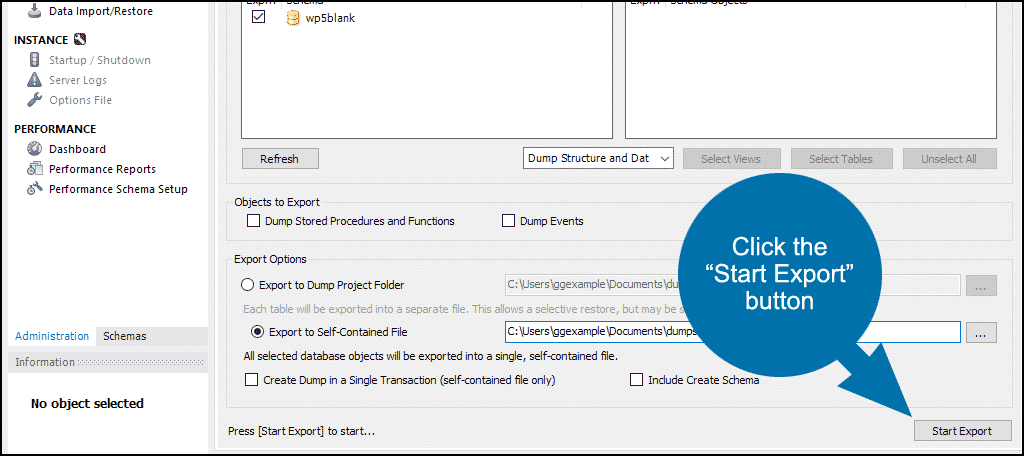
For this tutorial, we’re making a safety backup of the entire database, so we’re choosing “Export to Self-Contained File.”
Using the “Self-Contained File” method makes it easier to restore an entire database in a disaster recovery situation. The other option, “Export to Dump Project Folder” will make separate backups of each table. The “Export to Dump Project Folder” method makes it easier to restore single tables should the need arise. Which method you should choose depends on the purpose of the backup. If you’re simply archiving the database, use “Export to Self-Contained File.”
Click the “Start Export” button.
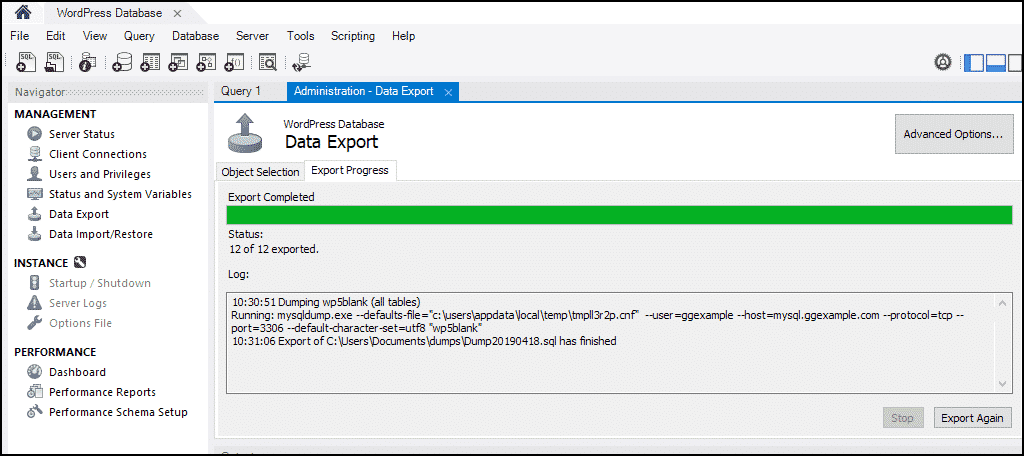
When the backup is complete, you’ll see an “Export Completed” dialog. The database backup will be located in the location specified in the “Export to Self-Contained File” path.
If the time ever comes to use one of your database backs for restoration, we have another tutorial that shows you how to take care of that, “How to Restore a MySQL Database From a Backup With MySQL Workbench.”
Keeping a Backup Matters
No one wants to see their website taken down by an errant code or someone accidentally deleting the wrong files. Unfortunately, it happens quite often. And a lot of times, it’s not even your fault.
Using MySQL Workbench to backup the database helps you keep those files safe and ready in case there is a restore process in your future.
It’s always better to be safe than sorry. A few moments today can save you a lot of hassle tomorrow.
Do you make regular backups of your website and database files? Which programs or services do you use to make your backups?

Can I automate this?
Not with Workbench. There are third-party services that will back up databases daily and keep a couple weeks of versions (or as many as you want to pay to store). I like DropMySite, but there are a lot to choose from.