Face it, when you are building a WordPress website, there is a lot you need to remember. Perhaps most important are relevant images and the way they are sized, compressed, and optimized. While WordPress handles a number of image sizes automatically, there are also steps you can take to add more.
Before we get into how to add an image size in WordPress, let’s talk about what image sizes are already available by default. You can already manipulate default image sizes within your WordPress admin dashboard.
However, to add more image sizes like a WordPress featured image size, you will need to modify the functions.php file some and use a thumbnail regenerator plugin. We will get to that.
WordPress Image Sizes
By default, every time you upload an image into your media library, WordPress creates four image sizes. These include:
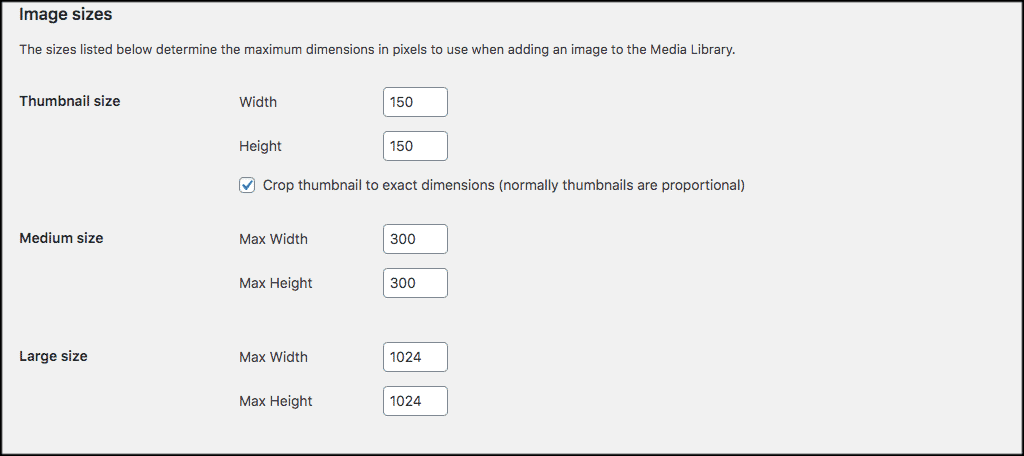
- Thumbnail size (150px square)
- Medium size (maximum 300px width and height)
- Large size (maximum 1024px width and height)
- Full size (full/original image size you uploaded)
Now, if the theme you are using specifies for additional image sizes, then WordPress creates those as well. A good example of this would be a featured image that is more rectangular.
The above information also applies to the Gutenberg block editor. You will be able to see all of the above selections in the image block that you can use while editing.
There are also some other recommended WordPress image sizes for other types of content. Again, you don’t have to play within these rules. But these sizes are recommended for certain types of images.
A lot of this will depend on personal taste and how you want your layouts to look. Here are some recommendations:
- Blog posts: 1200 x 630px
- Hero Images (full screen images): 2880 x 1500px
- Landscape Feature Image: 900 x 1200px
- Portrait Feature Image: 1200 x 900
- Fullscreen Slideshow: 2800 x 1500px
- Gallery Images: 1500px x auto width
Changing WordPress Default Image Sizes
To access the default image sizes that WordPress offers and change them, you need to be logged into your WordPress admin dashboard.
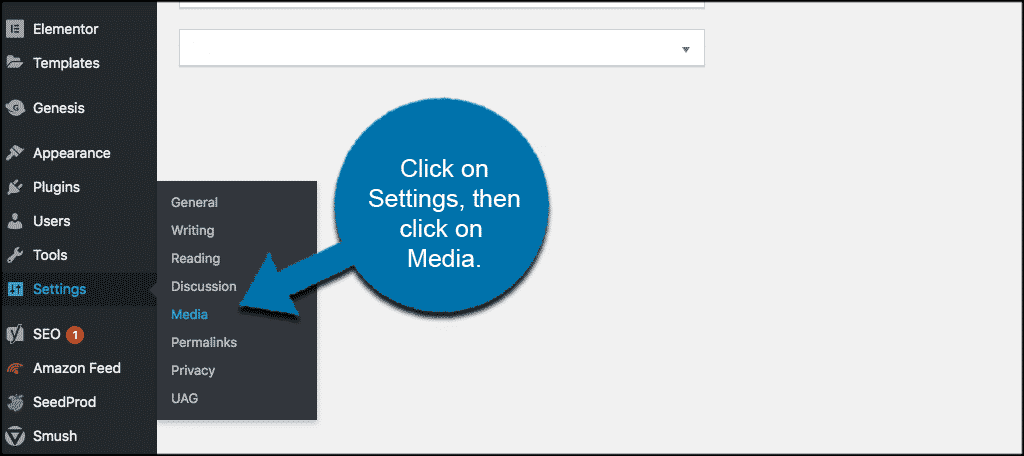
Once you have logged into the dashboard, click on Settings > Media. This will take you to the media page of the dashboard where you can change default image sizes to whatever you want.
Just make the changes you want and then click on the “Save Changes” button at the bottom of the page. WordPress will change your default image size to what you have selected.
Let’s look at image formats, compressions, and optimization next.
WordPress Image Formats and Picking the Right One
So, let’s continue to move forward with this. Now, you understand WordPress provides everyone with several default image sizes to use and choose from. You can also set “unique image sizes” within the image editor. However, they don’t always come out the right way.
There are two types of image formats used online. They are JPEG and PNG. Many people want to use a PNG no matter what. However, JPEG is a smaller file size and a higher quality for photos and images with lots of colors. For this reason, it is usually the preferred format in the majority of cases.
A PNG file works better with limited color images like logos, icon colors, and other graphics. Choosing the right image style will affect your site speed and overall quality of the image you are presenting.
A basic rule to remember for image use is this:
- JPEG for Photos
- PNG for Graphics
The JPEG image file includes all image sizes, including the WordPress thumbnail size.
If you have an image that is packed with colors and has different textures and gradients, save it as a JPEG. If it’s a logo, text, or has flat colors, save it as a PNG.
Let’s move on.
How Important is Image Compression and Optimization?
Before showing you how to add your own different image sizes in WordPress, let’s talk about how important image compression and optimization is. Many of you know the important role images play in any website.
First off, image sizes that are too large are going to slow your site load time dramatically. For this reason alone they need to be automatically resized and compressed to perform and load optimally on your website.
As a matter of fact, according to Neil Patel, 47% of people expect your website to load in less than 2 seconds. Another 40% will abandon it if it takes longer than 3 seconds to load. The online community does not have a lot of patience when it comes to loading times for websites.
Speed is also important to SEO. Google uses loading times as a factor when ranking pages in its search engine. The slower the page is, the worse it will perform in search results.
Optimization as far as SEO is also very important as well. Images drive traffic to your site. Having proper SEO image structure and including things like ALT tags will help you rank higher.
How to Add Custom Image Sizes in WordPress
Note: If this seems a little to technical for you, then go ahead and get in touch with your website developer for help.
In order to use WordPress to add an image size that isn’t already there, you are going to need to add some code to your functions.php file. This is the code we will use today to add to the file:
add_image_size( 'the-name-for-custom-image-size', 600, 400, true );
The function above basically accepts 4 different parameters in the following order:
- The name you decide to give to your custom image size.
- The width of the image in pixels.
- The height of the image in pixels.
- Should the image be cropped to fit the width and height you specified above.
To add the code above, you need to access the functions.php file of your WordPress theme.
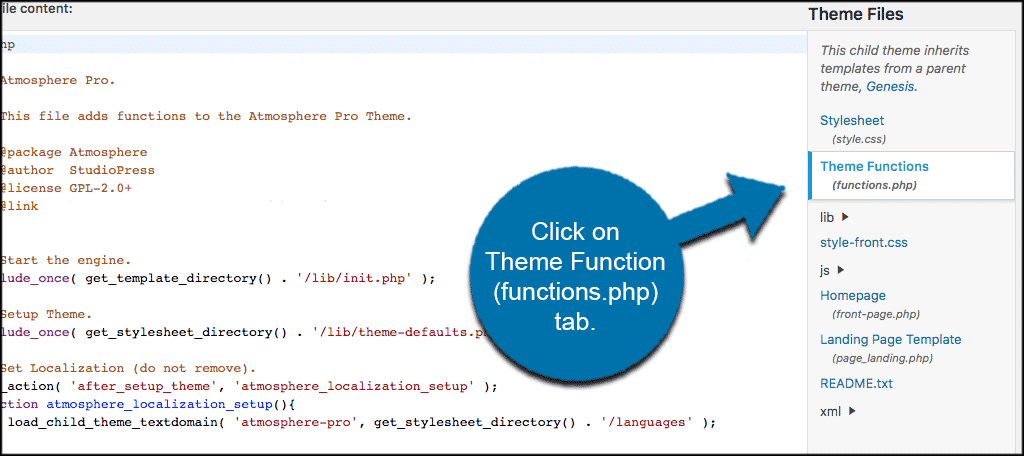
Click on Appearance > Theme Editor. This will take you to the editing files for your website.
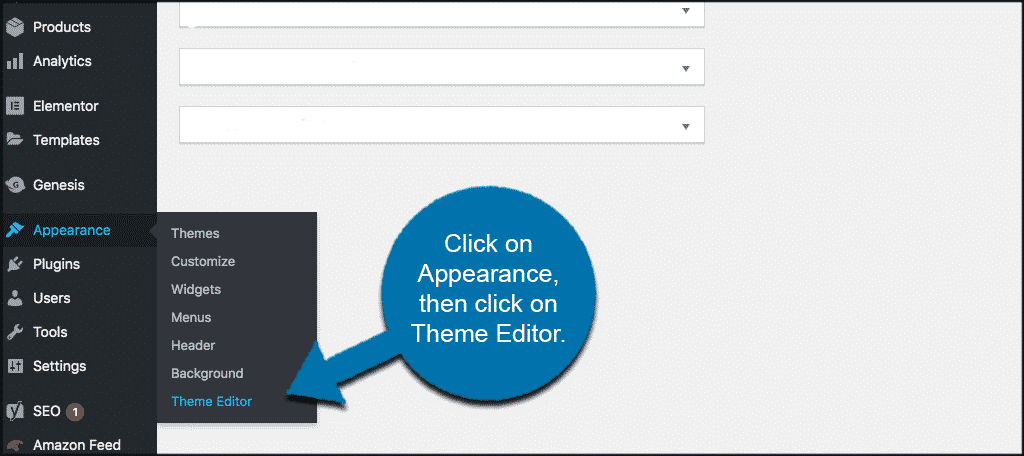
From here, look for the “Theme Functions (functions.php) file. Click on that to open the relevant file so we can insert the code above.
Now, scroll down to the bottom of the file and place the code I showed at the bottom.
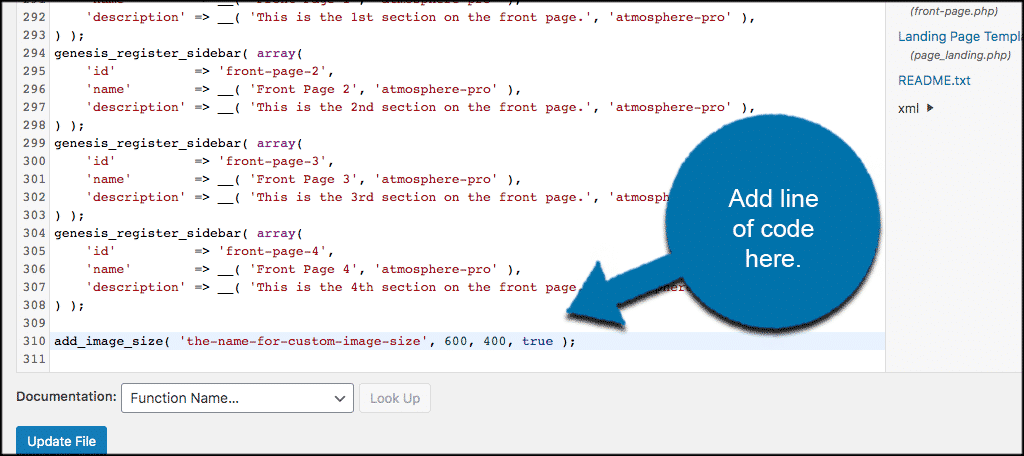
Now, click on the “Update File” button and you are good to go.
If you go back to your image sizes in media you will notice that a new option has been added. This will now become available for you to use anywhere you want on your WordPress website.
Regenerate Thumbnails
Whenever you make changes in media in WordPress, it is important to regenerate your thumbnail images. Such changes include things like:
- Changing or modifying WordPress default image sizes.
- Adding custom image sizes
- Switching over to a new WordPress theme.
See, when you make changes like the ones above, they only affect images moving forward from there. It does not change or update anything in your current media library.
To do this and move forward the right way after image changes, you need to use a great little plugin called Regenerate Thumbnails. The plugin is simple to use, very lightweight and will bring all your images up-to-date after you make sizing changes and updates.
First, install and activate the plugin. You can do this by going to the plugins page of your WordPress admin dashboard.
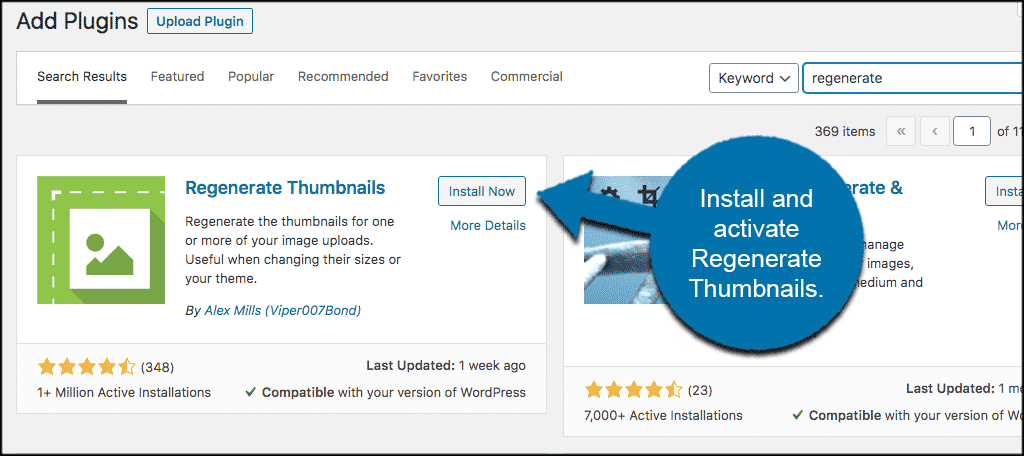
Once the plugin has been installed and activated, click on Tools > Regenerate Thumbnails.
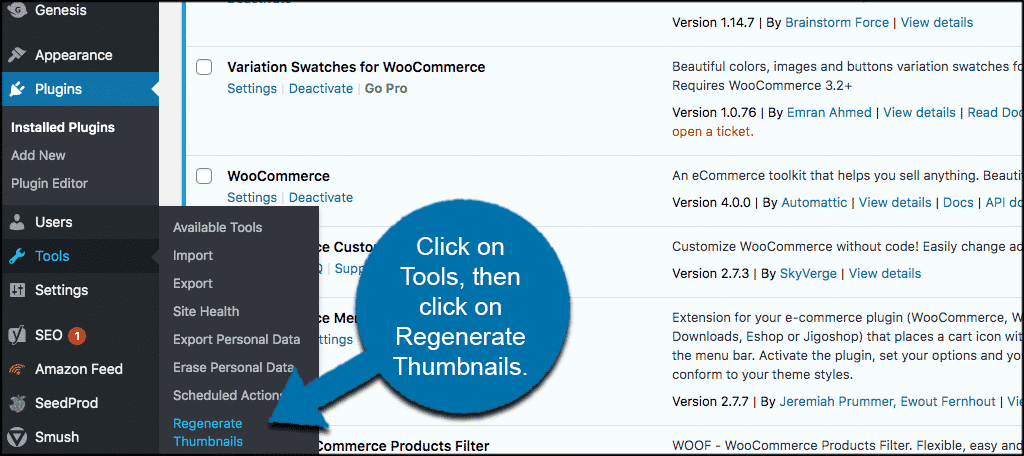
You will be bounced to the main configuration page for the plugin. Here, the process is very simple. Just click the button of the choice you want based on your setup.
Every setup is different based on what you have in your media library, and what attachments you have live. In this example, we have two different ones. So we will go ahead and regenerate thumbnails for both.
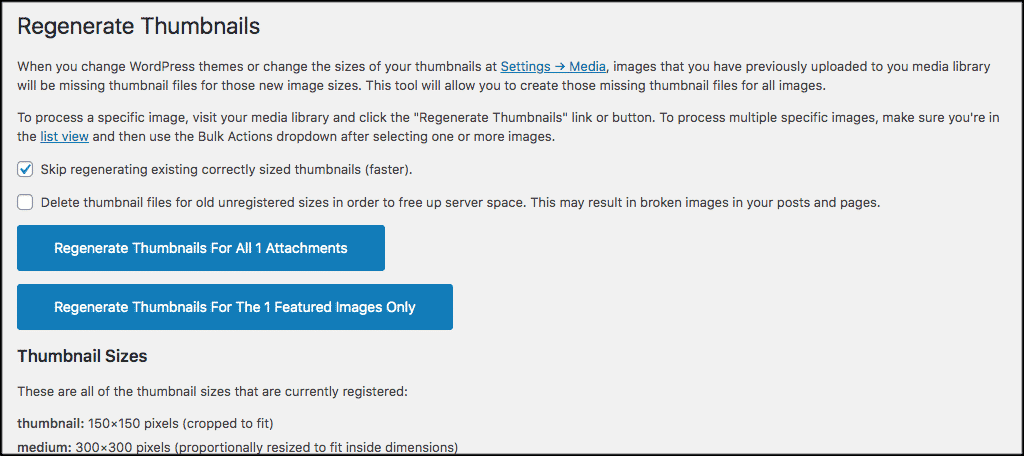
Note: You will also see a list of all the image sizes you have currently registered on your website. Again, this will differ from site to site. However, you can see everything listed and know that the plugin is taking care of everything you have.
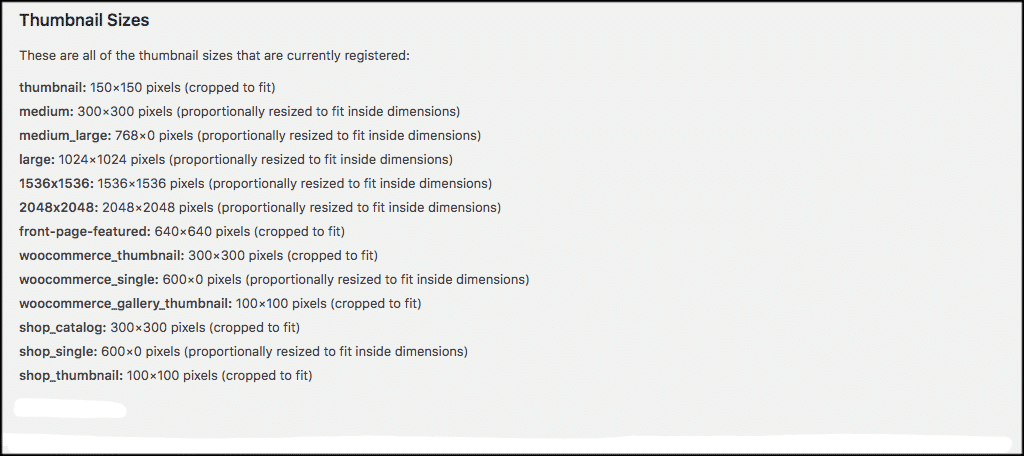
Note: There are a couple of alternative options listed at the bottom of this page. However, I recommend you stick with the process above.
That’s it! You have successfully created custom image sizes in WordPress and have regenerated thumbnails the right way.
You can repeat the process above and add as many different image sizes as you want. Just replace the size aspects in the code above.
Final Thoughts
Although WordPress gives you several default image sizes, there are times when you want to add more. Oftentimes, your theme will register custom image sizes as well.
If this isn’t enough, use the process above to add any image sizes you want. Remember, complete the process, use the Regenerate Thumbnails plugin, and then make sure you have a good compression and optimization tool running as well.
A lot of these things work together to give you the best site speed and SEO possible.
Have you ever tried to register a new WordPress image size using the technique above? Do you find that most themes give you plenty of built-in image sizes to work with?

Once you change the default image size, does it apply retroactively to posts that you already published?
Hi Lynh,
Install and run “Regenerate Thumbnails” and you should be good to go after that.