Not all plugins work flawlessly. Sometimes bad coding in a third-party tool can cause the website to break. As a result, you may lose access to the admin panel of WordPress. When this happens, it can be easy to panic. After all, it’s stressful to think about fixing an issue without access to the WP admin tools.
In reality, it’s not all that difficult to regain control of WordPress without admin access. There are several ways you can do this without causing harm to the core files of the website.
In this tutorial, we’re going to show you different methods for disabling the plugins when you don’t have access to the admin panel. Don’t worry, these methods are quite easy. Even the most novice of users can do this successfully.
How Do Plugins Break WP Admin?
Most of the time, developers are conscious about coding issues when creating a plugin or a theme. Unfortunately, not everyone is perfect. Sometimes even the slightest of changes in code can cause severe issues. This can lead to a site becoming unstable and unable to function correctly.
This is one of the biggest reasons why many experts would rather you install plugins directly within WordPress. Being able to choose the best plugins sometimes requires a bit of research to determine if it’s stable or not. Unfortunately, you may not get that information from an outside source apart from WordPress.org.
Method 1: Using FileZilla to Disable All Plugins
First, we’ll look at what you can do using FileZilla. This is a free File Transfer Protocol application, or FTP, and is very useful to have when troubleshooting website issues.
To use this program to disable all plugins:
Go to the FileZilla.org website and install the newest version, if you don’t have it already.

NOTE: This application is available for Windows 64 and 32 bit for Vista and up, OS X 10.7 or better and Linux.
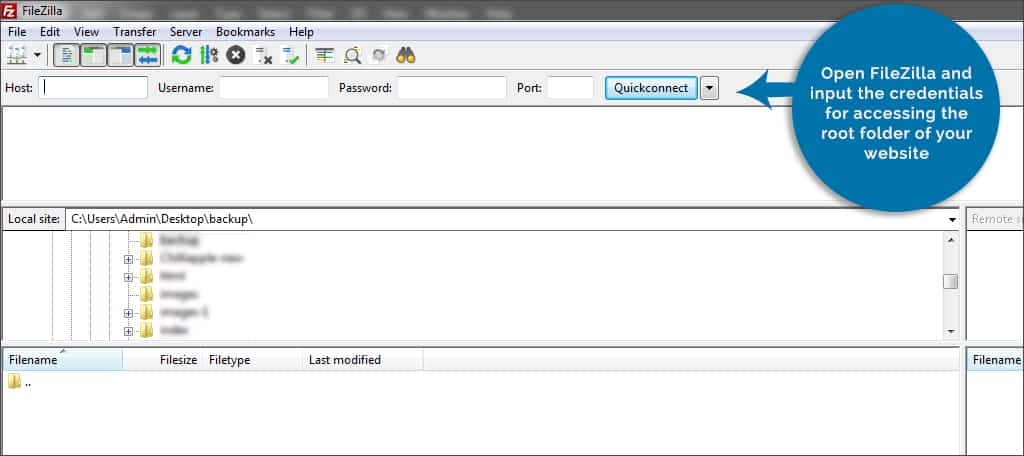
Open FileZilla and input the credentials for accessing the root folder of your website. If you’re unsure how to do this, we have an easy-to-follow guide about how to use FileZilla available.
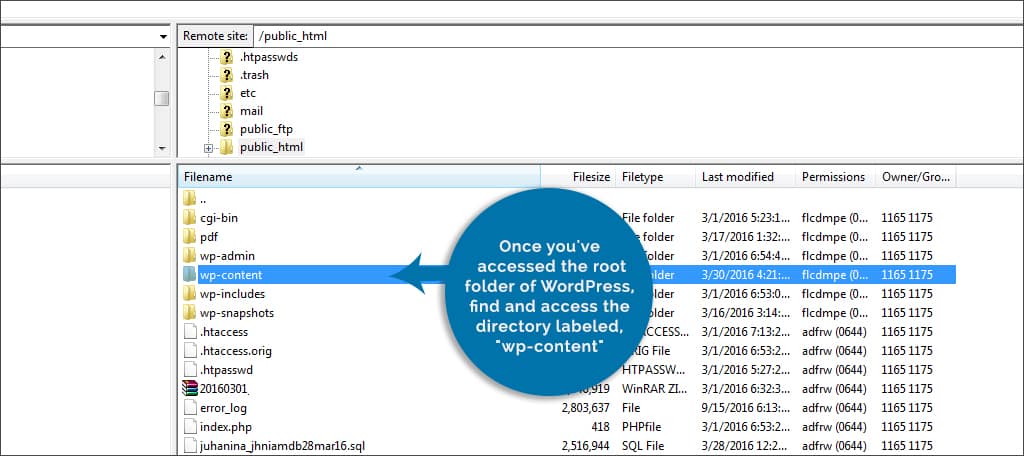
Once you’ve accessed the root folder of WordPress, find and access the directory labeled, “wp-content.”
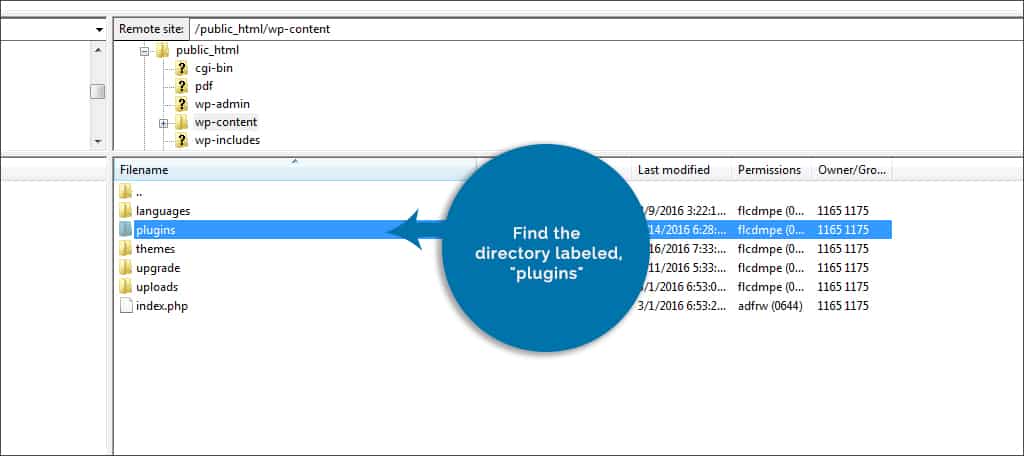
Find the directory labeled, “plugins.” Right-click this folder and then click the “Rename” option near the bottom of the list.
Rename the folder, “plugins.deactivate.”

This removes the folder from being accessible by WordPress which will allow user access to the admin panel. Open your browser and go into the admin screen for your website. WordPress will automatically remove all the plugins from operation.

Once you log into the admin screen, go back to your FileZilla application.

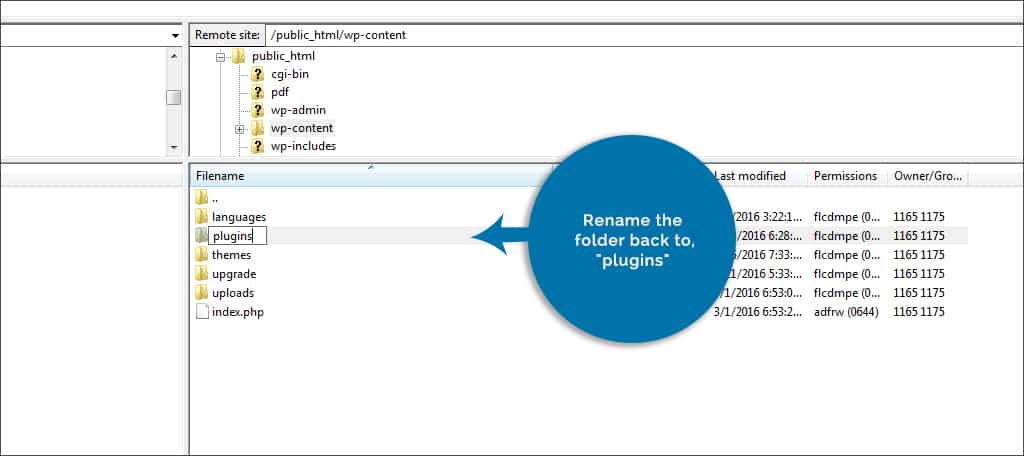
Rename the folder back to, “plugins”. This will add the list of plugins back into WordPress without being enabled.
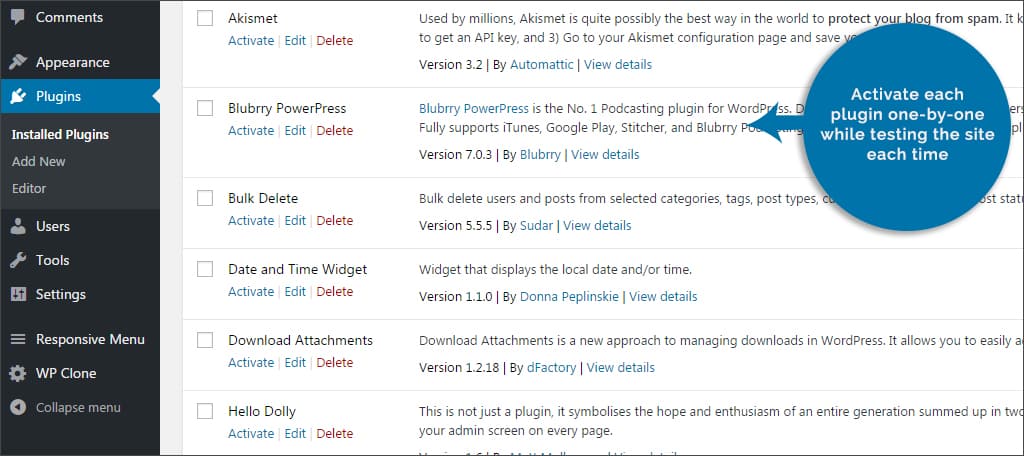
Activate each plugin one-by-one while testing the site each time.
Once you come to the plugin that is crashing the site, follow steps 4 through 8.
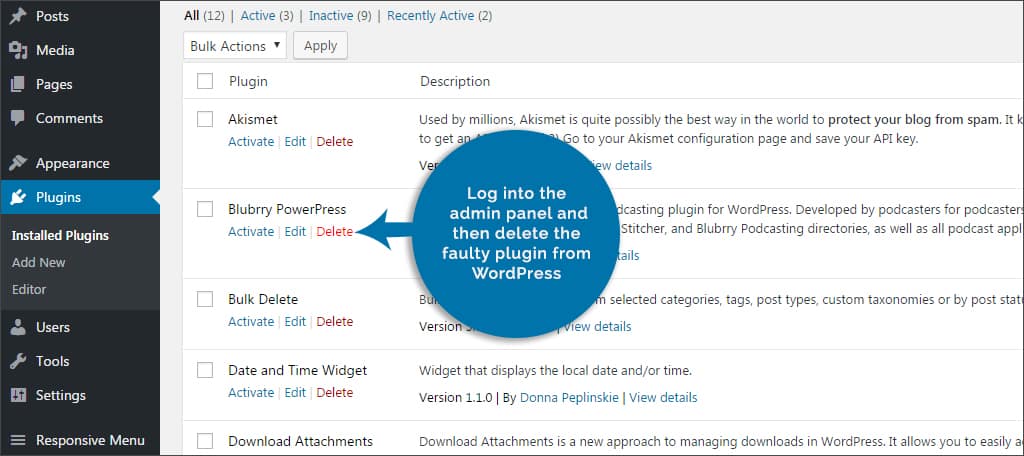
Log into the admin panel and then delete the faulty plugin from WordPress.
This is one of the easier methods as it doesn’t require a great deal of effort other than renaming a folder. If you suspect a theme is causing the issues, you can follow the same steps above for the “themes” directory within wp-content.
Method 2: Using cPanel’s File Manager
FileZilla isn’t the only way to access the root folder of WordPress. If you have access to cPanel, the directory can be accessible without installing new applications. This may be a more convenient method as it can be done from just about any browser with Internet connection.
To use cPanel to disable all plugins:
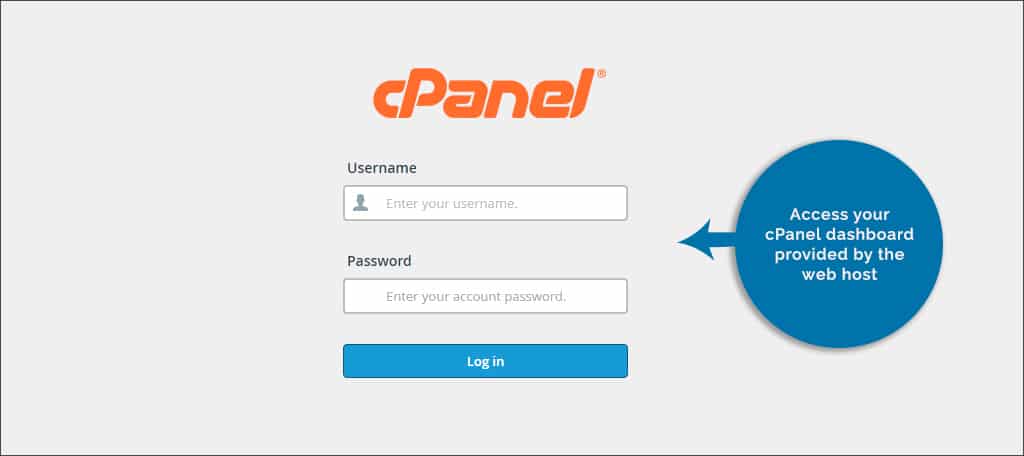
Access your cPanel dashboard provided by the web host.
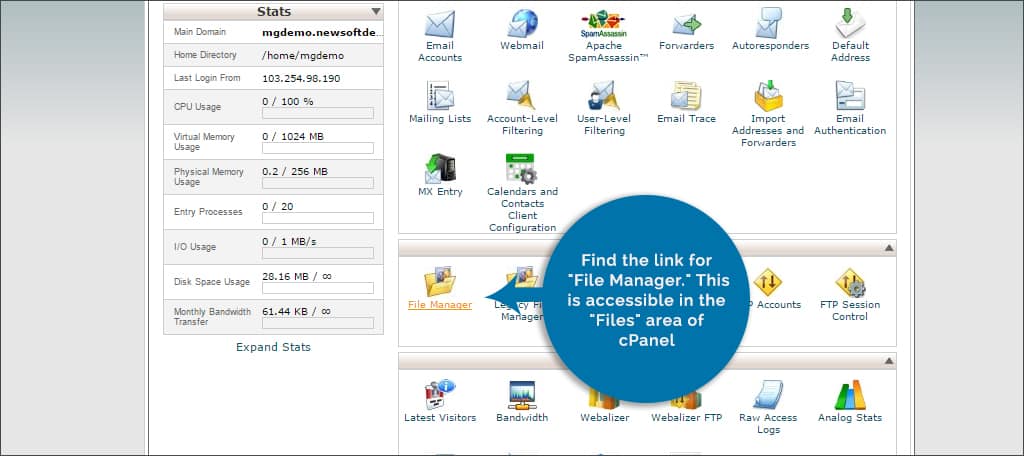
Find the link for “File Manager.” This is accessible in the “Files” area of cPanel. Once you click the link, File Manager will launch.
NOTE: Older versions of cPanel will ask for the website you’re accessing. Select the appropriate domain. Otherwise, you will need to access the correct site by opening the “public_html” folder in File Manager.
Locate and access the folder for “wp-content.”
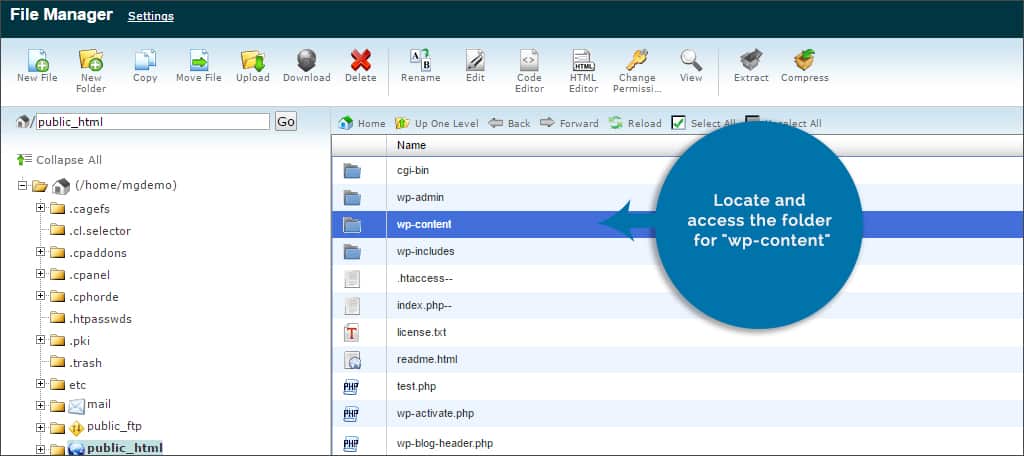
Right-click the folder for “plugins” and click the option to “Rename.”
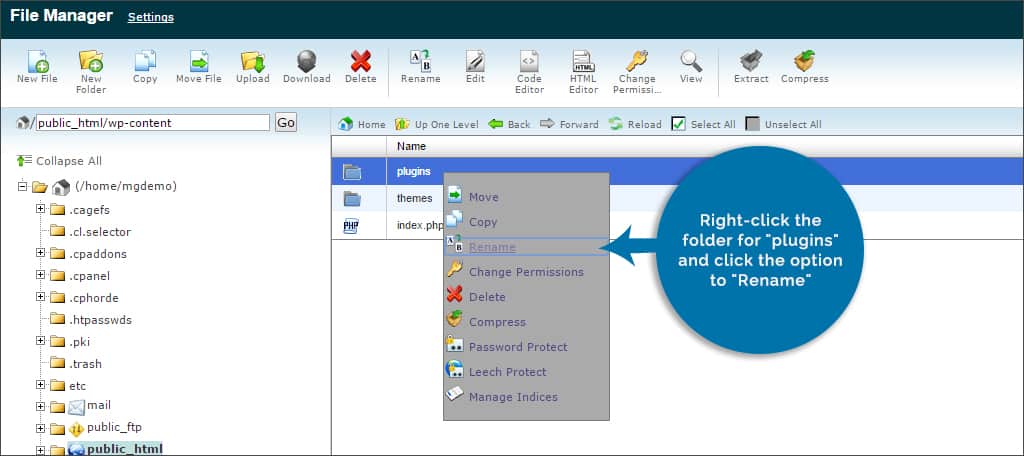
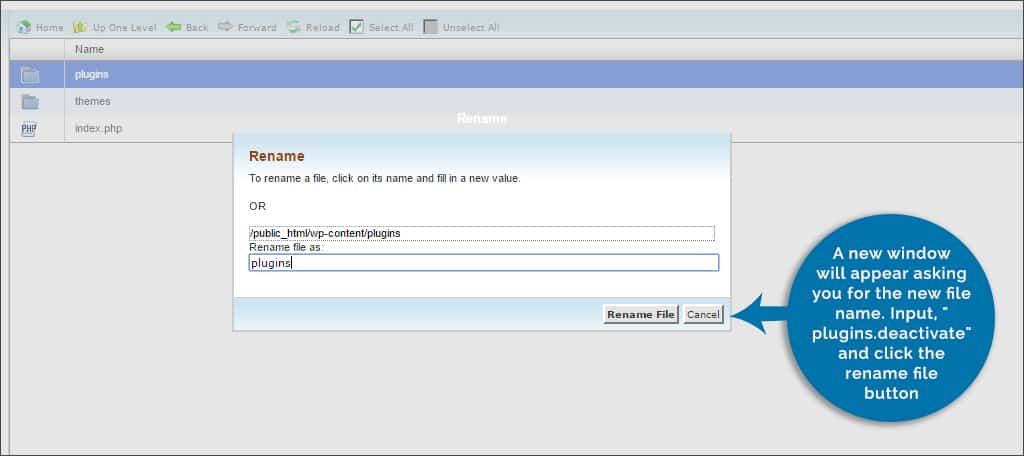
A new window will appear asking you for the new file name. Input, “plugins.deactivate” and click the rename file button.
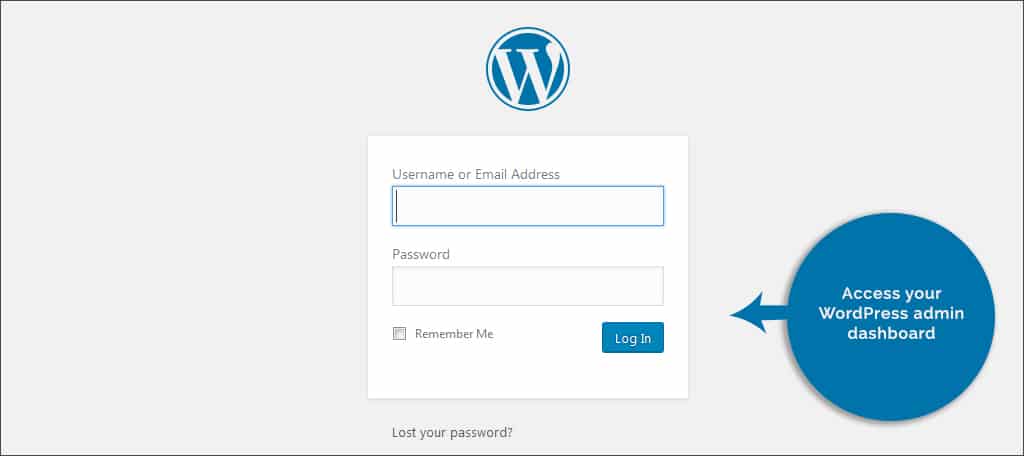
Access your WordPress admin dashboard.
Go back to the cPanel tab and rename the folder back to, “plugins.”

Return to the WordPress admin dashboard and activate your plugins one-by-one until the site breaks again.
Follow steps 4 through 7.
Go back to your admin panel and delete the faulty plugin from WordPress.
Once this is done, you can simply close the cPanel browser window. This is a preferred method by many simply because it can be accessed from any computer as long as you have your cPanel’s URL and login credentials. If you’re at a public computer, just make sure you don’t accidentally save the password to the browser if it asks you to do so.
Method 3: Using phpMyAdmin
Using phpMyAdmin gives you access to all the data stored for WordPress. This is perhaps the most difficult method in this list and requires a bit of finesse. However, it’s an option should the above methods be unrealistic for your specific situation.
To use phpMyAdmin to disable plugins:
Access your cPanel dashboard.
Click the link for phpMyAdmin. It will be in the Databases section.

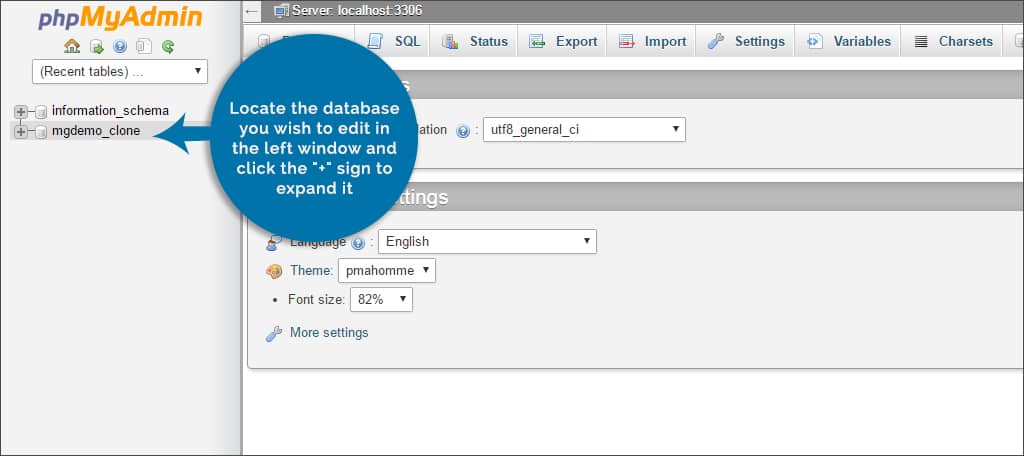
Locate the database you wish to edit in the left window and click the “+” sign to expand it.
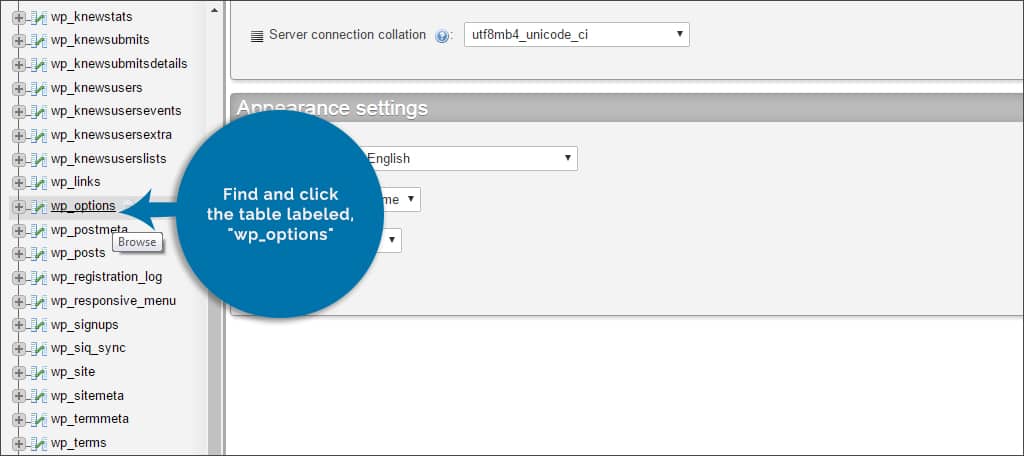
Find and click the table labeled, “wp_options.”
Find the option for, “active_plugins.”
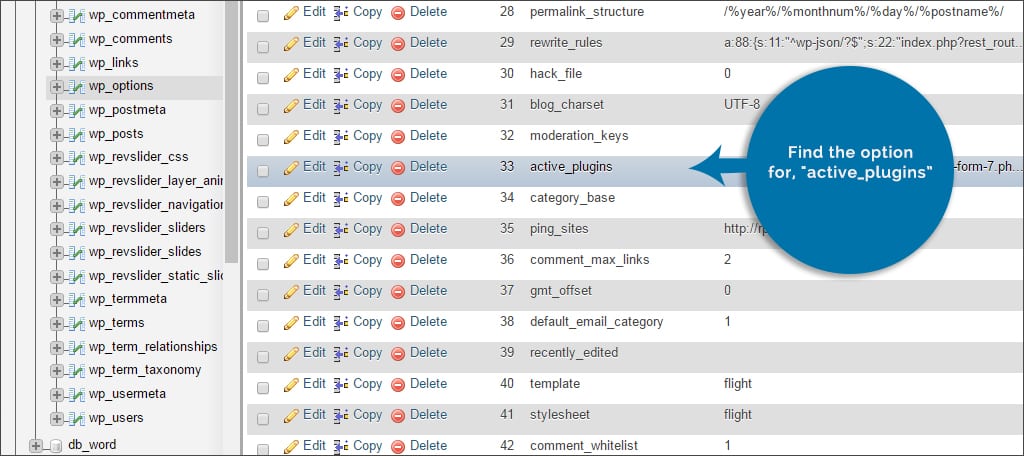
NOTE: This will be displayed in the option_name column. You may have to sort by name and browse through the pages of rows to find it.
Click the “Edit” link on the left side of the active_plugins option.
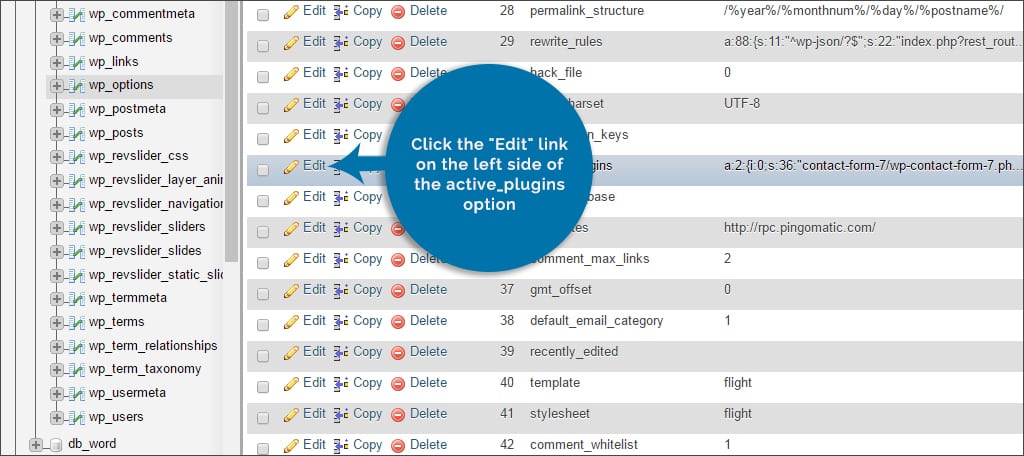
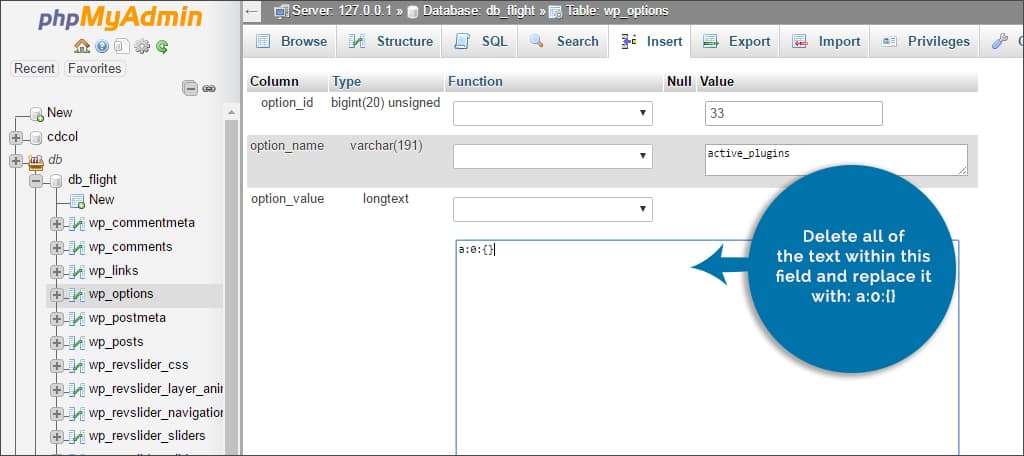
You will see a large text window filled with various characters and plugin names in the “option_value” area.

Delete all of the text within this field and replace it with:
[ht_message mstyle=”info” title=”” ” show_icon=”” id=”” class=”” style=”” ]a:0:{}[/ht_message]
Click the “Go” button below the field to save.
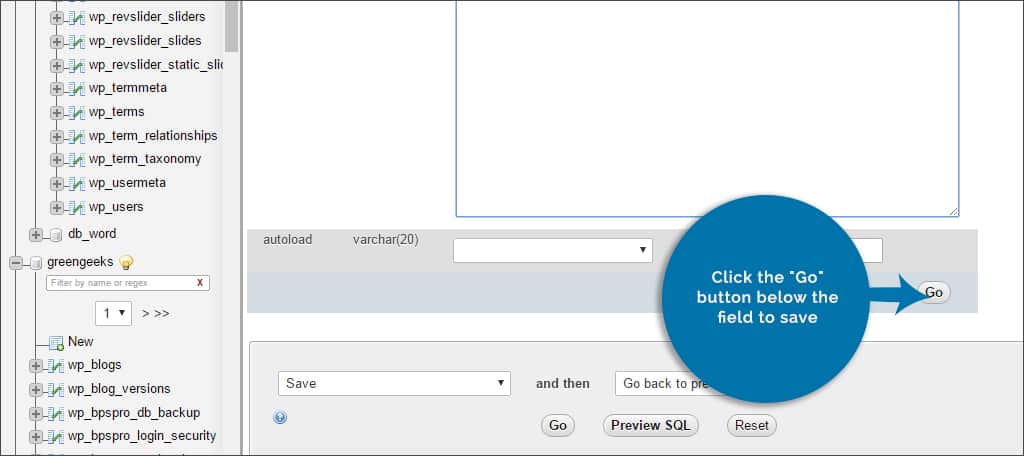
This will cause all of the plugins within WordPress to become deactivated. Now, you can simple activate each one individually until you come across the plugin that breaks the site. Once that happens, follow the steps above. This time, just delete the plugin that is causing the problem.
What if there is more than one database in the list?
If there is more than one database listed in phpMyAdmin, you will need to look for the one that ends with “wrd” and then a number. For example, if you have four WordPress installations on your host, the list could look like:
youraccountname_wrdp1
youraccountname_wrdp2
youraccountname_wrdp3
youraccountname_wrdp4
In this case, you can find which database to use by editing the wp-config.php file of the specific website. This is found in the root folder and is accessible using FTP or cPanel. In this file, you will look for the coding that looks like:
[ht_message mstyle=”info” title=”” ” show_icon=”” id=”” class=”” style=”” ]define(‘DB_NAME’, ‘youraccountname_wrdp1’);[/ht_message]
Note that the “wrdp1” will be different for every installation of WordPress. This is the database you will need to find in phpMyAdmin.
When you’re unable to access the WP admin controls, managing the site can seem difficult. Luckily, there are plenty of easy ways to help you regain control even in the most dire of situations. This is just one of the common problems in WordPress that can prevent it from working correctly. Although it’s one of the most stable and reliable content management systems, remember that nothing is infallible.
What kinds of things have you had to fix using FTP or cPanel? How often do you run into a plugin that negatively affects your website as a whole?
