What if you have a website hosted with one provider but want your email to arrive at another? That’s when changing the Mail Exchange record comes into play. This is often referred to as the MX record. Essentially, you tell the original domain server to send email to a new server location.
This can be done for a variety of reasons, such as using an unlimited host or one that has better tools and functions. For example, you can change the MX record of your current host to send email to our web hosting platform.
In this tutorial, I’m going to go over how to set up this MX record for your domain name through cPanel. It’s a bit different than managing MX entries through the WHM system.
NOTE: If you set up a remote MX record, you will also need to adjust the “Email Routing” in cPanel to ensure it is set to Remote/Automatic(Remote). Otherwise, messages sent from the website won’t be routed properly.
Changing the MX Record
First, you need to access the cPanel account for the original domain. This is where the email will be coming from.
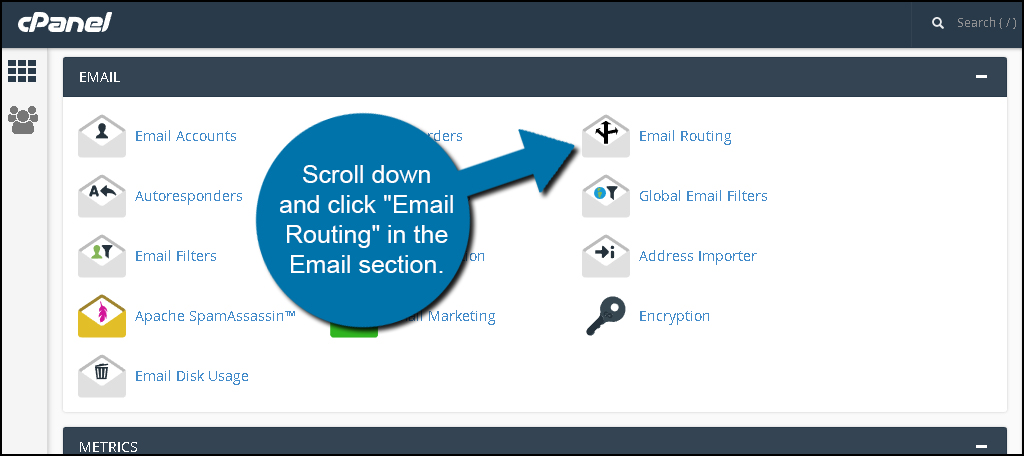
From the cPanel dashboard, scroll down and click “Email Routing” in the Email section.
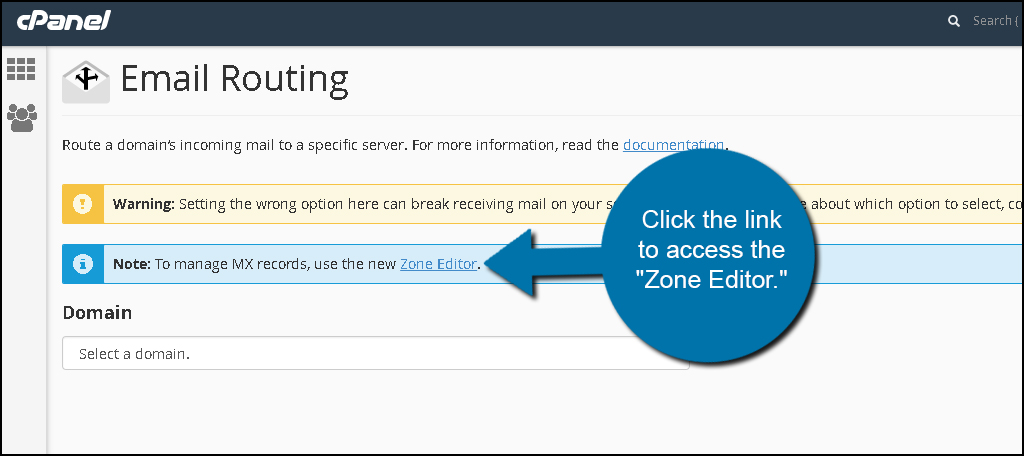
Click the link to access the “Zone Editor.”
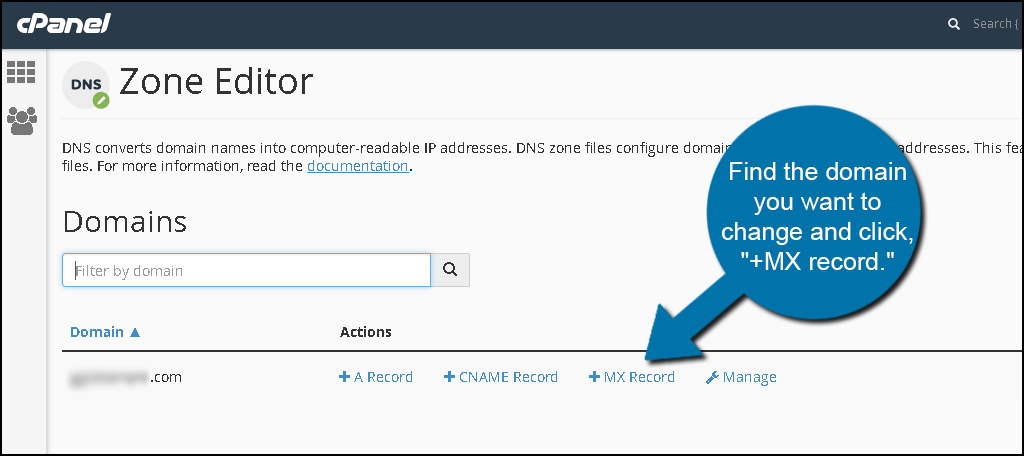
Find the domain you want to change and click, “+MX record.”
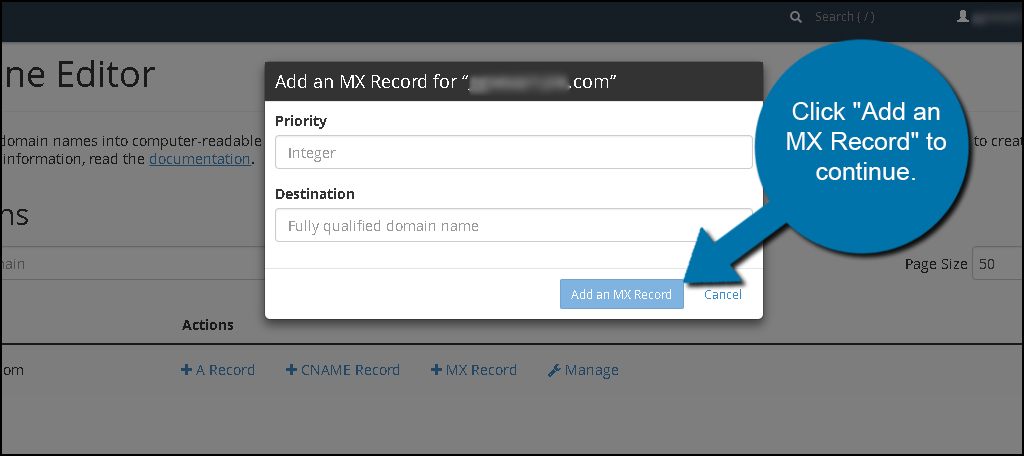
In the edit screen, you will need to put in a “Priority” number and the “Destination” server. The Destination needs to be a fully qualified domain name. Your new host should provide this for you.
Click “Add an MX Record” to continue.
The record will then be changed and activated. This will immediately alter how the domain handles email from the particular server.
Deleting the MX Record
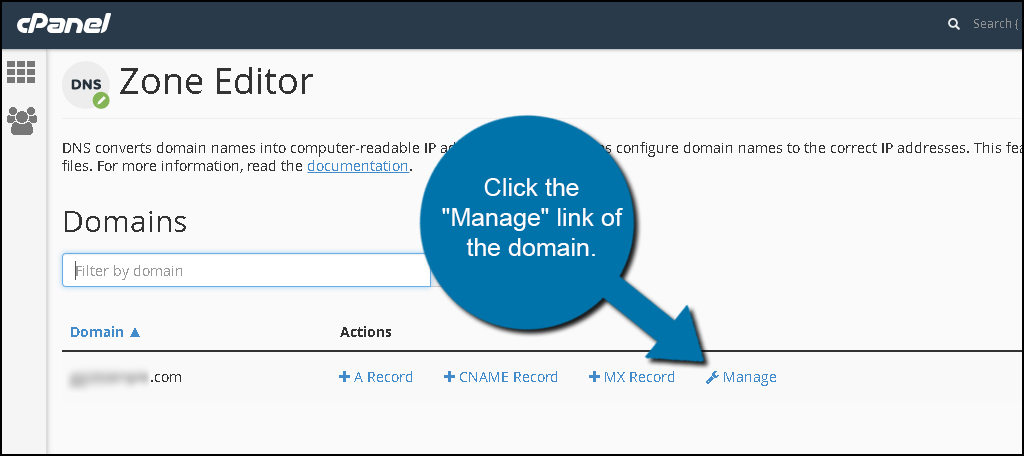
If you want to manage or remove the MX record, click the “Manage” link of the domain.
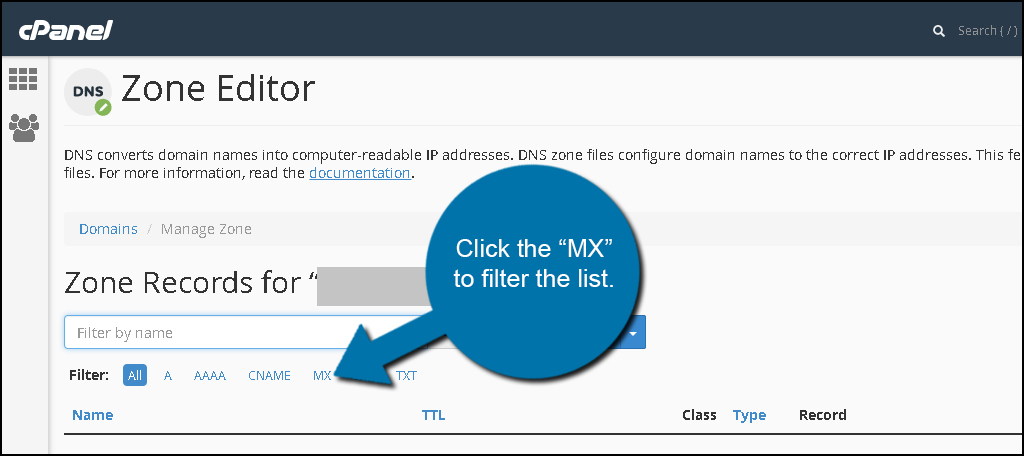
Click the MX to filter the list.
Find the entry you want and click “Delete.”
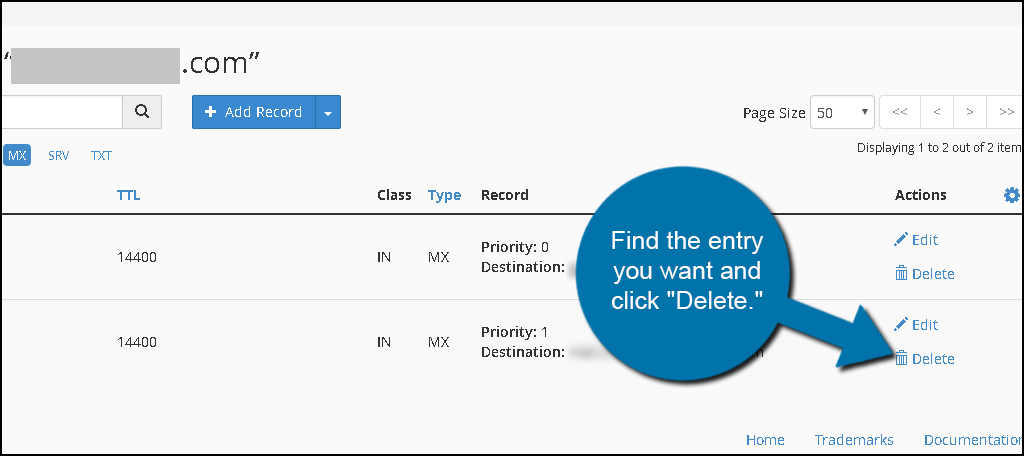
Make Sure Your Changing the Right One
Once the MX record has been changed, email will begin following the new rule. Make sure you have selected the correct servers on both ends as it will prevent you losing important data. Always remember to run a test of your system before believing it is ready. It may save you for spending time fixing things later on.


Thanks for this information. For other people visiting, I’d like to add if you were not provided a Priority along with the destination server information when you are attempting to Add an MX Record, try entering Priority number 10.