Your website’s performance is one of the proven factors that search engines, like Google, use to calculate rankings. Thus, you need to do everything possible to get the best results. And the W3 Total Cache plugin can help.
Caching plugins ensure that your website loads pages faster by storing common web page data to speed up loading. This means that the page doesn’t need to load all of the data, instead, it has the static content ready to go.
Today, I will demonstrate how to use the W3 Total Cache to speed up your website.
What Is Caching And Why Do You Need It?
Caching is the process of storing data so that it can be delivered faster upon the next request. It is commonly used for static content, which is content that never changes.
For instance, consider your Contact Us page. The content on this page should not change very often. As such, it is likely to be cached so it can be delivered faster to the next visitor and that can help increase business.
Depending on the structure of your website and the settings you choose, W3 Total Cache can speed up your website by 10% or more. That said, every website is unique so, the results will vary. But even a one percent increase is worth the effort.
That’s because visitors don’t like to wait. Every second it takes for a website page to load is another second they might choose to leave. The end result is a better experience for visitors and search engines alike.
Therefore, it’s something every website should do.
How to Use W3 Total Cache to Speed Up WordPress
Step 1: Install W3 Total Cache
W3 Total Cache is a free WordPress caching plugin with over one million active installs. And unlike most caching plugins, this one is a complete framework, meaning it can solve all of your caching needs instead of just a few.
One of the best parts of this plugin is its flexibility in regard to your web hosting plan. It works in shared, virtual, and private environments. Or in other words, any website environment. It’s the perfect caching plugin that anyone can utilize.
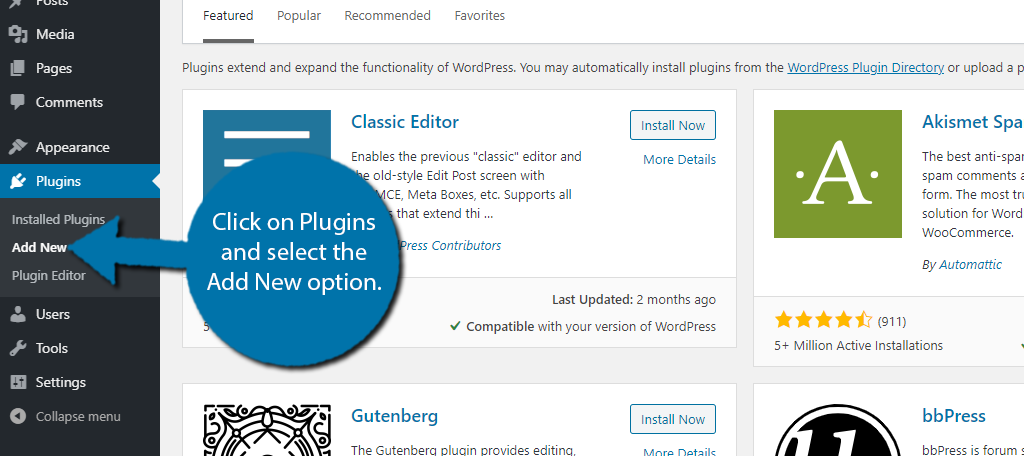
Let’s start by clicking on Plugins and selecting the Add New option on the left-hand admin panel.
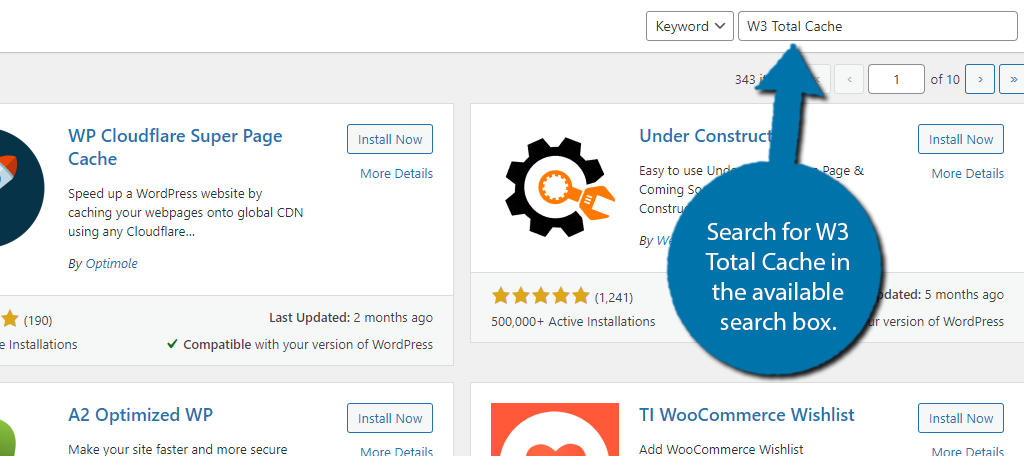
Search for W3 Total Cache in the available search box. This will pull up additional plugins that you may find helpful.
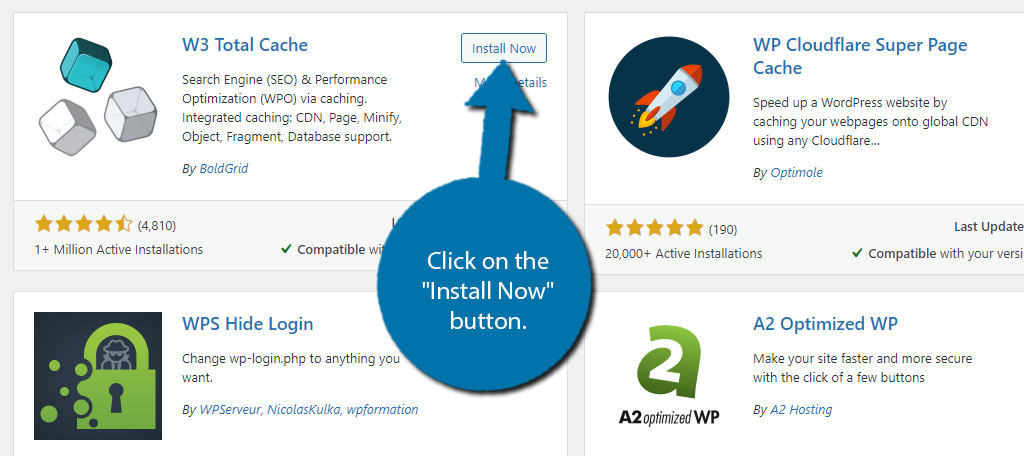
Scroll down until you find the W3 Total Cache plugin and click on the “Install Now” button and activate the plugin for use.
Note: If you have had another caching plugin installed on your website, you might see a warning message after activation. Essentially, W3 Total Cache has detected a file that does not belong to it and wants to delete it. This is nothing to be concerned about, and you can safely click on the button to delete the file.
Step 2: Start the Setup Wizard
Before going any further, I need to emphasize that every website is unique, which means setting up a caching plugin is too. Luckily, W3 Total Cache makes the process easy by providing a setup wizard.
I will only be able to provide general tips, but there might be better options for your website.
On the left-hand admin, panel click on Performance and select the Feature Showcase option.
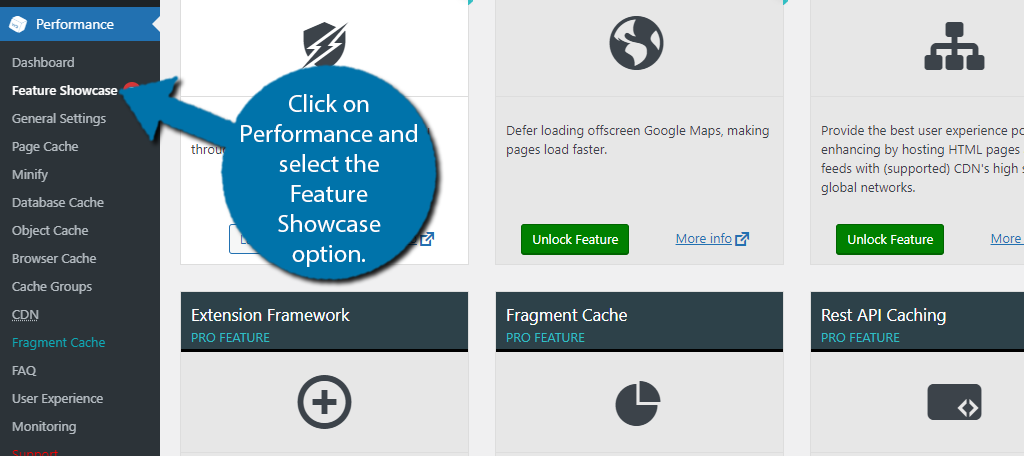
Here, you can find a variety of features that the plugin offers, but most of them are for the Pro version. Locate the Setup Wizard and click on the “Launch” button.
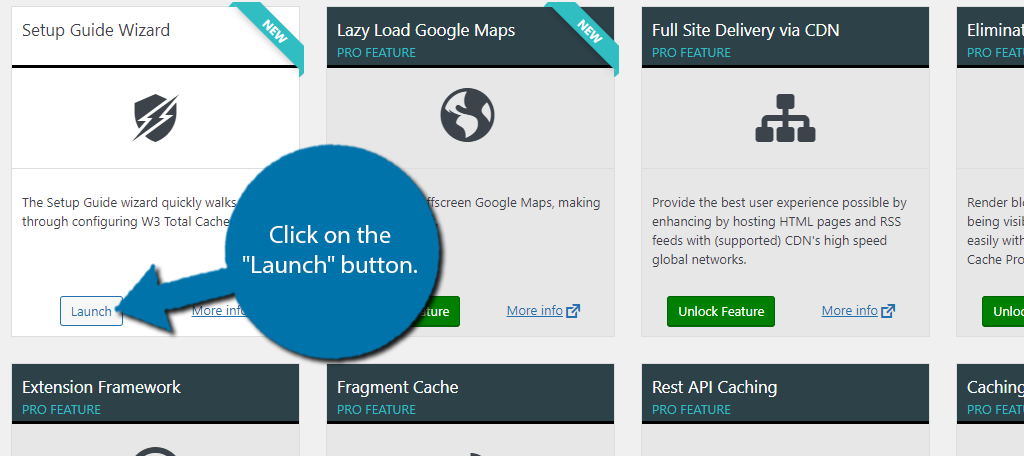
One important thing to keep in mind is that the options available to you depend on your version of the plugin. The free version does not have access to many of the potential storage engines and additional features. While you can still see a huge performance boost with the free version, the Pro version is superior.
Step 3: The Setup Wizard
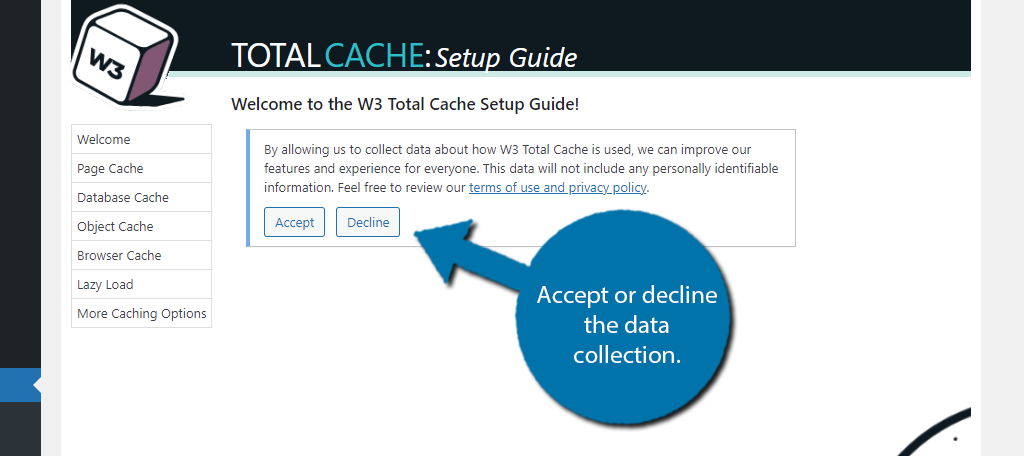
You must first decide if you want to allow W3 Total Cache to collect data. You are free to click on either the “Accept” or “Decline” buttons because neither will affect the plugin. This is all just personal preference.
Click on the Next option when you are done.
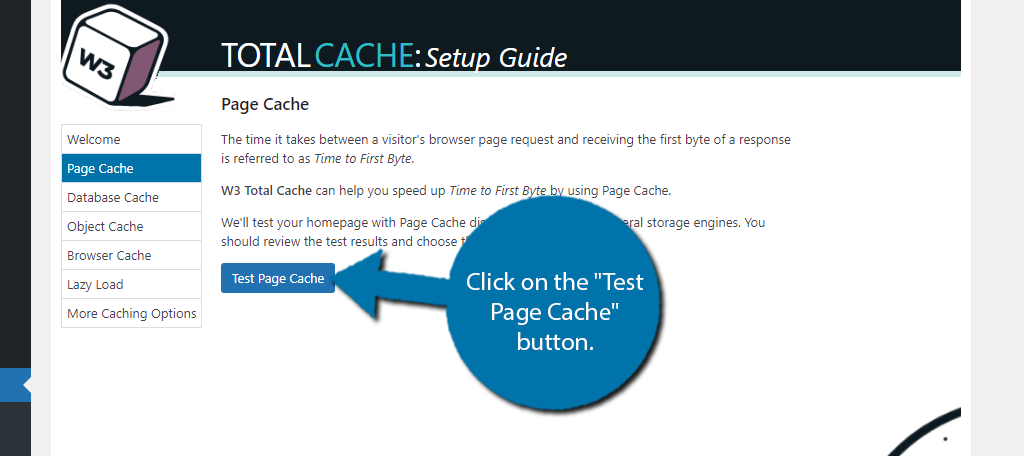
Next, the plugin wants to test your Page Cache with a variety of storage mediums. Click on the “Test Page Cache” button to begin the test.
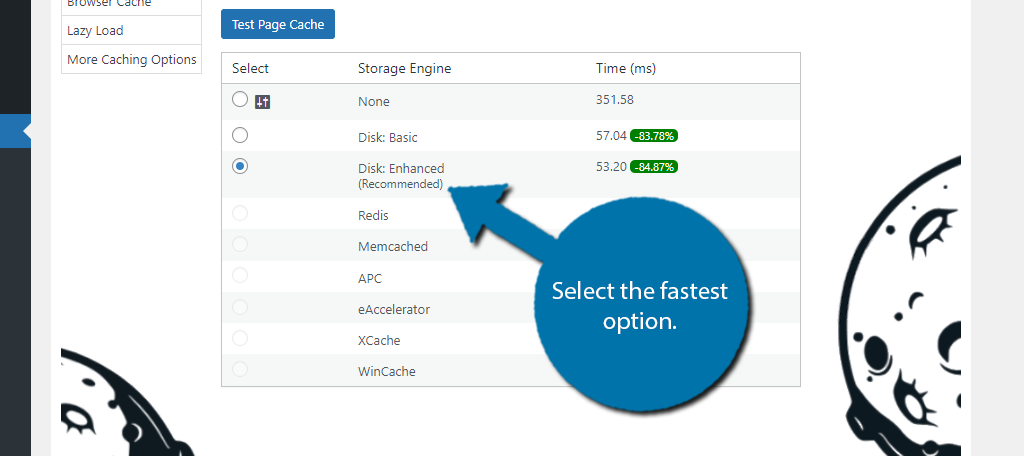
When the test concludes, you will see the results from a variety of storage engines. The plugin will recommend the fastest one, so be sure to pick it. Click on the Next option to continue.
Note: The results will be different for every website, so choose whichever is recommended.
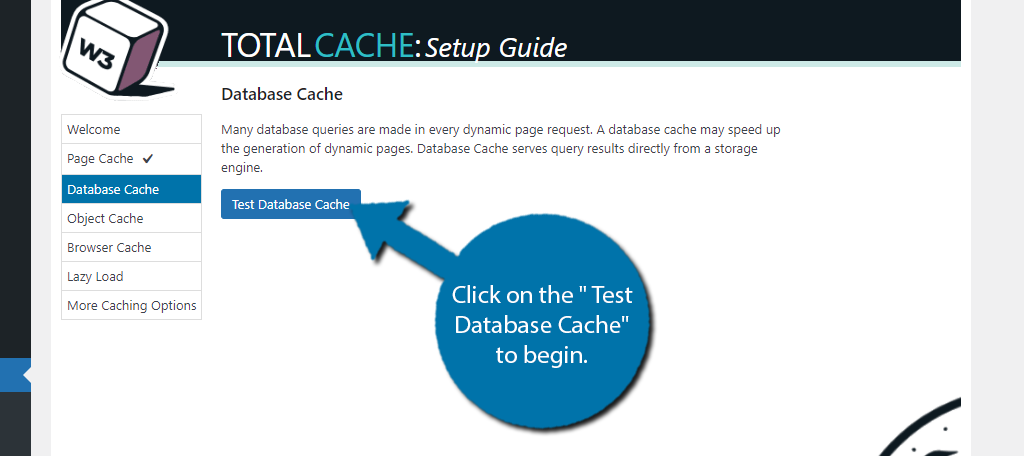
The next step is to test the Database Cache. Click on the “Test Database Cache” to begin.
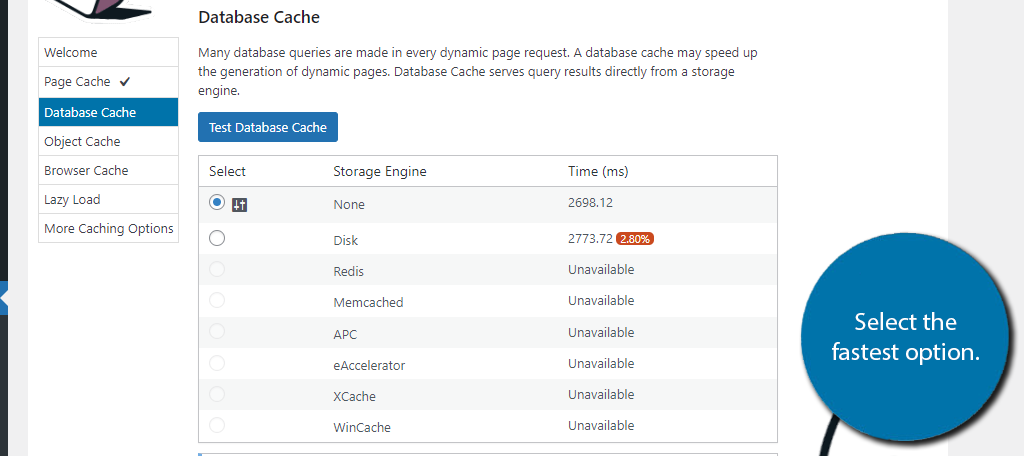
Once again, you will see the results from a variety of storage engines. Select the recommended options. In some cases, the default might be faster.
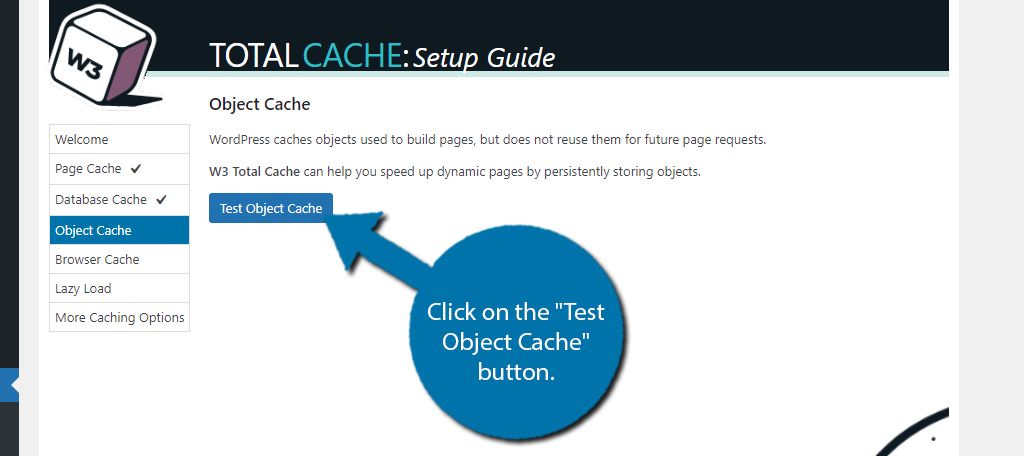
Continuing on, the next focus is on Object Cache, which helps speed up dynamic pages. Click on the “Test Object Cache” button.
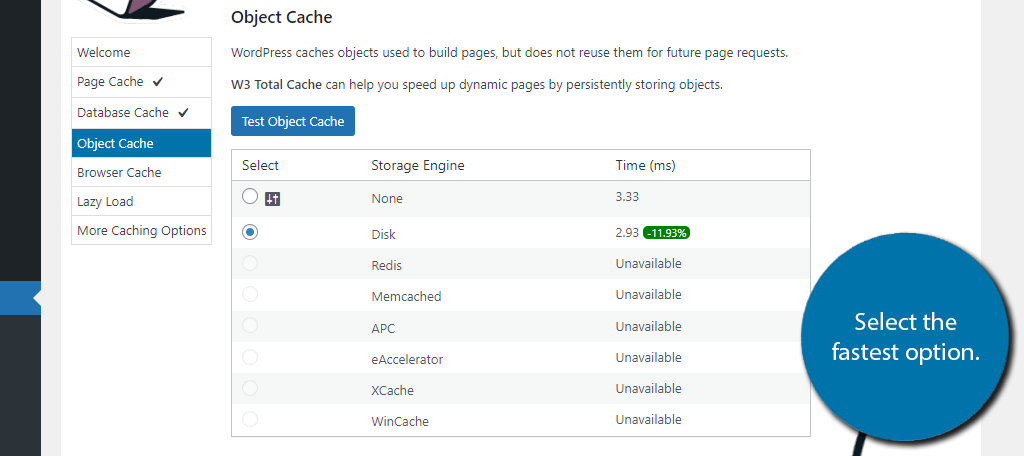
And just like the others, you can see the results of the test and pick the fastest option.
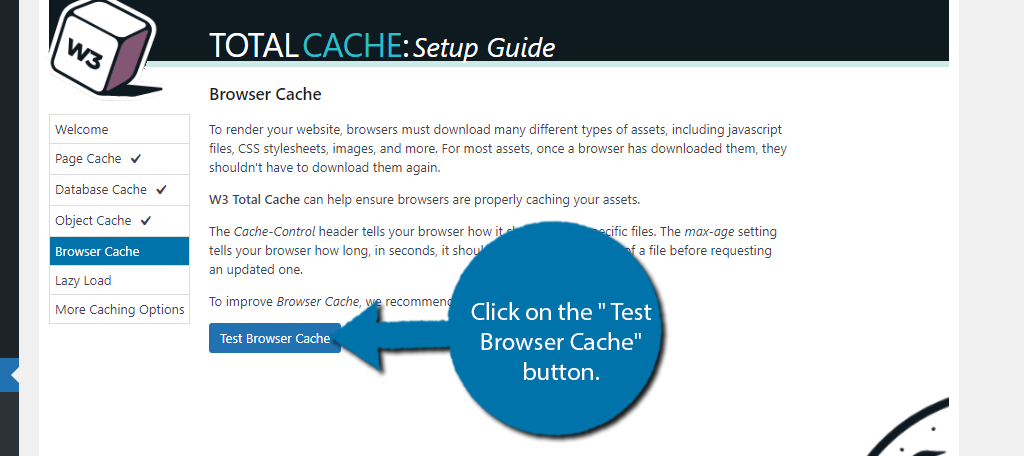
The next section focuses on Browser Cache. This essentially tells a web browser what files to cache and how to do it. Click on the “Test Browser Cache” button to begin.
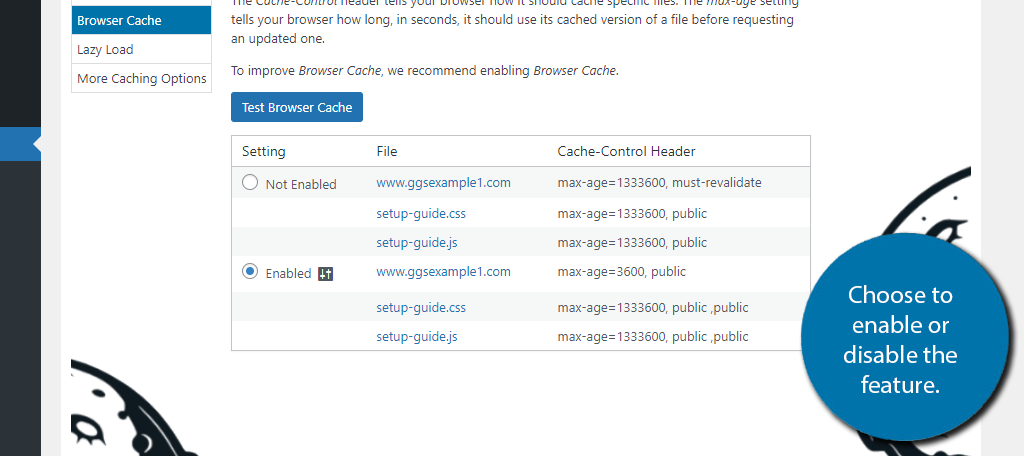
Unlike the other options, you simply choose to enable or disable it. It’s recommended to enable this feature.
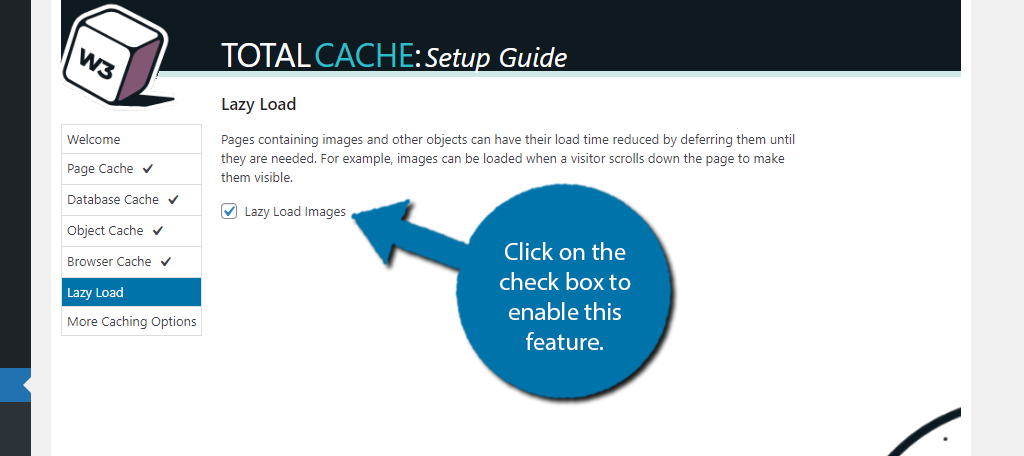
The next section actually isn’t related to caching, but it can seriously speed up your website. Lazy loading is a technique that only loads media content when it is necessary. For instance, imagine a page that you scroll down. Images that appear at the bottom load at the same time as images at the top.
This results in a lot of extra loading for items you can’t see in the initial load. By enabling lazy load, only the images that are visible will load. And for some websites, this alone can save a lot of time on PageSpeed Insight scores.
Click on the check box to enable this feature.
That concludes the setup wizard. You can see everything you selected. Your website should now be faster than ever before!
Where Is the Caching Stored?
The information that is being cached is stored within a web browser’s caching folder. Each web browser has its own unique folder, thus a visitor using Chrome and switching to Microsoft Edge will need to store the data again.
What If the Visitor Clears the Cache?
It is recommended for visitors to clear their cache regularly to maintain high speeds. This doesn’t mean they will load the page slower on the next visit, but the cache will be stored again after that initial visit.
Website Speed Matters
If there is one thing that everyone can agree on, it’s that speed matters. Many users have become accustomed to fast loading times and when a website is slow, they go somewhere else. This is especially true on mobile devices that have less power.
In fact, most mobile users are in more of a rush than their desktop counterparts. Optimizing your website for speed not only improves the customer experience but can also boost your search engine rankings tremendously.
If there was ever a plugin to consider purchasing a Pro version for, this is definitely the one. You can get even faster results and a ton of new features, not to mention that improved speed is always worth paying for.
Did you consider using the Pro version? How did you manage WordPress cache before W3 Total Cache?

What would be helpful would be the correct settings to use for GreenGeeks. This is too general.
Hello Bill,
It’s not advisable to use both. If you’re hosted on GreenGeeks, I would stick to LSCache as it provides you to take advantage of all the optimization and caching capabilities of our hosting platform.
Is it advisable to use both this tool and LiteSpeed? This article seems old since it links to another blog post from 8 years ago. It seems to me LiteSpeed might be your preferred method now?