One of the biggest reasons that websites run slowly is due to images. Images take up a lot of space and require a lot of resources to load correctly, which is why most sites try to optimize them in WordPress.
And if I’m being honest, this is pretty easy to do nowadays. There are a variety of tools and techniques web developers can use to help optimize images for their site. This can be something simple like shrinking the file size.
Or, you can use a compression tool to do it for you. Regardless of which way you go about it, there are a ton of ways to do this using WordPress, and today I am going to cover five different ways you can optimize images for WordPress.
Why Should You Optimize Your Images?
If there’s one thing nearly every person can agree on, it’s that no one likes a slow website.
Speed is one of the most important factors for a website as it not only negatively impacts the user experience but is also a factor that determines your rankings on Google and other search engines.
And generally speaking, images are one of the biggest reasons a website will run slowly. As such, taking the time to optimize images will ensure your website is running as fast as possible, which can boost your rankings.
While these are the two main reasons why you should optimize your images, there is actually a third.
Most web hosting plans will limit how much data you can store on your server. As a result, optimizing your site’s database is a must, otherwise, you will spend a lot of money paying to store more data.
Optimized images should only have file sizes in Kilobytes (KB), while unoptimized images can sometimes have file sizes in Megabytes (MB) or even Gigabytes (GB) depending on how the image was created.
Thus, optimizing your images can help you save money on your web hosting plan, and the same is also true for your backups.
Method 1: Properly Size Images
One of the simplest ways to optimize your images is to make sure they are sized correctly before you upload them to your media library.
For example, if you have a very small image, it will be comprised of less data than a very large image. Many beginners will upload images of any size, which can result in huge file sizes being stored, which ultimately slows down your site.
Most websites get their images in three ways. The first is through a royalty-free stock image site or paying a graphic designer to make them. In these cases, the sites should have multiple image sizes to select from while you can tell the graphic designer the exact size.
The other method is to make the images yourself, which is what we will be focusing on.
In this case, you would be using a piece of photo editing software to edit the image. When it comes to photo editing, there are a variety of tools you can use to do it, so let’s cover some of the major ones.
Note: If you need a tutorial for these tools, check out our full guide that covers each in more detail.
Photoshop

Photoshop is easily the most recognizable name when it comes to photo editing. Naturally, many graphic designers rely on it to create graphics and images for their projects and sites.
It offers a free trial that you can use to test it out, and then you will need to sign up for a subscription. In terms of features, you can do anything with Photoshop. It is the industry leader that every other piece of software is chasing.
When it comes to image size, you have full control over how big or small an image will be saved as. This will naturally reduce the file size, thus when you export it to WordPress, the site will load it faster.
Pixlr
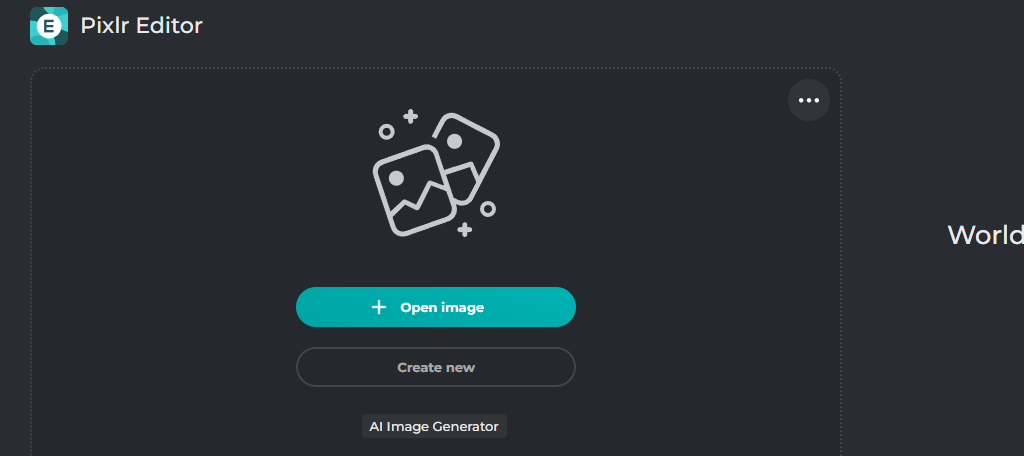
Pixlr is a popular web-based photo editor. It is free to use and works similarly to Photoshop in nearly every regard, but naturally lacks many features and tools you would find in the paid alternative.
Pixlr allows you to resize images to meet your needs, thus, you can easily take images and resize the file itself without lowering the quality of the image. It is a great choice for sites looking to save some money.
IrfanView
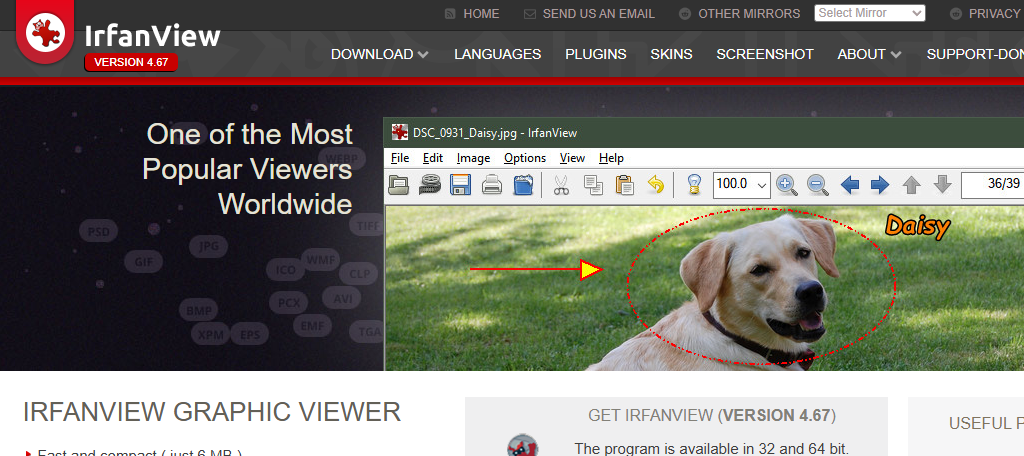
IrfanView is another great free tool you can use to optimize images for WordPress but it only works on computers that use Windows. And it supports all newer versions of Windows, as well as legacy versions like XP and Vista.
Like most other options, it is very similar to Photoshop but lacks a lot of the bells and whistles. That said, it gives you complete control over the size of an image, thus you can save it as any value or file type.
GIMP
GIMP, or GNU Image Manipulation Program, is another popular editing tool you can use to optimize images for WordPress. It is free and available on most operating systems and is, most importantly, free to download.
The tool is yet another that looks similar to Photoshop but has fewer options to offer. Yet, you will have no issue with resizing images to any dimension you need, which makes it a great pick for sites looking to save a few dollars.
Photopea
Closing out this list is Photopea. It is another popular free option that sites can use to optimize images for WordPress. This tool is web-based, so your operating system does not matter.
It can open nearly any kind of file and will give you the ability to resize the images as you need. Exporting from it is very simple, and you can choose any popular file format you want. It’s a great option for any site.
Plus, it supports PSD files. That means images that have layers saved in Photoshop will have them in Photopea.
Method 2: EWWW Image Optimizer
Another approach to optimizing images in WordPress is to use a plugin. While there are many to choose from, one of the best options is the EWW Image Optimizer. It is a free and comprehensive compression plugin for WordPress.
Simply put, you install the plugin and it will optimize the images stored in your media library. This will reduce their file size while not impacting the quality of the image. There is a Pro version that offers higher compression rates, though.
Important Note: This plugin will alter the original image you uploaded in WordPress. You should take a moment and create a backup of your website, so you have a copy of the original images.
Step 1: Go to the Settings
Start off by installing and activating the plugin. Once that is done, click on Settings and select the EWWW Image Optimizer.
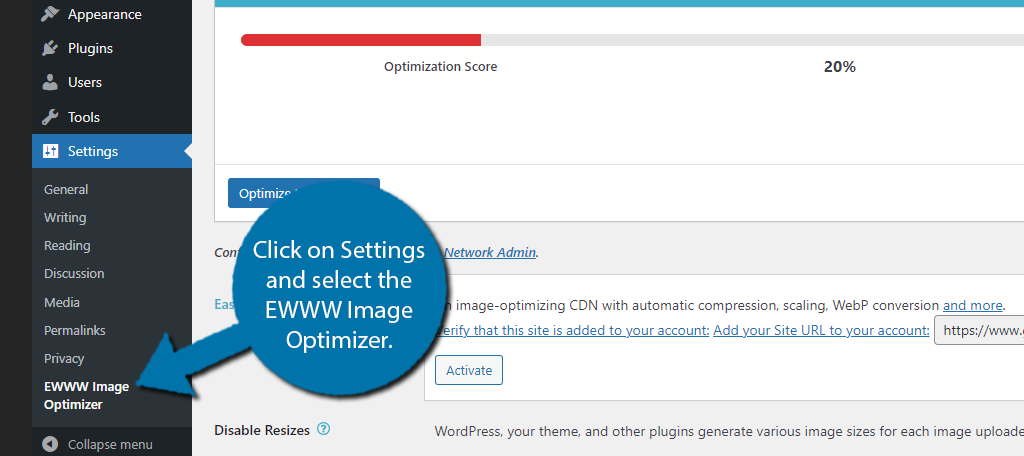
You’ll notice that the plugin provides an optimization score at the top. This will tell you your current optimization percentage. It will most likely be on the low end but fear not, the plugin will fix that.
If you view the recommendations, the plugin will mention several steps you can take to improve the score which include:
- Enable premium compression
- Configure maximum image dimensions
- Enable Lazy Loading
- Enable WebP conversion
Some of these require additional tools to carry out, but just keep in mind optimizing your images will not really change the score, only the above steps will make it change.
Step 2: Optimize Images
Click on the “Optimize Local Images” button.
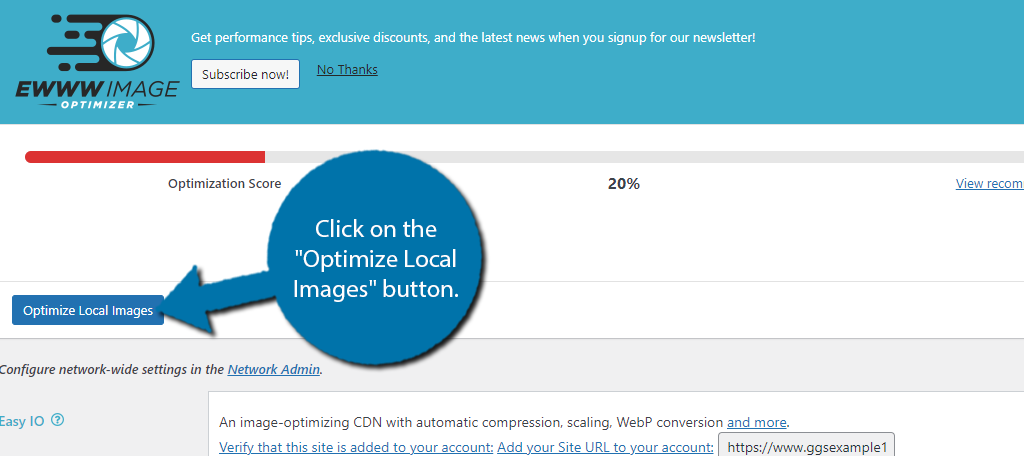
Doing so will tell you how many images were selected to be optimized. There are some settings that will appear on the right-hand side. The first one is to reoptimize any images that have already been optimized.
If this is your first time running the plugin, you can safely ignore this option as you have no images that need to be re-optimized. On subsequent re-runs, I would advise checking the box.
Below this is an option to pause the optimization process between images. This is to help reduce the burden on your site. I did not enter a number in the setting, which results in zero pauses and had no issues, but the option exists if you need it.
Click on the “Start Optimizing” button to begin.
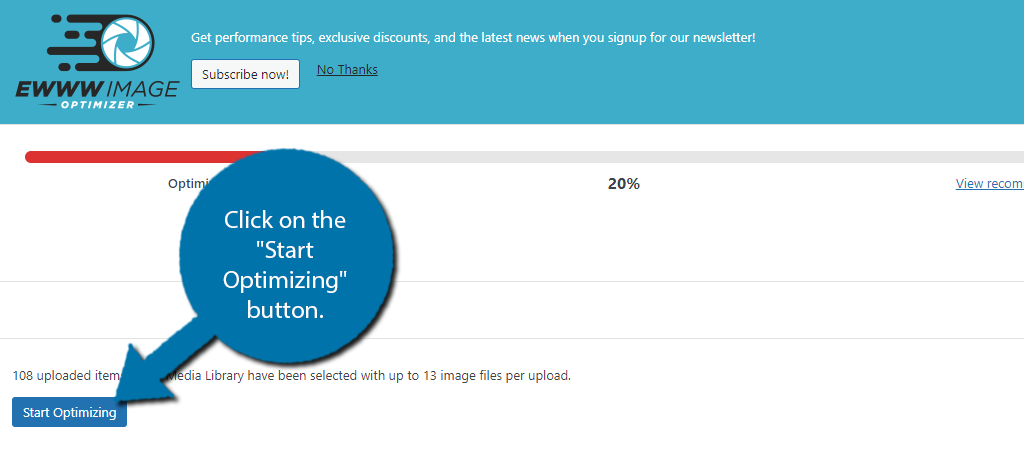
You will see a short reminder that the original image will be altered. This is the last chance you have to make a backup of your images. This process cannot be undone. The amount of time the plugin takes depends on the number of images you have.
In my case, the images took around 5 minutes to optimize, but I would expect larger sites to take upwards of an hour. Just be aware that this is the only time you’ll need to do this.
All images you add will be optimized automatically when uploading to WordPress.
Step 3: Additional Settings
There are some additional options below this feature that allow you to connect with Easy IO, which is an image-optimizing CDN.
I recommend using a dedicated CDN, see Method 5 for more details. There are also options to disable optimizing certain images based on their size, as well as telling WordPress to stop making extra copies of the images.
And with that, you know everything you need to about the EWWW Image Optimizer plugin.
Method 3: WP-Optimize
WP-Optimize is an all-in-one solution for optimizing your WordPress website. It does everything from caching your website to compressing images to ensure that your website is running as fast as possible.
In this case, we are just going to be looking at its image compression tools, which are pretty straightforward to use. The plugin will scan your site and show you all of the images it views as unoptimized. Select them all and optimize them.
It only takes a few moments to go through, so start off by installing and activating the WP-Optimize plugin.
Step 1: Go to the Settings
WP-Optimize has a lot of options, but we are only looking to compress our images today. To do so, click on WP-Optimize and select the Images option.
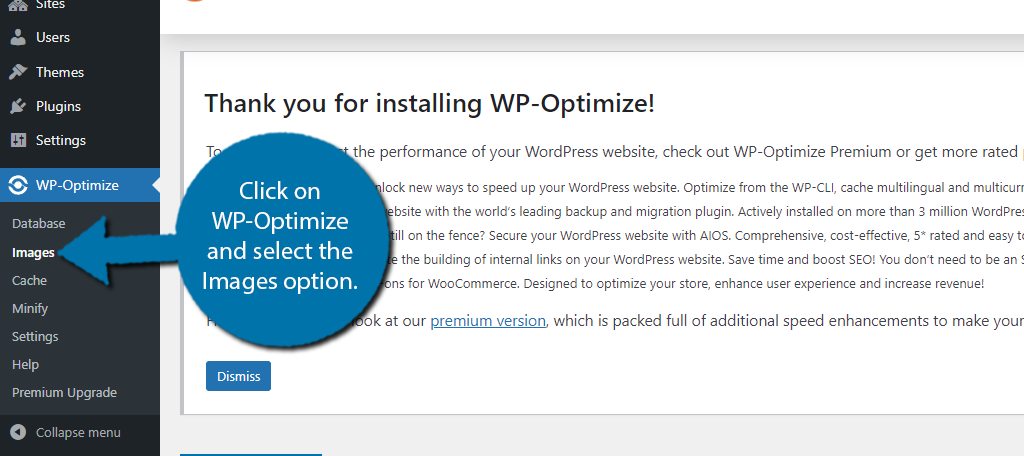
Step 2: Configure the Settings
The image settings are broken up into three tabs, but in the free version, only the first is accessible. Thus, we are only looking at that today.
The first option you can configure is if new images will automatically be compressed when they are added to your media library. This is off by default, but it is recommended to turn it on as it will ensure that all images are optimized.
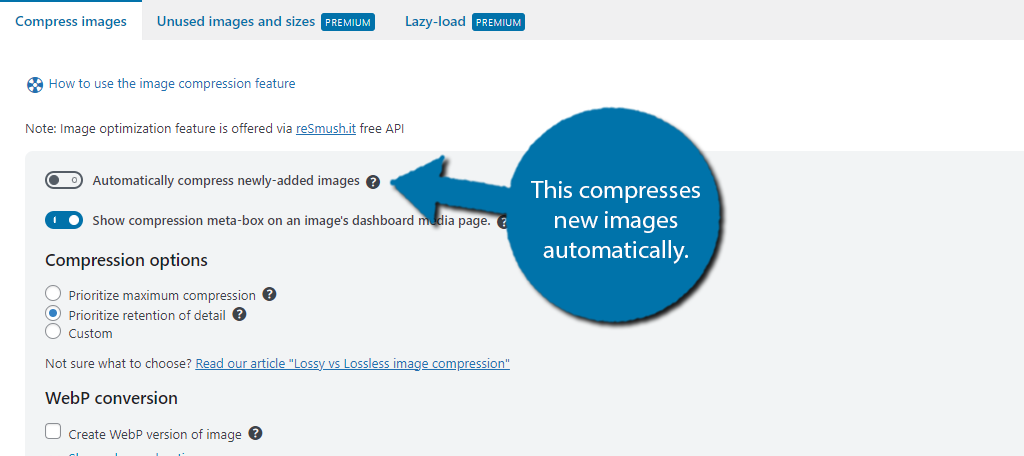
The next option is enabled and just shows you an extra meta-box on the image dashboard. Feel free to turn it off or leave it on. Below this, you will find the Compression option. There are three options you can choose from.
The first is to prioritize maximum compression, which just means it will make the image file size as small as possible no matter what. This even means at the cost of image quality. This is not recommended.
Instead, the second option, which is selected by default, will prioritize the retention of detail. This just means it’ll make sure the image doesn’t lose quality. The third option is custom, which you can configure.
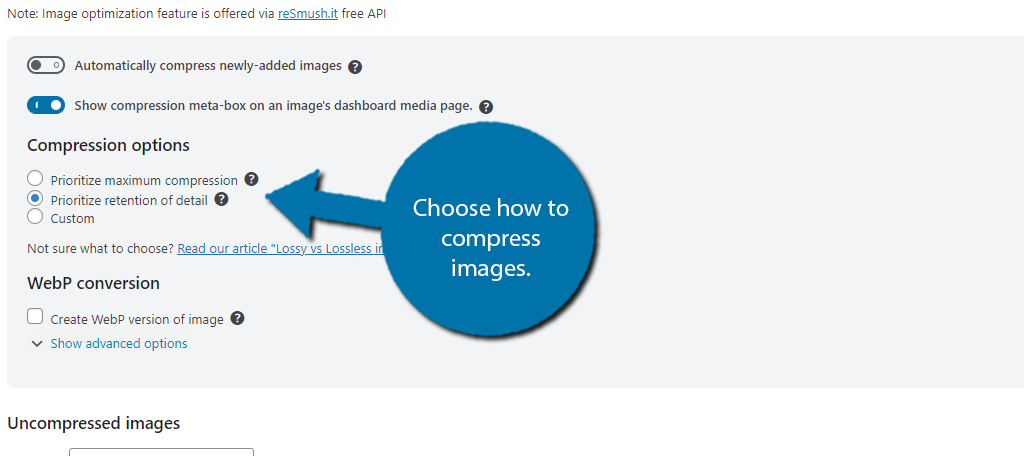
The next option gives you the choice to convert images in the media library to a WebP file type. WebP offers users a smaller file size compared to more traditional JPEG and PNG images most sites still use.
The choice is yours, but for further optimizations, switching to WebP is recommended.
Also, keep in mind that WebP is the preferred file type for mobile devices. That means Google is going to prioritize sites that use them.
The Advanced Setting section will give you more control over the data of the plugin and create backups for your images. Feel free to configure these options as you see fit.
Step 3: Compress Images
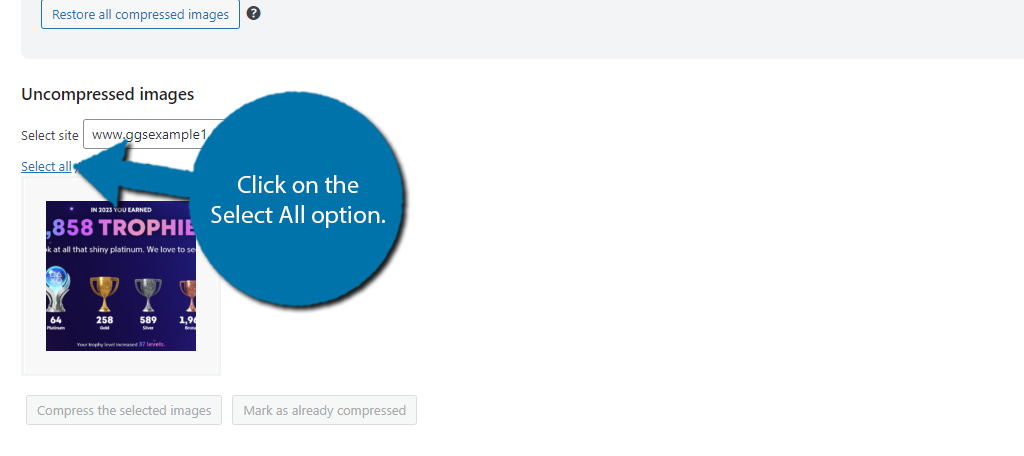
With all of the settings taken care of, it is now time to optimize your images in WordPress. Underneath the settings, you should see an Uncompressed Image section. Here, you will see all of the images the plugin does not think are optimized.
If you have used other compression tools, the plugin may already find them fine. For example, I used the EWWW Image Optimizer, so it found my library was already optimized and thus had no recommendations.
Simply click on the Select All option to select all of the uncompressed images.
Click on the “Compress the Selected Images” button.
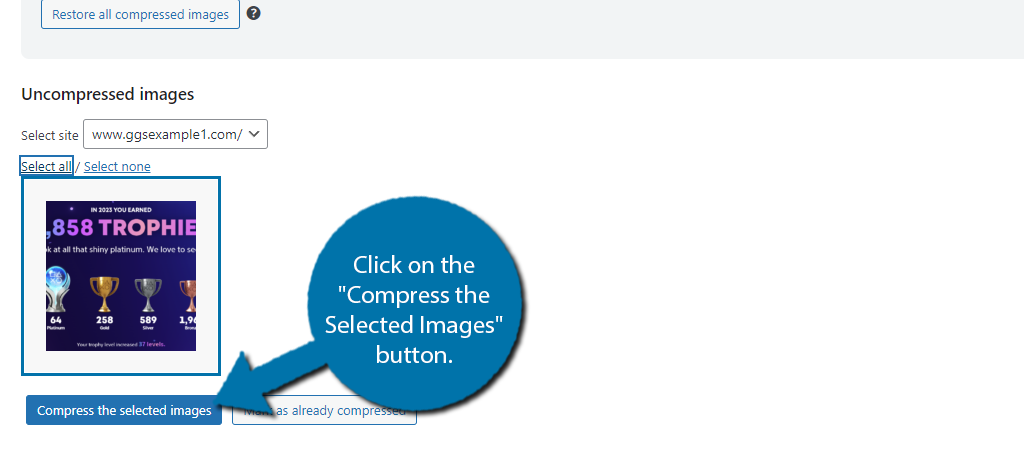
This will begin the process of optimizing images in WordPress. All you need to do is wait for it to complete. The amount of time it takes depends entirely on how many images you selected. Larger websites may take several hours to fully compress.
And that’s all there is to it. Once the process is complete, your images will be optimized.
Method 4: ShortPixel Image Optimizer
The ShortPixel Image Optimizer is yet another amazing plugin you can use to optimize images for WordPress. Just like the previous two, you install the plugin, go through the settings, and compress the images for an optimized performance.
It also has the ability to compress PDF files as well, so it can be very useful for business-related sites. Luckily, the plugin is just as easy to use but is a bit more involved in the setup due to needing an API Key.
Important Note: ShortPixel only provides 100 credits for free. These 100 credits allow you to optimize 100 images (1 image = 1 credit). You can purchase additional credits or an unlimited plan.
Step 1: Obtain the API Key
After you install and activate the plugin for use, you will need to obtain an API key. Luckily, this only requires a valid email address and can be done directly from WordPress without creating any additional accounts.
Click on Settings and select the ShortPixel option.
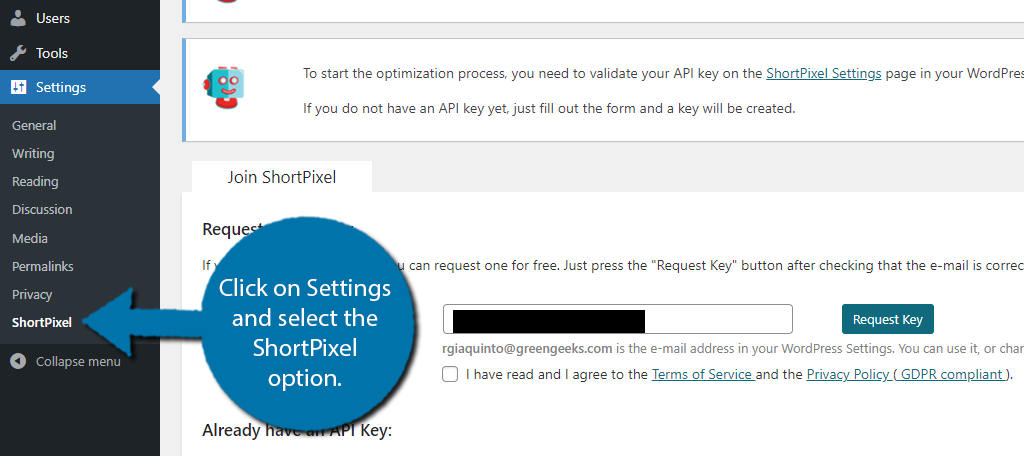
The plugin will automatically insert the email address attached to your admin account into the appropriate box. Right next to it is a “Request Key” button that you need to click. Doing so enters an API key for you.
You don’t actually have to check your email or anything like that. Instead, the plugin will be fully activated, which will make all of the other settings visible.
Step 2: Configure the Settings
With all of the settings revealed, we can go through them. They are broken up into four tabs. The first is the General settings. This is where you can select what type of compression to use. The default option, Lossy, is recommended as it ensures images look the same.
The rest of the options are switches you can enable or disable that deal with other options.
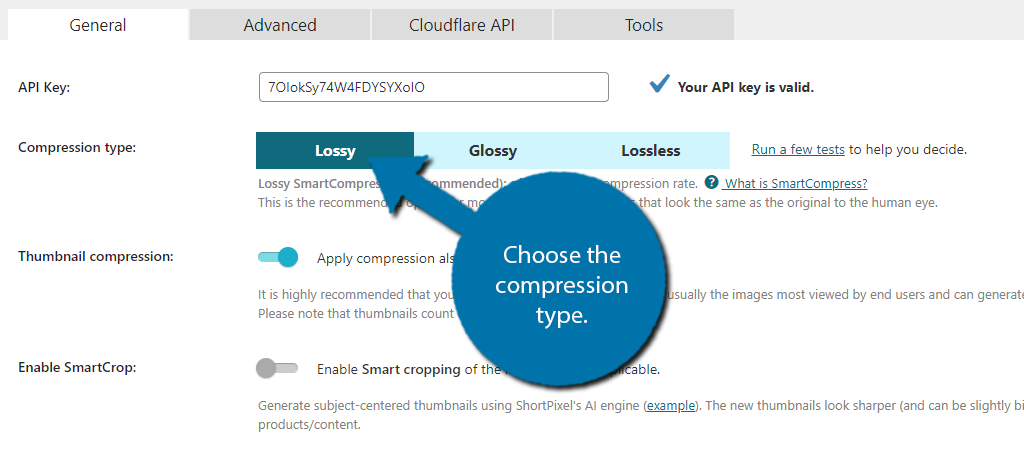
The other tabs are not important for this tutorial but be aware that they give you greater control over the plugin. When you are done configuring the settings, click on the “Save and Go to Bulk Process” button.
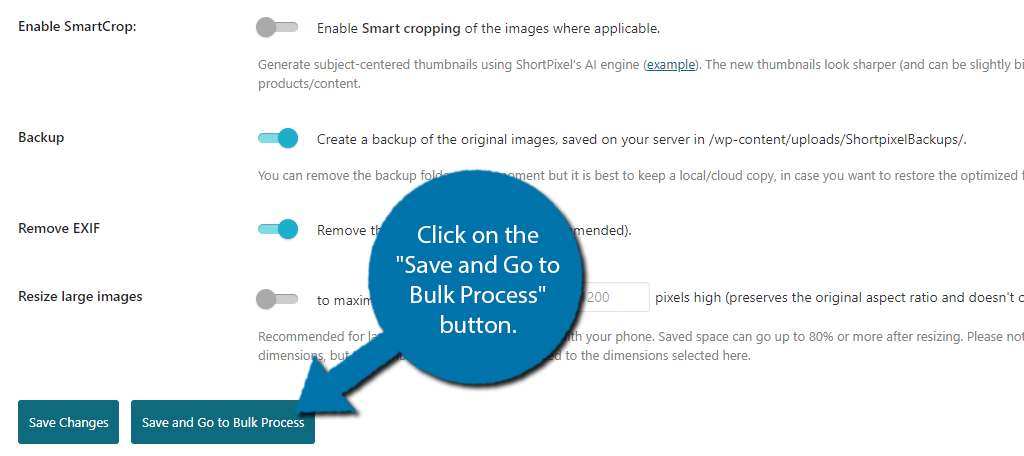
Step 3: Optimize Images in WordPress
Click on the “Start Optimizing” button to begin the process. By default, all of the images in your media library will be selected, which is what most sites will want. However, if your site has over 100 images, you will need to purchase more credits.
If you just want to test out the plugin. I recommend choosing up to 100 images. There are also some other options you can configure.
These include:
- Creating WebP versions of the images
- Create AVIF versions of the images
- Background Mode
Once you have made your choices, click on the “Calculate” button.
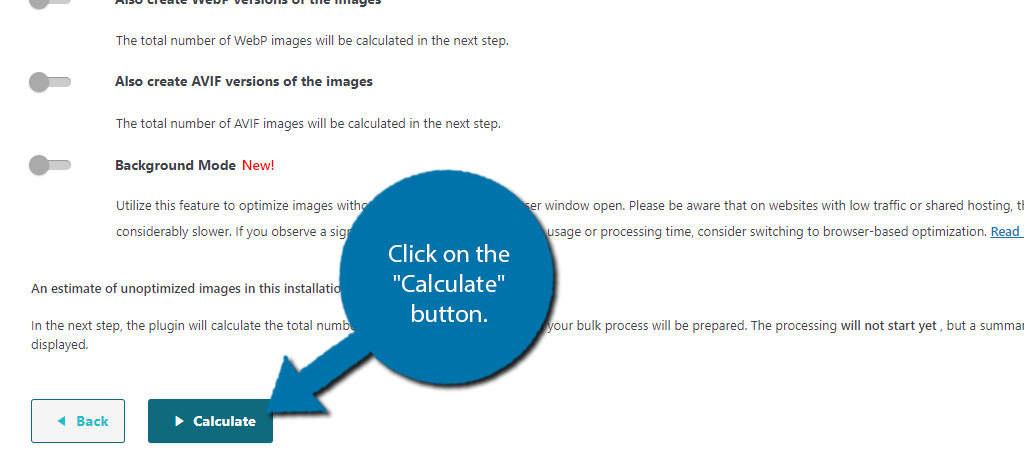
This will give you a summary of what you selected. Remember this plugin only provides 100 free credits, thus you can only optimize 100 images for WordPress. If you want more, you will need to purchase credits individually or buy the unlimited plan.
Regardless, once you have selected the images and reviewed the summary, click on the “Start Bulk Optimization” button.
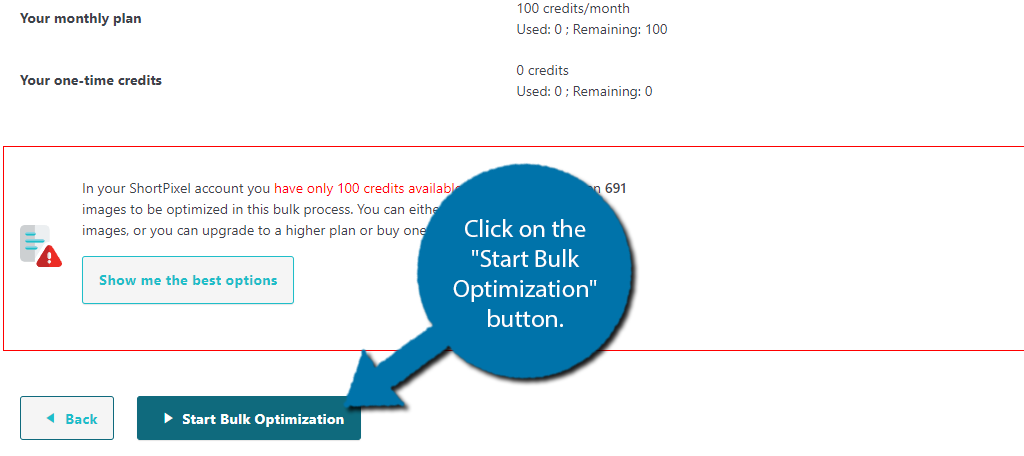
The process will take several minutes or hours depending on how many images you selected. Come back when it is complete to see the results screen. If you are using the full 100 free credits, the process took me about an hour or so.
You can stop the process at any time and resume it later if the need arises.
And that’s really all there is to it. The plugin is great at what it does but it is not a free option like the others, so it isn’t for everyone.
Method 5: Use a CDN
While using a plugin to optimize your images in WordPress is easy enough, there is another way to approach the problem. A Content Delivery Network, or CDN, is a tool that can automatically pick the best way to deliver an image to a user.
That said, images are not the primary focus of a CDN, but there is definitely a benefit to using one. CDNs are typically a paid service, and many websites today will utilize one to help boost the performance of their site.
The good news is that CDNs optimize your image delivery automatically, thus you really just need to set up the CDN and it should take care of the rest. Some services may have some settings to configure, but it depends on the tool.
Perhaps one of the most popular options you can choose is Cloudflare. And it even offers a free version that you can use to test it out. That said, it is limited. Thus, to really get all of the benefits, you will want to pay for an actual plan.
Let’s take a look at how to set up Cloudflare for WordPress.
Note: Setting up a CDN is complicated. It is not recommended for beginners. Many CDNs will have agents that can help you go through an initial setup, but these are typically reserved for paid plans.
Step 1: Sign Up for Cloudflare
Begin by visiting the Cloudflare website. If you already have an account sign in. If not, click on the “Sign Up” button.

There are several plans to choose from. Simply click on the “Add A Website” button to choose the plan. In this case, I am just choosing the free plan. You will then be prompted to enter an email address and password.

This will create an account with Cloudflare. Be sure to pick a strong password for the best security.
Step 2: Connect with WordPress
The first thing you will see after creating an account is a thank you screen. Click on the “Add website or application” button.

Enter the domain name of the website you wish to connect with Cloudflare. Do not enter the “https://” or “www.” components of URL, only the domain name itself.
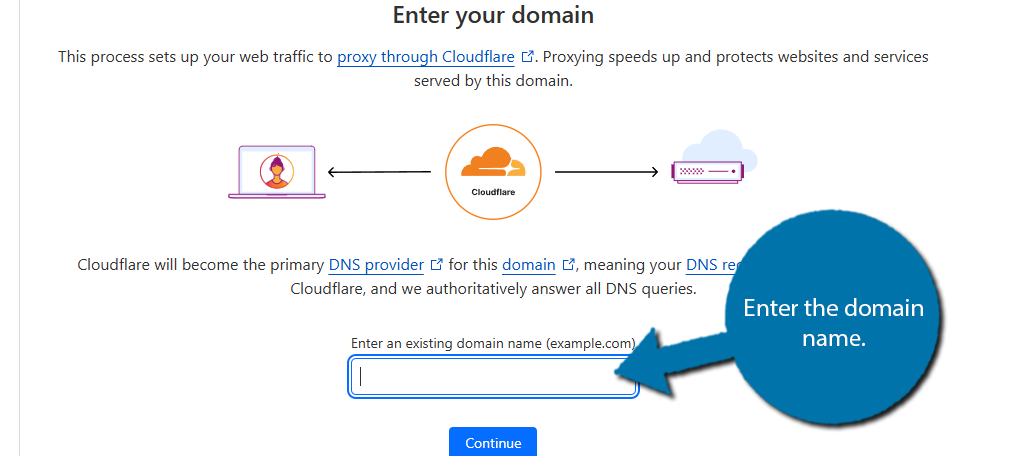
Click on the “Continue” button. It will now ask you to confirm your plan. Choose what you wish, but I am just using the free option, which is located at the bottom. Click on the “Confirm Plan” button to continue.
Now you must perform a DNS scan of your website. Click on the “Start quick scan” button to begin.
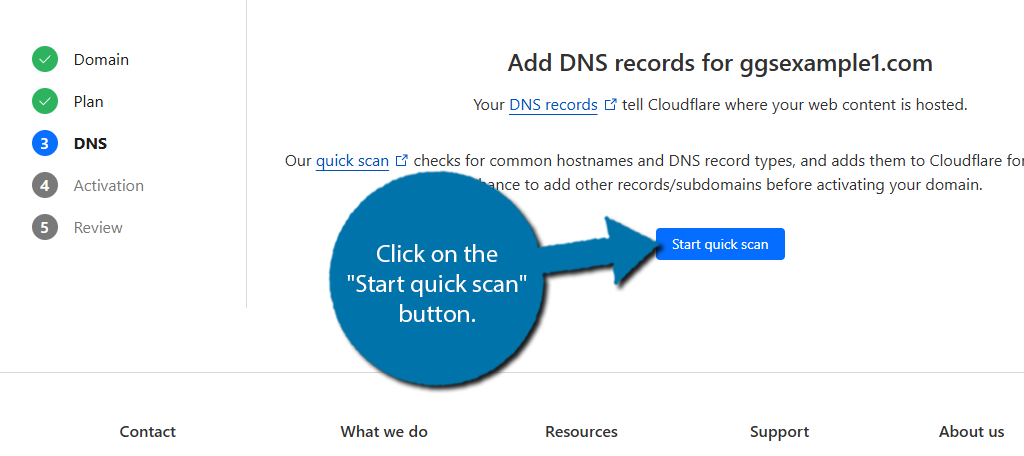
This will tell Cloudflare about your hosting environment and continue when it is complete. You now need to go through the Domain Activation process. This is the most complicated part of connecting Cloudflare with WordPress.
The good news is that Cloudflare spells out exactly what you need to do. That said, it is still worth mentioning setting up Cloudflare is something for advanced users. You will need to access the file on the backend of your site and change Nameservers among other things.
Step 3: Add the Nameservers to Your Domain Registrar
You can find the names of the new nameservers at the bottom.
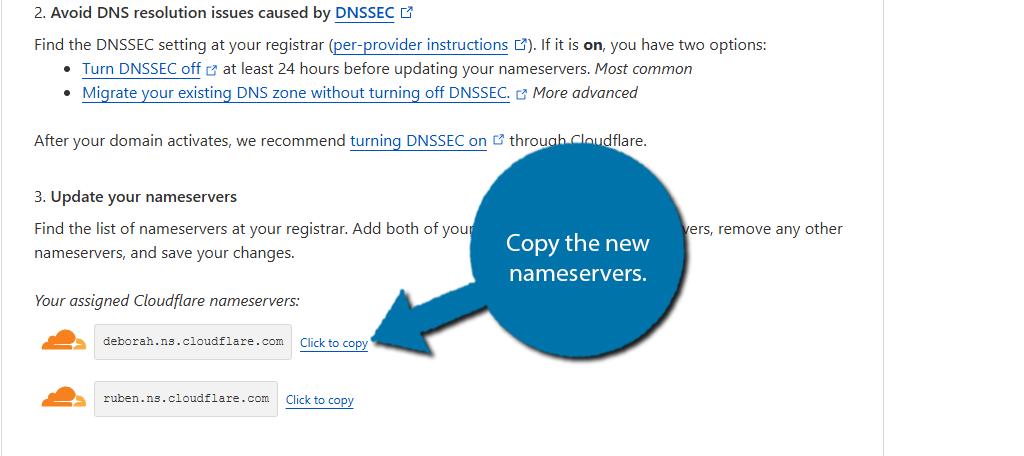
Be aware that a nameserver may take more than 24 hours to properly change, thus, you will need to wait until that has occurred.
Once everything is taken care of, you will be able to view the Cloudflare overview of your website.
This will lead you through a setup wizard. Since much of this is dependent on your site, I will not showcase it, but again, if you are not sure, contacting a support agent is the best course of action.
Essentially, it entails changing the nameserver of your domain through your registrar. It’s a relatively easy process as you’re just going to copy and paste the nameservers from Cloudflare to your registrar.
NOTE: It’s a good idea to keep your old nameservers readily available in the event you want to revert back from any CDN platform.
Once a CDN is set up, it should automatically optimize your image delivery to users.
Optimize Your Images in WordPress Today
Images play a critical role in most websites today. Unfortunately, they tend to slow down many websites when they are not optimized correctly. Luckily, there are several compression tools and techniques you can utilize that help prevent this from happening.
In most cases, these tools are free to use and can often reduce file sizes between 30 to 80 percent depending on the compression level they support. All websites must optimize their images or they risk having slow load times that impact search rankings.
I hope you found this tutorial helpful in learning how to optimize your images in WordPress.
Which method do you use to optimize your images in WordPress? Do you think WordPress should have compression tools built in?

