Google Adsense is one of the most utilized platforms in the world for making money on a website. Part of this is because of how easy Google makes it for site publishers. The only thing you really need to do is copy and paste the code into any place you can add HTML.
When using Adsense, Google sends advertisements to your website from third-parties. These are usually based on the content of your site or even the previous searches of the visitor.
Each time these are clicked, you earn money. Some ads may even pay you for simply showing it.
How easy is it to include Adsense blocks into a WordPress website? Very. In fact, you could start earning right now if you wanted.
Today, we’re going to show you two methods for adding Google Adsense to your WordPress website. Both are relatively easy while giving you a level of customization.
Method #1: Using a Template Plugin
Templates are a great way to save layouts that you use often. For example, you can save specific headers and sections for structured posts in content. What does this mean exactly? It means that any posts you create that follow a certain layout can be saved for future use.
For this tutorial, we’re going to show you how to use TinyMCE Templates to save the code from Google for future use. It’s a very useful tool that will make Adense much easier to place as well as change later on.
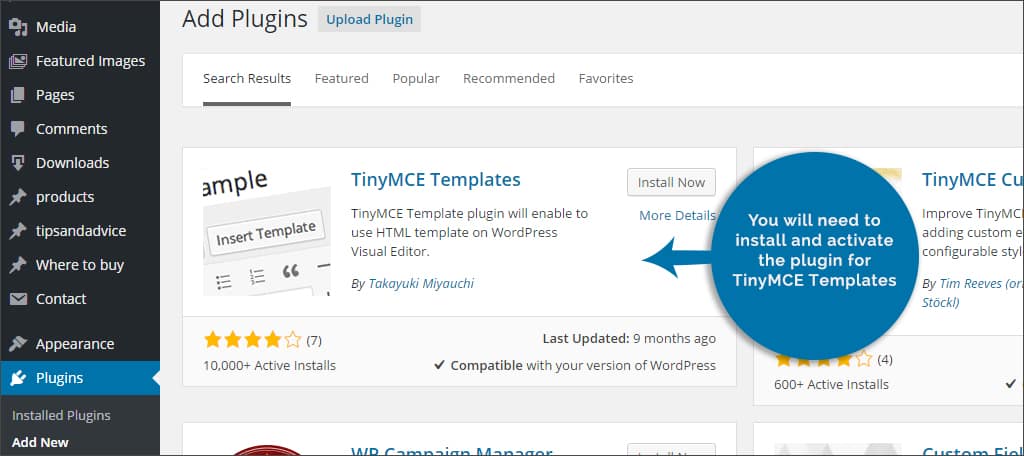
Step 1: First, you will need to install and activate the plugin for TinyMCE Templates. This is done through the “Plugins” area of your WordPress dashboard. Simply click the “Add New” button and search for the title.

Step 2: Once you install the plugin, it will add a new function to your WordPress dashboard. Scroll down until you see the control, “Templates” on the left. Click this to open the tool.

Step 3: From here, you will add a new template by clicking, “Add New” on the top. This will open a window in which you’ll define its abilities. This editor uses the WordPress TinyMCE you use for creating posts. Virtually anything you can do in a post, you can set as a permanent template.

Step 4: Title this template something that would be easy to remember. For instance, using something like, “Google Adsense” as the title would make it easier to find later.
Step 5: In editor, you want to change the tab on the top to “Text.” This will let you put in the code from Google correctly.

Step 6: You’ll then paste the code for Adsense blocks from Google directly into the text field of the editor.

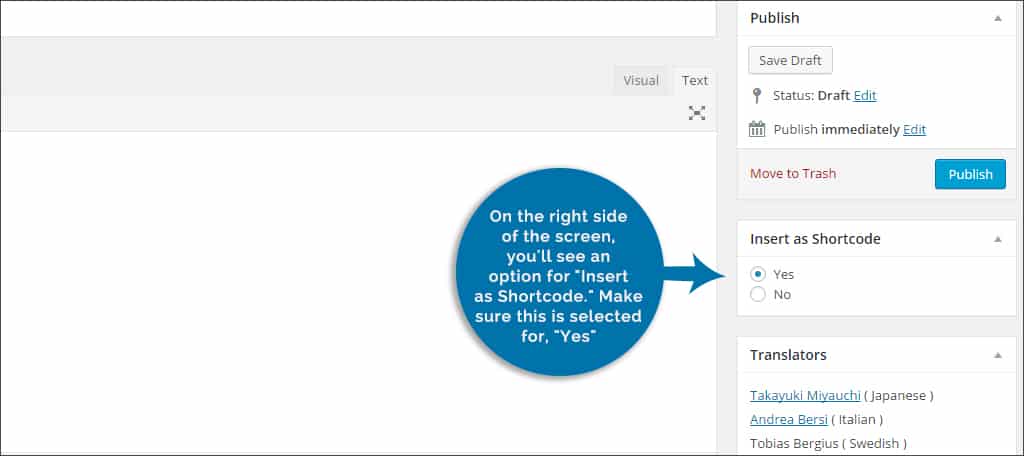
Step 7: On the right side of the screen, you’ll see an option for “Insert as Shortcode.” Make sure this is selected for, “Yes.”

Step 8: Click on the “Publish” button when you are done.

Unfortunately, the plugin doesn’t display what the shortcode is when it’s created. So, you won’t actually see it until you use the template on a post or page. Once you do, you can write it down for future reference.
Once the template has been made, you can then create a new post or go into an existing one. Above the text editor in those posts or pages, you’ll see a new button called, “Insert Template.” Place the cursor anywhere in your text and press this button. It will open a new window where you select which template you want to use.
Click on the dropdown that is available and find the “Google Adsense” template you created. If it’s your first time using TinyMCE Templates, it should be at the top. On the bottom right, click the “Insert Template” button. You’ll see a shortcode appear where your cursor was in the editor. This will be where the Adsense ad appears in your post.
What Can You Do with the Template?

The template gives you means to quickly add text or code to any post or page in WordPress. It can also help you add content to the side bar of your site by using shortcodes. Let’s say you wanted to put Adsense along the right of your website in a text widget. You can put in the shortcode from the template directly into that area.
What if you want to change the ads that are displayed through Adsense? What if you wanted to change its size or color? This is where the plugin shines the most. Because you’re using the shortcode instead of text display, any changes you make to the Google Adsense template you created will affect every page you placed it on.
This means you can change every Adsense display which uses that shortcode from a single location in WordPress. Even if you have 1,000 posts using that one template, every one of them will be affected.
What if you want to use several different sizes of ads on your site? Just create a new template for each one that you want to use, but make sure you label it so you can find it later. For example, labeling a template, “Google Adsense 300×125” would help you find the one you want to use for 300×125 size ads.
Any place in WordPress that uses the TinyMCE editor has access to the template button. However, using the shortcode will let you use templates in far more locations within the site.
Method #2: Placing Ads Manually

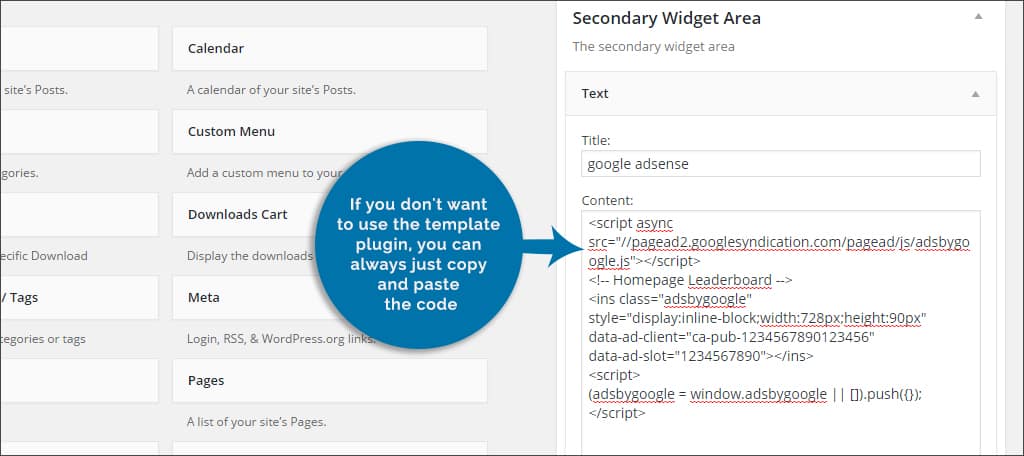
If you don’t want to use the template plugin, you can always just copy and paste the code directly from Google Adsense into your WordPress posts. However, it will take longer to adjust or change any Adsense blocks you have throughout your site should you wish to try something different.
This is done by going into the text portion of the WordPress editor screen of your post or page. Set your cursor anywhere you wish in the content. Then, paste the code.
The code that Google gives you to operate Adsense can be used in almost any location that text is available in WordPress. This includes the text widgets.
The downside to installing ads in this fashion is that you would have to edit every post and page if you want to make changes. For instance, what if you wanted to make it a different size or change the color of the ads? You would have to paste the new Google code in all of those posts and pages one by one.
Setting Up Google Adsense

If you don’t have a Google Adsense account, you’ll need to make one. This is extremely easy to do, especially if you have a Google account in any form. For instance, simply having a gmail.com account can make setting this up quick and painless.
Once you agree to the terms and conditions and set up your account, you can start using ads on your WordPress website.
When you create an ad in Google Adsense, you’re provided with many options of sizes and colors. You can virtually customize the display to fit your theme. You can also choose whether to show visuals, text only or both. Finding the best one for you may take a bit of trial and error over time.
Pay close attention to the “Responsive” layout for ads. This type of ad will automatically adjust to fit the visitors’ mobile device. If you don’t, Google could suspend your account because an ad size may be too large for mobile devices. This goes against the usage policy from Google.
Google Adsense can be a useful tool when it comes to generating money from your website. Once the code is placed, there is nothing more you need to do in order to start generating income. That is, except for develop stunning content that can attract visitors.
What kind of money-making ideas do you have for your site? What other ideas have you tried in the past to make money in WordPress?

Thanks