Having an events page on your website is a great way to not only share events that you are interested in but also a good way for others to see events and happenings that are going on around them. Whether you run a small site and list a few events, or run a large event site, the Events Manager plugin gives you everything you need to manage it.
In years past, there were some problems listing events and trying to get them out to your audience on your website. Poorly built portals, bad permalinks, and other publishing issues could really get in the way when it came to building an events section on your site.
However, now there are a few great plugins that can help you with this. One events manager plugin that I am particularly excited about is the one we are going over together below.
Why Post Events on WordPress?
Having an event section on your WordPress site can be both informational and help bring traffic to your site. Even if you only post about certain events, chances are that your site page can become a solid resource for people looking for relevant information on happenings around them.
However, you can really create an amazing event-related WordPress site if you are willing to put a little time in and build a site that is totally dedicated to events. No matter what type of functions you want to focus on, if you use the right events manager in WordPress, then you are going to be well on your way.
Let’s take look at the plugin we are going to use today to build and manage events in WordPress and see all that it has to offer.
Events Manager
Events Manager is a fully-customizable event registration plugin for WordPress. That is to say, not only can you build and manage events on your site, but you can also allow others to submit events and publish them as well.
The plugin has every setting and configuration imaginable, so you will have all the tools needed to manage and post events on a small or large scale.
Despite all the features and functionality, the Events Manager plugin includes, it will not slow your site down, so publishing and managing events from your WordPress dashboard is as easy as ever.
The features and functionality that are included with this plugin are too many to list at once. However, here are some of the main ones that you gain access to when you install and activate the plugin:
- Easy event registration
- Recurring and multi-day events
- Full bookings management
- Multiple location types
- Multiple tickets
- MultiSite support
- BuddyPress support
- Google Map integration
- Categories
- Tags
- Custom events
- RSS Feeds
- Compatible with other plugins
- Add to Google Calendar button
- Compatible with SEO plugins
- Documentation and tutorials
And again, that is just the tip of the iceberg. If you are looking to build a fully functional event page or event site in WordPress, then the Events Manager plugin is definitely worth a look.
Let’s get the plugin set up together so you can start publishing events.
Note: There is a pro version of this plugin. It provides even more features. If you feel you need this, then go ahead a take a look. The tutorial and setup below are based on the free version of the plugin.
How to Share Events in WordPress
Step 1: Install and Activate the Plugin
Before you can start sharing events in WordPress, you first need to install and activate the Events Manager plugin. You can do this by jumping over to the Plugins page in the WordPress admin dashboard.
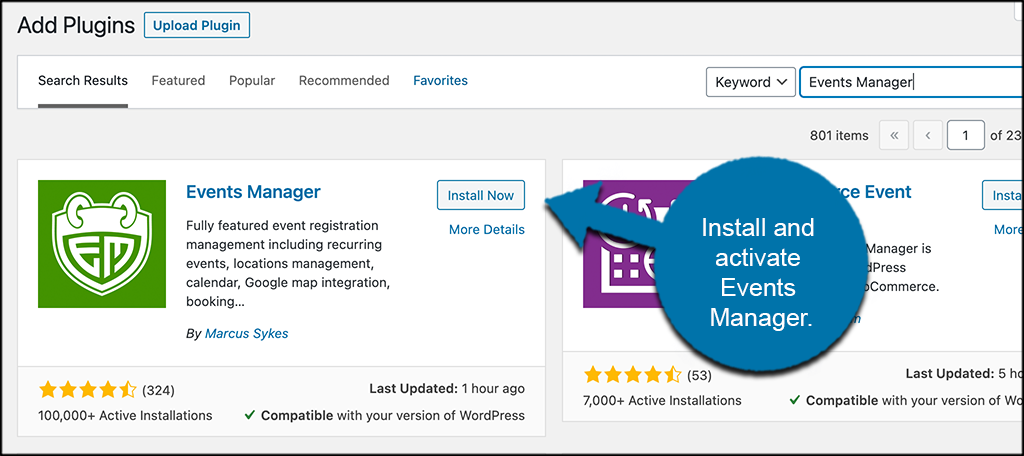
Simply use the available search field and search the plugin by name. When you see it pop up, install and activate it right from there.
Step 2: Go to the Settings Page
Now that the plugin is installed and activated, you need to access the main settings page for the plugin. To do this, click on Events > Settings, located on the left menu area of the dashboard.
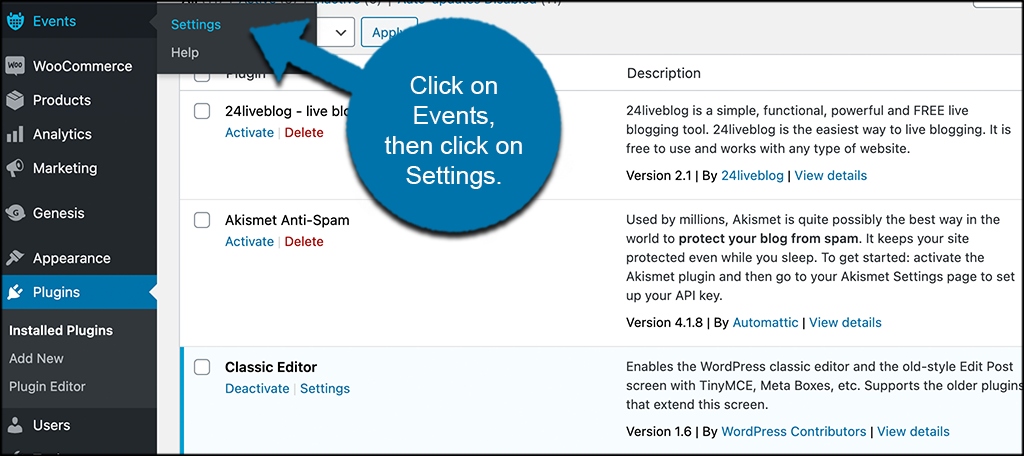
You can see that this option is now available because you activated the plugin. Don’t be alarmed when you see all the available features. It is simply a matter of going through them and setting them up how you want.
Step 3: Configure the Plugin
At this point, you have reached the main settings page for the plugin. It is more advanced than others, but that is because of the functionality that the Events Manager plugin offers.
There are just a lot of customizations you can make. Before we go through these, just realize that everyone is different and you can create the configuration setup that you want. Remember, you can always come back and make any adjustments needed.
When you land on the main settings page, you will see five different tabs. These include:
- General
- Pages
- Formatting
- Bookings
- Emails
Let’s run through these together real quick.
General
Under the General tab, you will be able to configure all of the general settings for the plugin. This includes:
- General Options
- Image Sizes
- User Capabilities
- Google Maps
- Event Submission Form
- Performance Optimization
- Styling
- Privacy
- Admin Tools

Simply click on any box to open the dropdown and configure the relevant settings from there.
Pages
Here is where you will be able to configure all of the page settings for the plugin. This will include:
- Permalink Slugs
- Event Pages
- Event List/Archives
- Location Pages
- Location List/Archives
- Event Categories
- Event Tags
- Other Pages
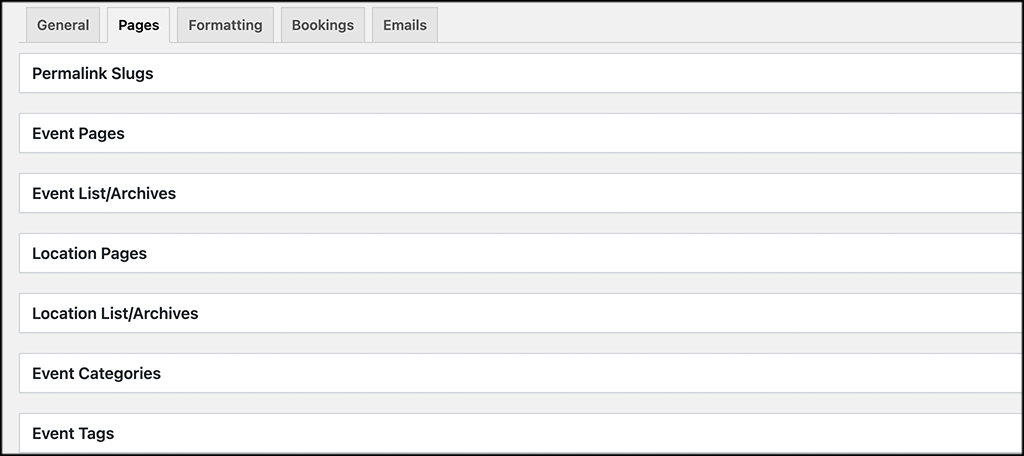
Go through these and configure all the page settings you want.
Formatting
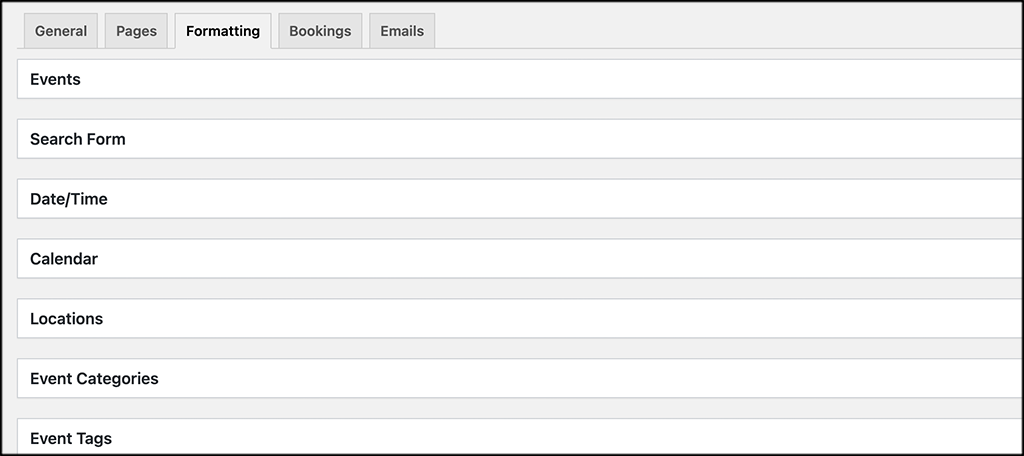
This tab provides you all the formatting options for the plugin. Go through them and set all the formatting how you want. This will include:
- Events
- Search Form
- Date/TimeCalendar
- Locations
- Event Categories
- Event Tags
- RSS
- Maps
Bookings
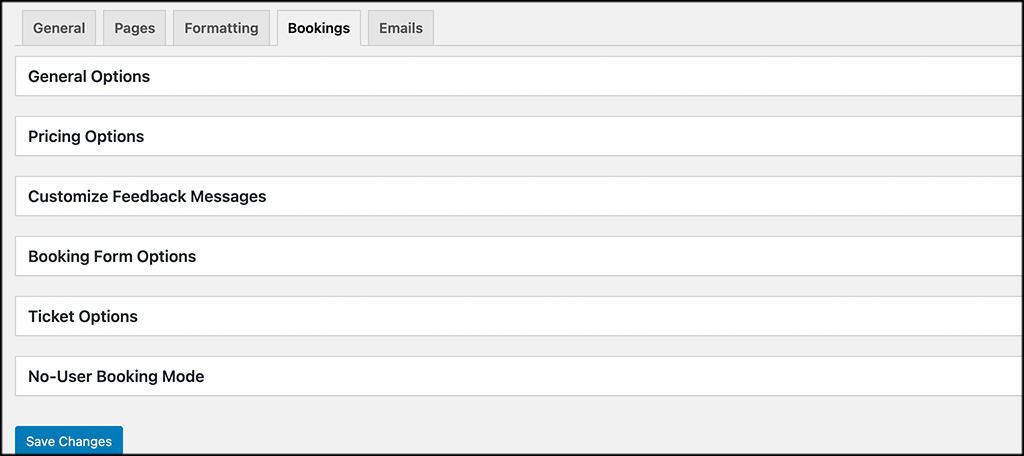
Configure all the settings for the bookings section of your events under this tab. Available dropdowns include:
- General Options
- Pricing Options
- Customize Feedback Messages
- Booking Form Options
- Ticket Options
- No-User Booking Mode
Emails
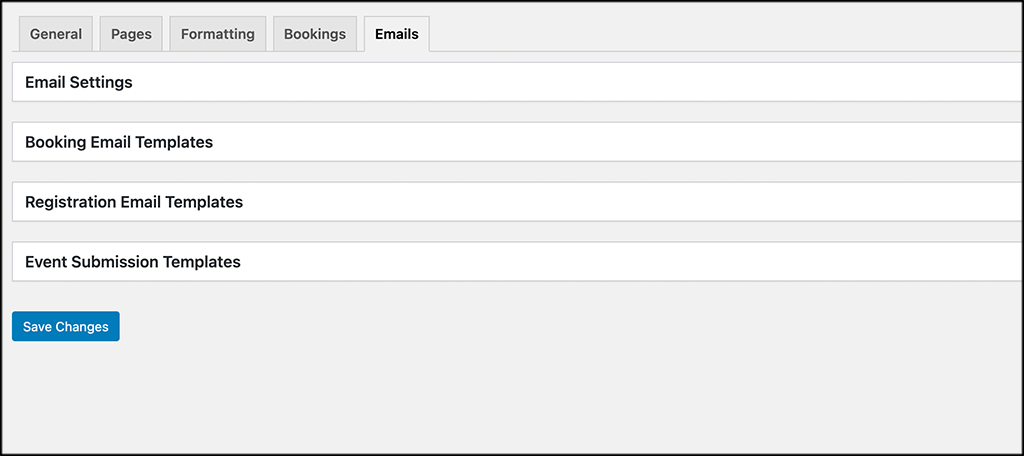
Last, but not least, configure all of the available email settings according to how you want them set. Options include:
- Email Settings
- Booking Email Templates
- Registration Email Templates
- Event Submission Templates
Be sure to click on the “Save Changes” button to save all the configurations you have made. That’s it! When you are finished in this section, you are ready to add your first event.
Remember, you can come back to the settings page any time and update any of the configurations.
Step 4: Set Up Event Tags and Categories
There is one last thing before you add your first event. On the left side menu area, you will see links to set up Event Tags and Event Categories. Go ahead and click through those and pre-set some categories and tags so that you have a few to reference when creating your first event.
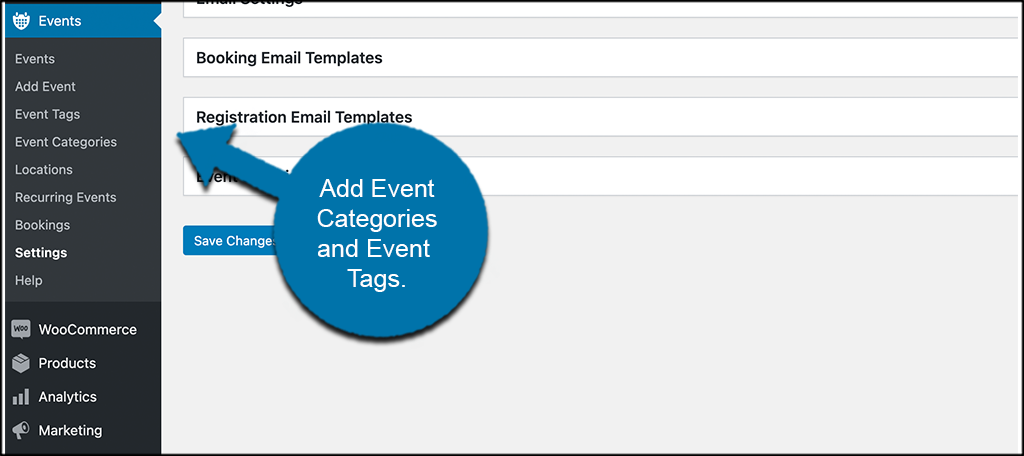
Note: You do not have to do this, as you can manually add event categories and tags from the event editor.
Step 5: Add Locations
Again, the concept is the same as categories and tags. If you want, go ahead and add some event locations so you have them to easily add when you are creating an event.
Note: Just like categories and tags, you do not have to add these in advance. It is just an option.

Step 6: Add an Event
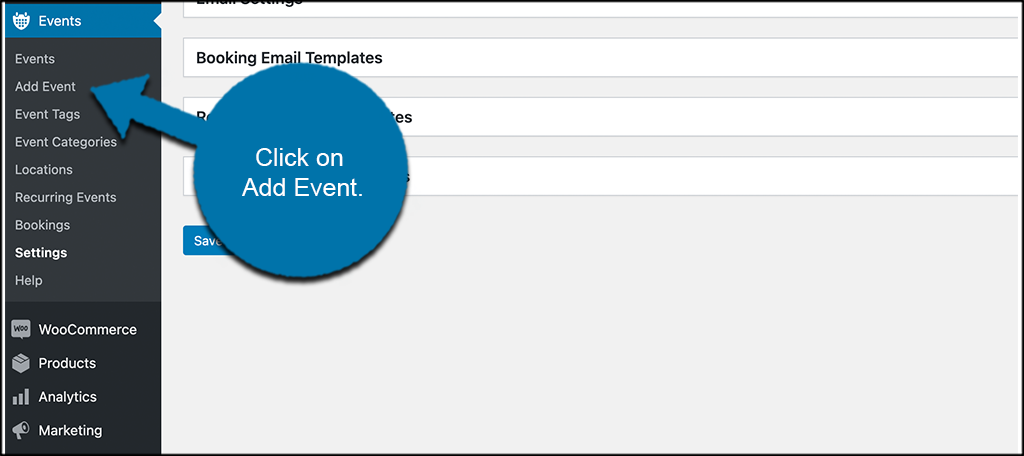
Click on the “Add Event” tab. This will open the event editor and you can create your first event.
Step 7: Add Event Title and Description
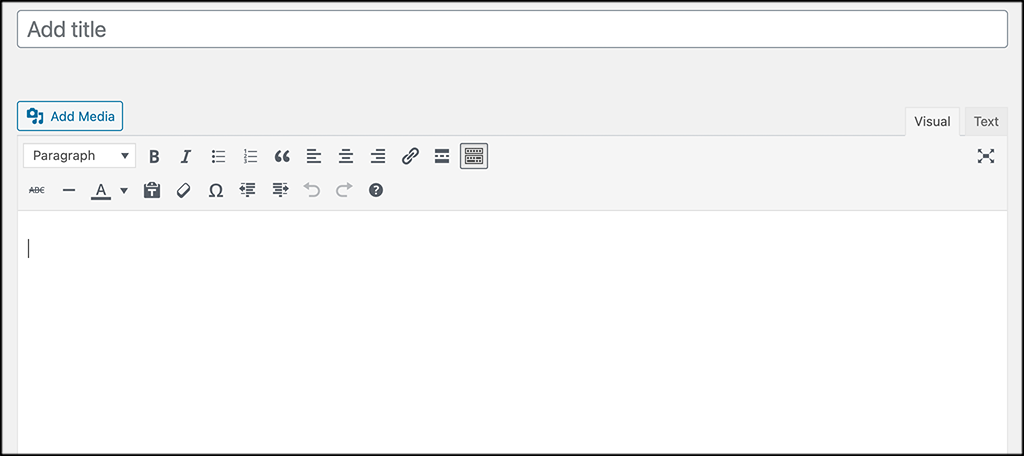
Go ahead and add an event title and description. Use the editor like you would any other in WordPress. You can add pictures, media, and anything you want.
Step 8: Add When and Where Details
Scroll down some and add the “when” and “where” details for this particular event. The boxes are easy to fill out.
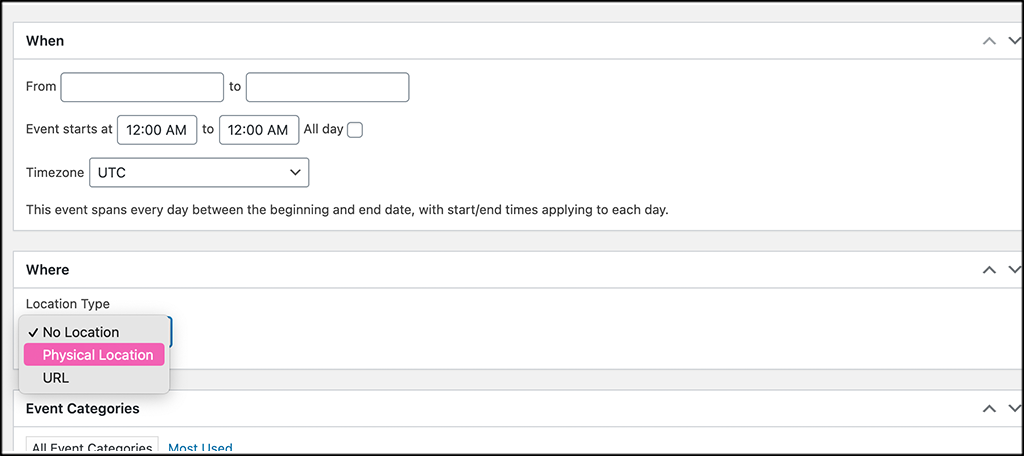
Note: If your location type is “Physical,” then a dropdown box will appear with the option to add a pre-set location, or fill out the location options manually.
Step 9: Add an Event Category and Tags
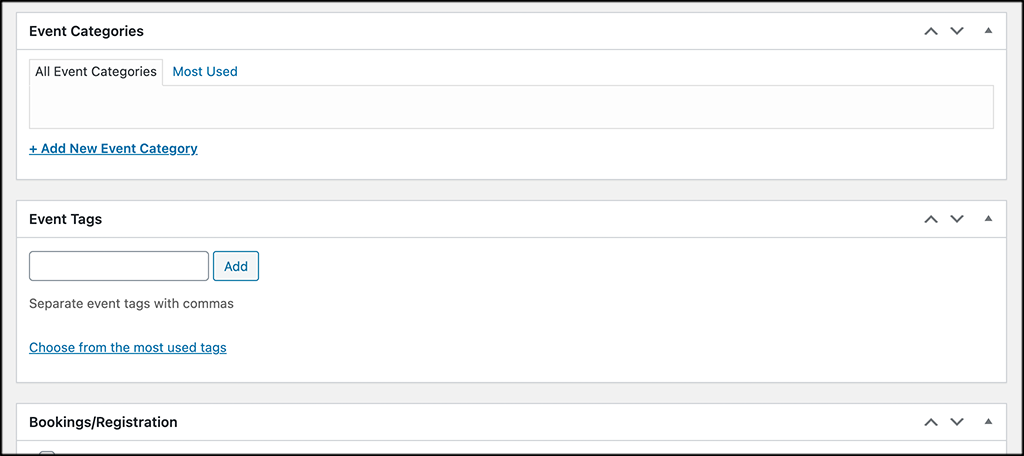
Scroll down a little more and go ahead and add an event category and any event tags you think are appropriate for your setup.
Step 10: Enable Bookings and Registration If Needed
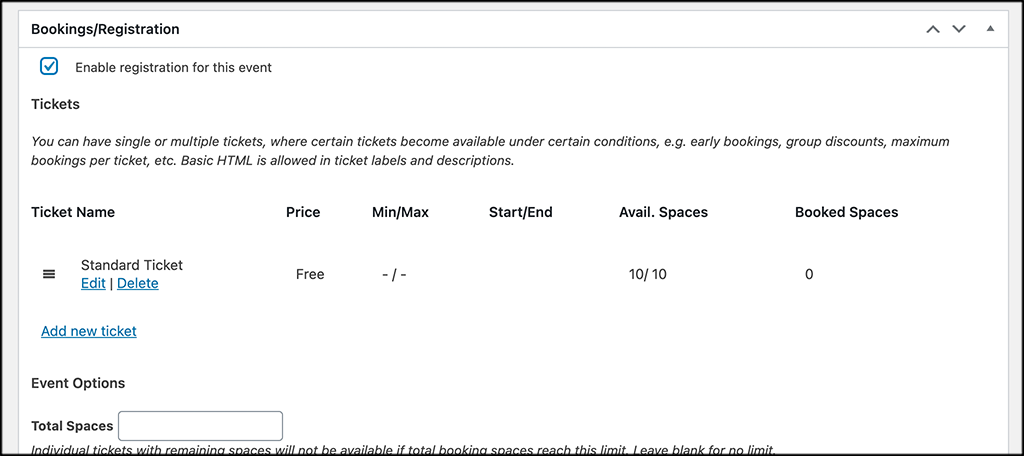
You will now see a Bookings/Registration box. If you enable this, then a full dropdown will appear with a variety of configurations. Go through these and set them up how you want.
Step 11: Select a Featured Imaged and Publish
Last but not least, select a featured image for your event. When that is done, go ahead and click on the “Publish” button and make your event live.

That’s it! Your event is now live and showing on your site based on the configurations you made on the settings page. Feel free to go check it out and make any adjustments needed.
You can repeat the process above and set up as many events as you want.
Final Thoughts
Having a solid event page or calendar on your site can help bring in traffic and keep people in-the-know. It isn’t difficult to put this together with the right plugin, and the Events Calendar plugin will give you all the tools you need and more.
Have you tried other event plugins? Have you found one you have stuck with or is the process frustrating?

Thanks for sharing such great information with us. This information is use full for us. I hope you will share more valuably information about How to Use Events Manager to Plan and Share Events in WordPress.