Oftentimes you need to add (or want to add) custom fields to a WordPress post or page that has already been published. This can be tricky, but with the code below we have made it quick and easy.
WordPress custom fields can be added to posts and pages a couple of different ways. You can add them to media, add them to comments, display them in specific posts, and more.
In this tutorial, I will show you how to add custom fields to a WordPress post or page that has already been published.
Add Custom Fields to an Already Published Post or Page
Note: Remember, you can add custom fields in WordPress a couple of different ways if the post or page is not published. There are also several plugins that handle this. This technique gets the job done after content has already been published.
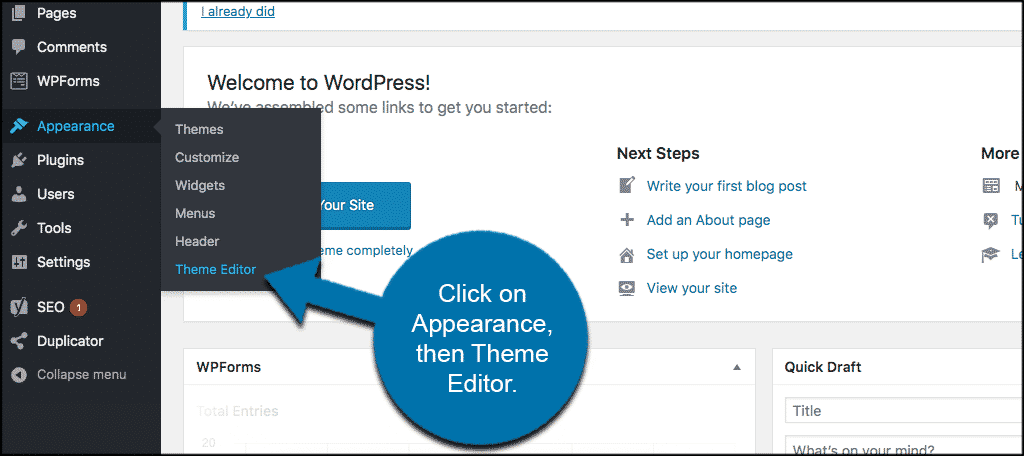
The first thing you need to do is go to your theme’s functions.php file so you can add the code below. To get there click on Appearance > Theme Editor from the WordPress admin area of your website.

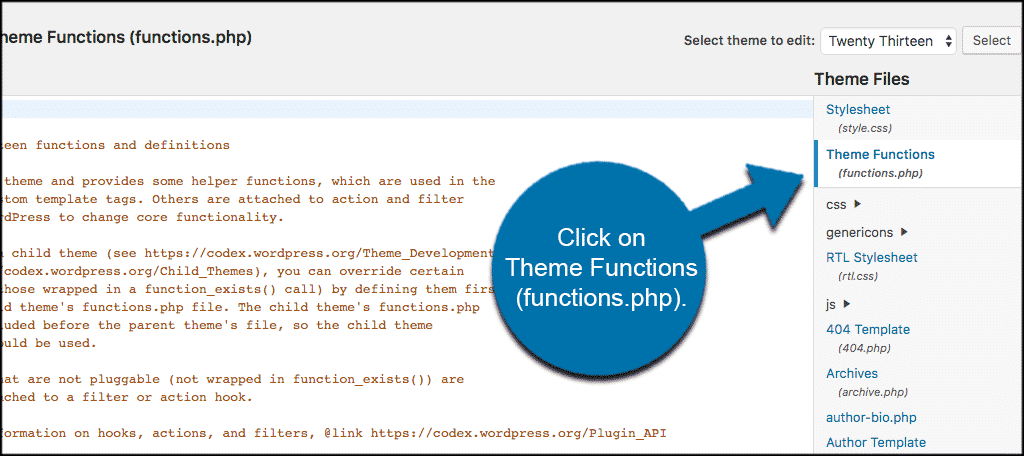
Once you are there click on the Theme Functions (functions.php) tab to access the correct file.

Now that you are in the correct spot just add the following code to the file.
[ht_message mstyle=”info” title=”” show_icon=”” id=”” class=”” style=”” ]add_action(‘publish_page’, ‘add_custom_field_automatically’);
add_action(‘publish_post’, ‘add_custom_field_automatically’);
function add_custom_field_automatically($post_ID) {
global $wpdb;
if(!wp_is_post_revision($post_ID)) {
add_post_meta($post_ID, ‘field-name’, ‘custom value’, true);
}
}[/ht_message]
Now you simply replace the field-name and custom value with your Custom Field Name, and the Value.
That’s it. This is a pretty simple trick to use if you have the right code and place it in the correct file. Now you do. This is also very effective if you are trying to use WordPress for more than just blogging. This, along with other code, helps you push your WordPress site to the next level.
Have you used this code before? Does it work and have you found it useful?
