As websites age, older content can stick out like a sore thumb when compared to newer pieces. For this reason, most websites will choose to archive older posts in WordPress if they cannot repurpose them.
This helps keep the quality standard of your website, without deleting the content. Archived content won’t pop up unless it is directly searched for. That said, it is very important to point out that doing this can have negative consequences.
Sometimes, older pieces can be seen by search engines as part of your site’s structure, and their disappearance can negatively impact your SEO rankings. Thus, you need to do proper research and consider repurposing the content instead.
Today, I will demonstrate how to archive content in WordPress using a plugin.
Why Not Just Delete the Older Content?
As I have already said, it can negatively impact your SEO rankings. Thus, the real question is why is deleting bad for your SEO?
Well to put it simply, it is because there are links on your site, or off your site that point to that deleted content. If the links are not redirected, that will bring the user to a 404-error page, which is not a good thing as far as SEO goes.
Now you can heavily mitigate this by setting up redirects or deleting the backlinks. But again, it is not just the links on your site. Reaching out to sites that may have created a link to this post, isn’t always successful.
Now, with all of this said, it’s not always the worst choice to delete older content.
The truth is that sometimes there is some really bad older content that shouldn’t see the light of day. This can be due to misinformation, bad quality, inappropriate comments, and so on.
And let’s be honest; deleting older content that can be seen as offensive today could save your brand from scrutiny. Not to mention that Google puts emphasis on “helpful” content.
Thus, it is still a reasonable choice to delete some content.
How to Archive Posts in WordPress
The Archived Post Status plugin is a great choice for archiving content in WordPress. It makes the entire process take about five minutes, and it even has bulk options to help you save time.
One thing to note is that the plugin stores your archived posts as a custom post type. If you were to delete the plugin, those posts would become inaccessible. That doesn’t mean they were deleted.
Step 1: Install Archived Post Status
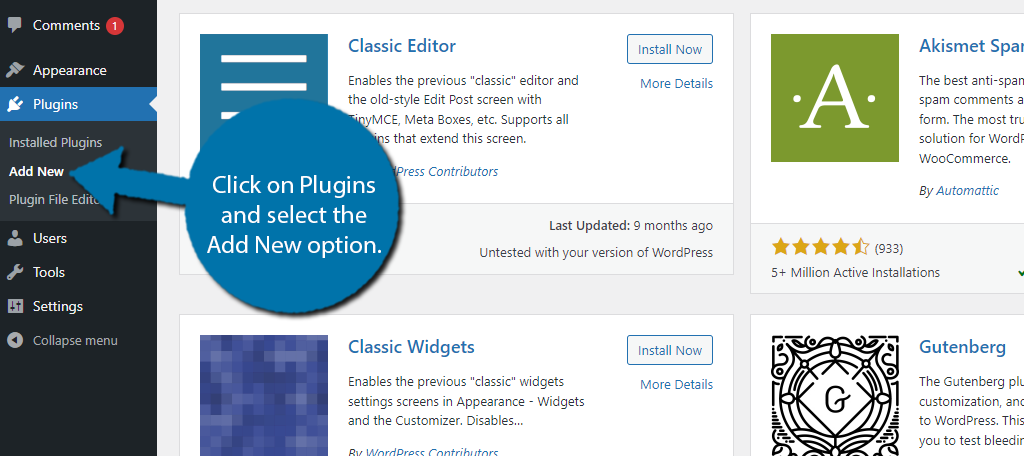
Let’s begin by clicking on Plugins and selecting the Add New option on the left-hand admin panel.
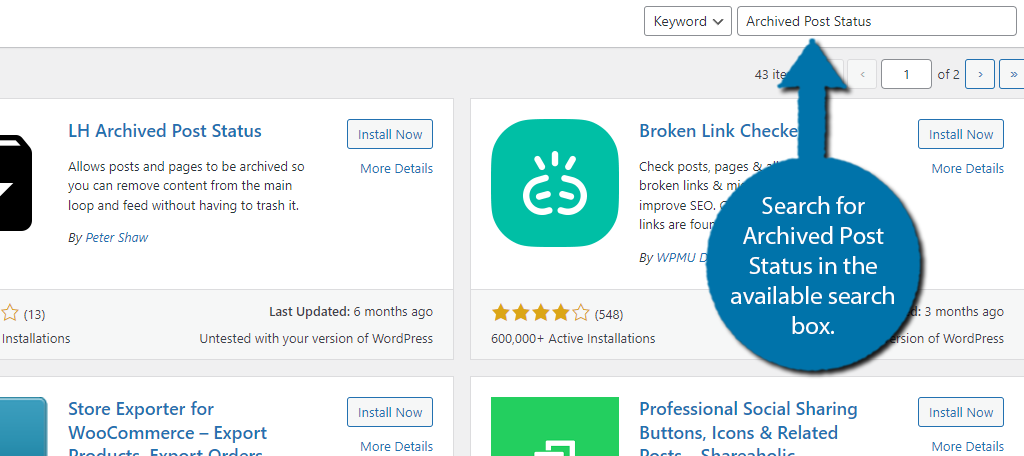
Search for Archived Post Status in the available search box. This will pull up additional plugins that you may find helpful.
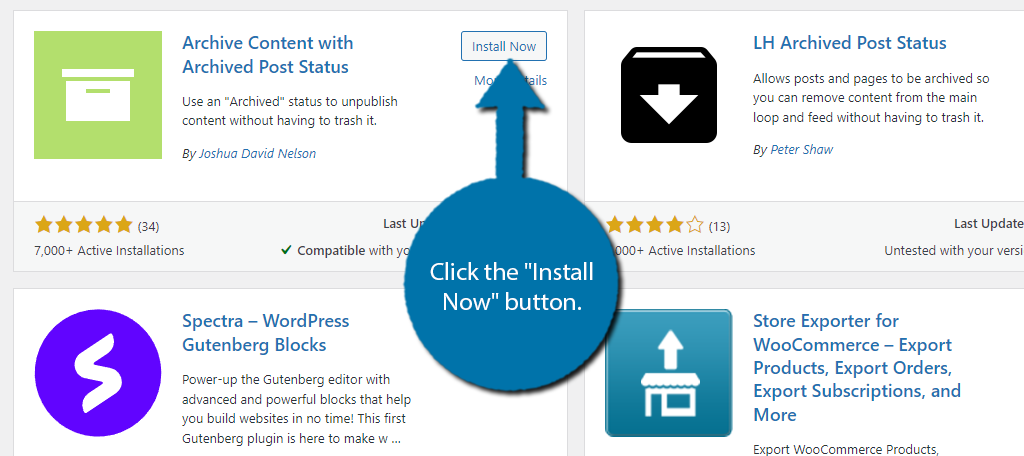
Find the Archived Post Status plugin and click the “Install Now” button and activate the plugin for use.
Unlike other plugins, Archived Post Status does not have a settings page. It works immediately after activation.
Step 2: Archiving a Single Post
There are two ways to use the plugin. The first is to individually archive your posts, and the second is to do them using bulk actions. Let’s start off by checking out how to do them individually.
Start by going to the post or page section of WordPress and locate the post or page you wish to archive. Click on the Quick Edit option underneath the post or page.
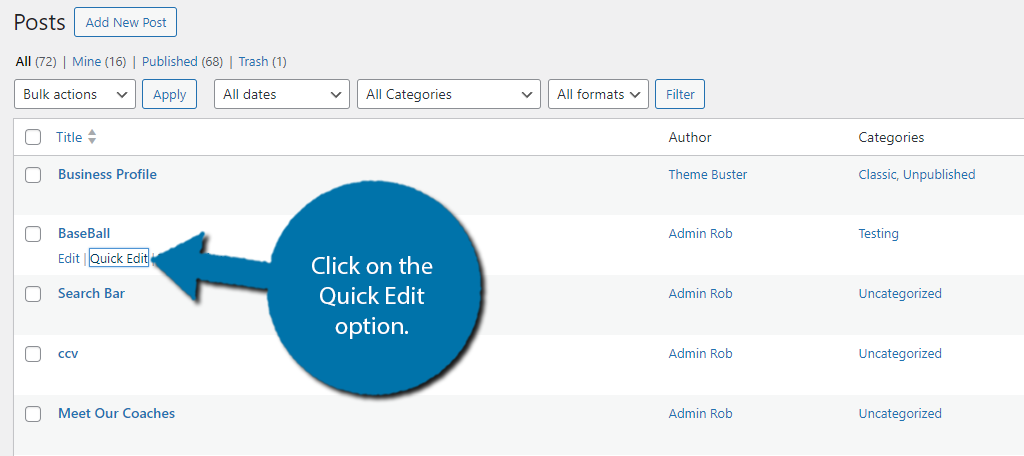
Clicking on it will reveal all of the details about that post. You should see a Status drop-down box that should be set to Published. Click on it and select the Archived option.
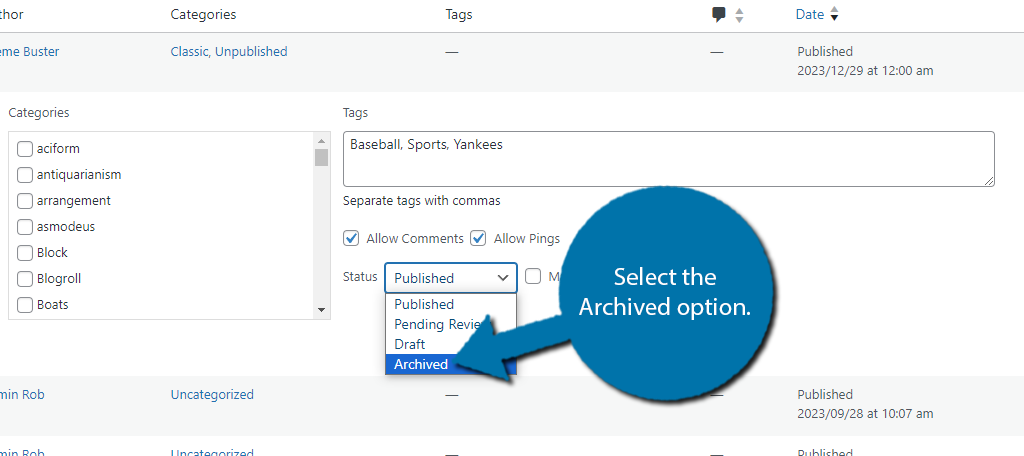
Click on the “Update” button to finish the process.

And that’s really all there is to it. The content is now archived. The process is identical for post and page content. Now, if you only have a few posts, you can just repeat this step. But if you have a lot of content to archive, you should use the bulk options.
Step 3: Archiving Posts with Bulk Actions
Now let’s take a look at the second way you can archive content with this plugin, which is with bulk actions. Start by selecting all of the posts or pages that you want to archive. You can do this by checking the box next to them.
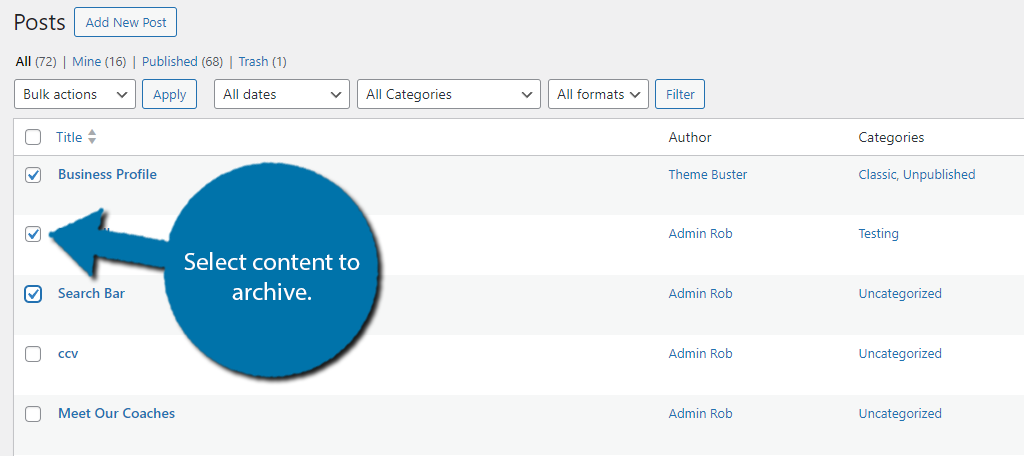
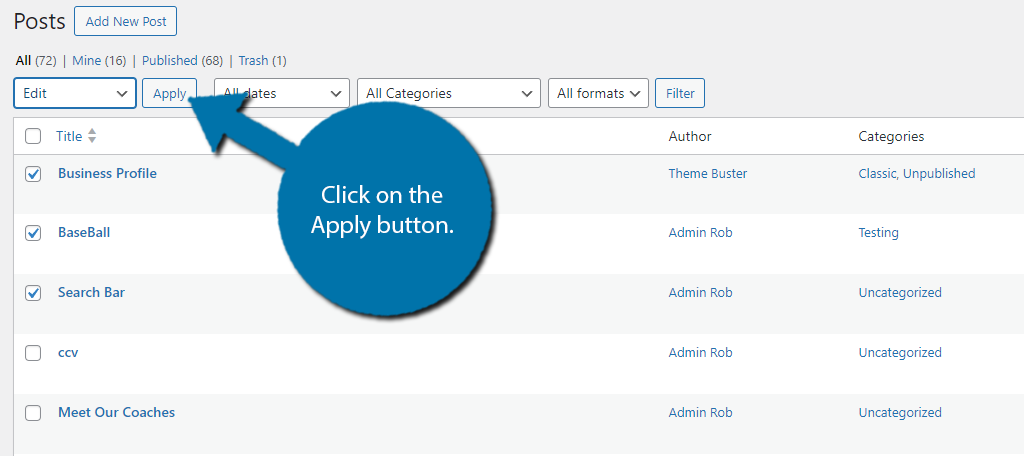
Once you have selected everything you want to archive, click on the Bulk Action drop-down menu and select the “Edit” option. Then click on the Apply button that is next to it.
This will now open up a menu that allows you to edit the options for all selected posts. Locate the Status option and use the drop-down menu to select the Archived option.
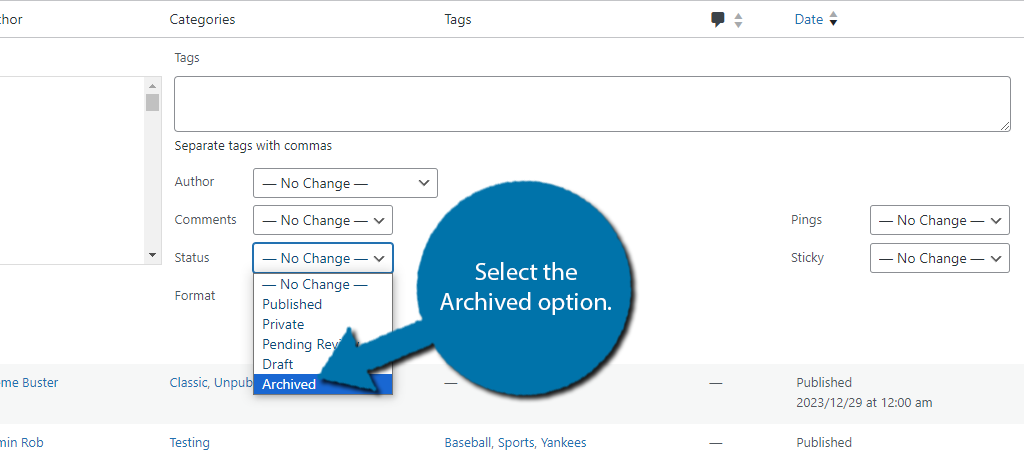
After that, all you need to do is click on the “Update” button and that content will be archived.
Congratulations, you have successfully learned how to use the Archived Post Status plugin. They will not be visible on the front end of your website anymore. You can still view them at any time on the back end.
Other Plugins to Try to Archive Posts in WordPress
While the Archived Post Status is a great platform that simplifies the process for you, it is worth pointing out that it is not the only option available. In fact, the best part about WordPress is the number of plugins at your disposal.
Let’s take a look at a few other plugins that you may find useful when you want to archive posts in WordPress.
Simple Yearly Archive
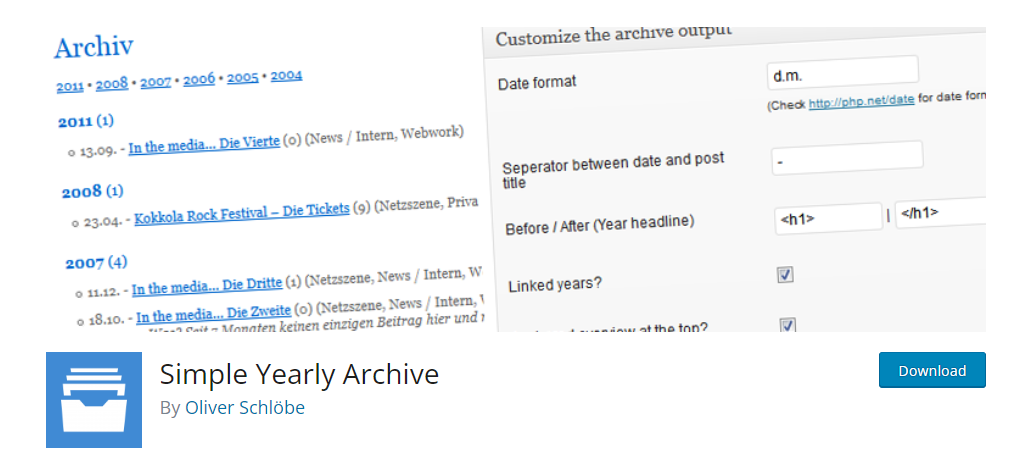
The Simple Yearly Archive plugin is very interesting because it is focused on making sure that your archived content is easy to access. With it, you can sort your content by year, month, and day to ensure it is easily accessible.
You can place this display on any post, page, or even widget area by adding the shortcode to the desired location. You can customize the appearance of it very easily in the settings, thus it fits into most sites.
It is possible to even exclude certain pieces of content from appearing if the need arises. Thus, it is a great choice for any site that wants to ensure its older content is accessible.
JS Archive List

The JS Archive List is another plugin that can help you display your archived content in an appealing way. It provides a widget/block to display a collapsable archive menu that can be separated by year.
The years are further separated by providing the months with their own collapsable menu for the posts within. It’s a great display that looks grand on a sidebar and works on a dedicated page as well.
Overall, the plugin is quite simple and provides a great display, so there’s no reason to not give it a try.
Manage Your Older Content
It can be very hard for some content creators to look at things they have written in the past and choose to archive them or delete them as they age. You must be able to detach yourself from the content and manage it efficiently.
Otherwise, it may drag down your entire site. While the focus of this article was on archiving, I strongly recommend updating older content and bringing it up to your site’s current standards.
Doing so can help you bring new life to old content and improve your SEO all in one fell swoop.
Why have you chosen to archive content on your website? Have you considered repurposing your older content?

