Animating bits of text can be an effective way to grab a visitor’s attention. It’s easy to animate text in WordPress if you choose the right plugin for the job. If you want to avoid complicated CSS coding and animate text using a simple shortcode, we’ve got it covered.
We’ll use the Shortcodes Ultimate plugin to do text animation in WordPress. With an impressive 60 animation options, the plugin is bound to have something just right for your application.
It’s worth mentioning that Shortcodes Ultimate does a lot more than just animate text. Progress bars, pull quotes, tooltips, sliders, carousels, tables – and that’s just a sampling.
We’re interested in text animation in this tutorial, but take some time to get to know the plugin. It can cover a lot of bases (and replace a lot of other plugins).
Installing the Shortcodes Ultimate Plugin
Log in to your WordPress admin panel.
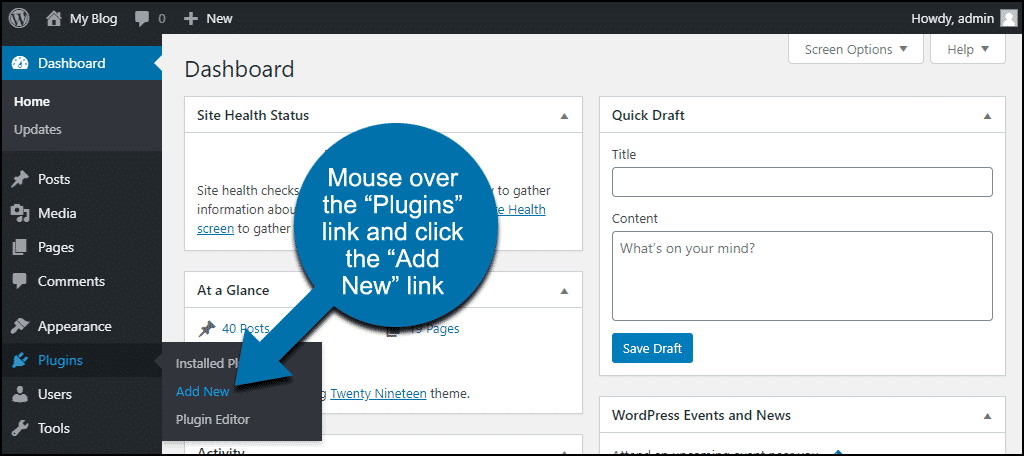
In the left column navigation, mouse over the “Plugins” link and click the “Add New” link.
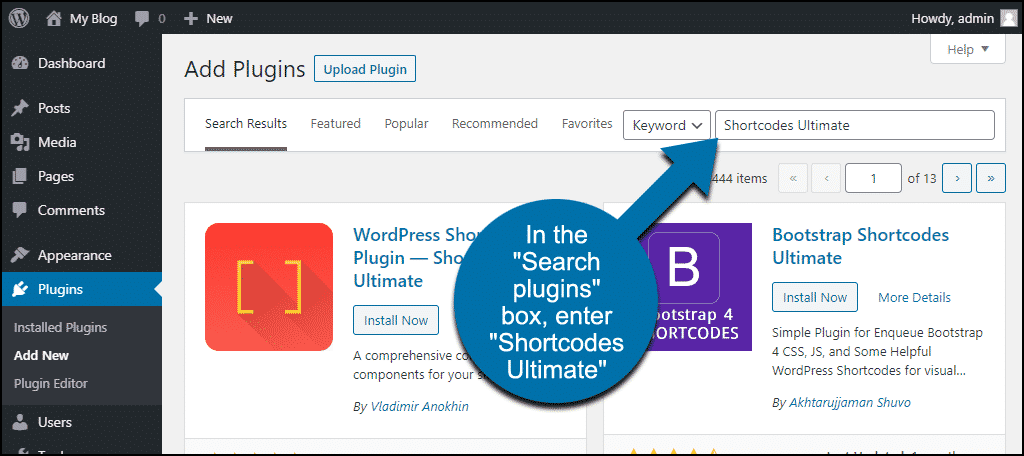
In the “Search plugins…” box, enter, “Shortcodes Ultimate.”
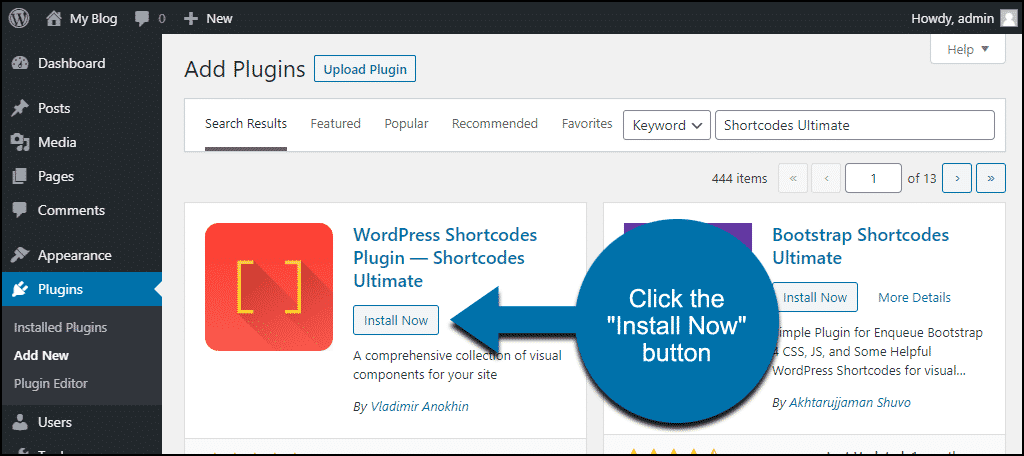
Once you have located the plugin, click the “Install Now” button.
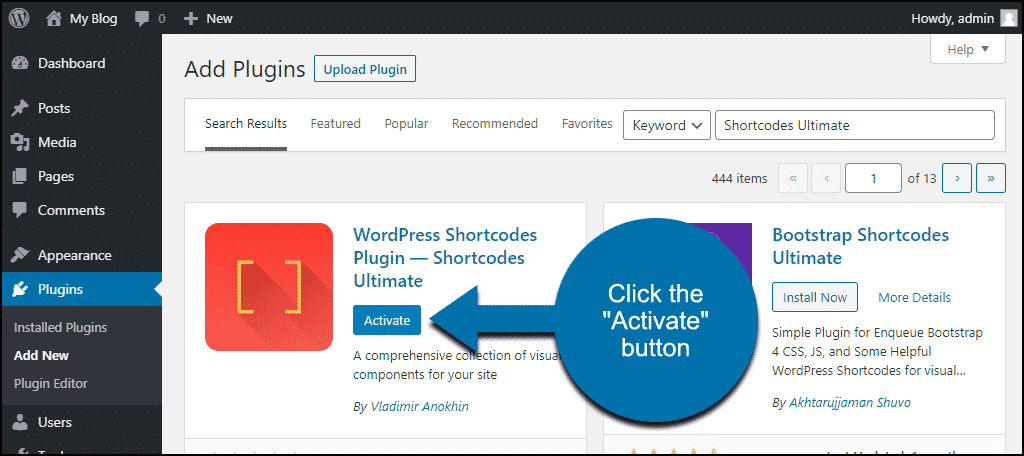
Finally, click the “Activate” button.
Configuring Shortcodes Ultimate
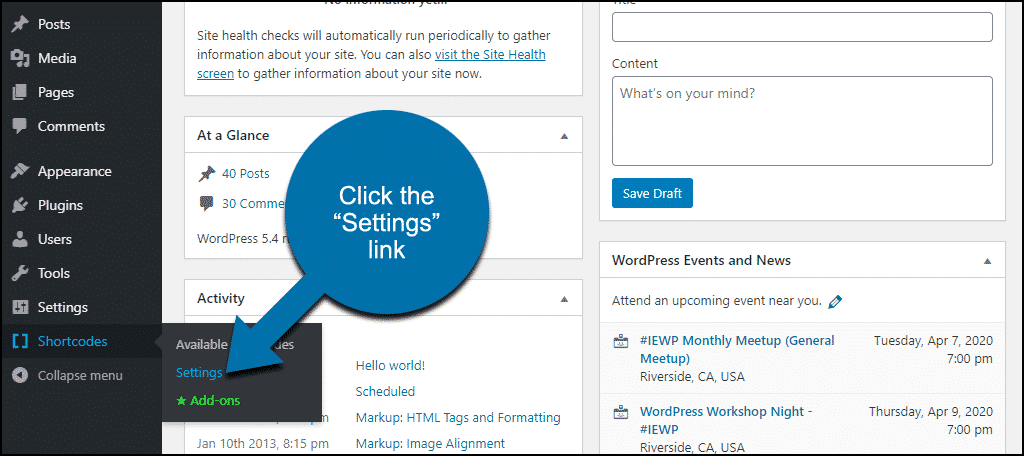
In the left column navigation, mouse over the “Shortcodes” link and click the “Settings” link.
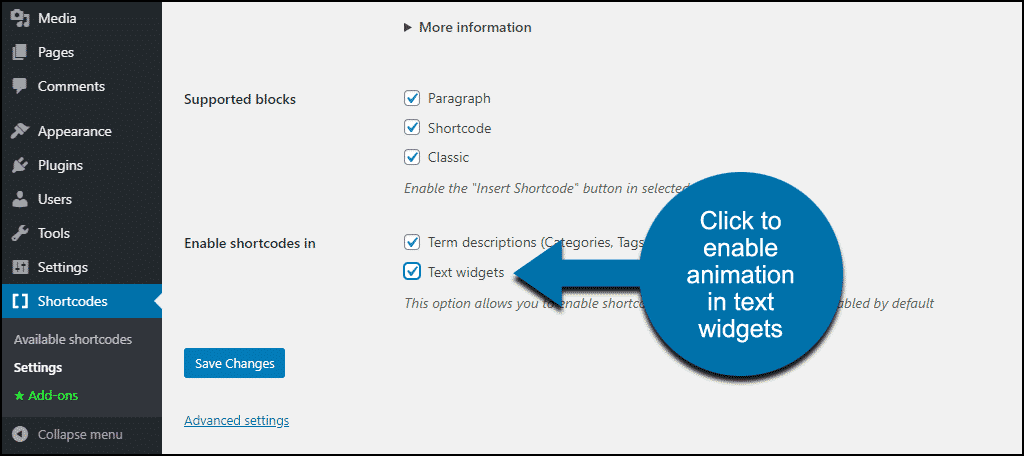
Most of the available settings can be left with the defaults assigned by the plugin. The only thing you may want to change here is enabling “Text widgets” in the “Enable shortcodes in” section.
If you’re only going to animate text in posts or pages, leave the box unchecked and skip all the settings.
Animation options like duration and delay times are set using variables in the individual shortcodes. We’ll get to that in a minute.
Okay, Let’s Animate Some Text in WordPress
To get started, we’ll animate a line of text on an existing page.
Open up a page in the WordPress editor and find the text you want to animate.
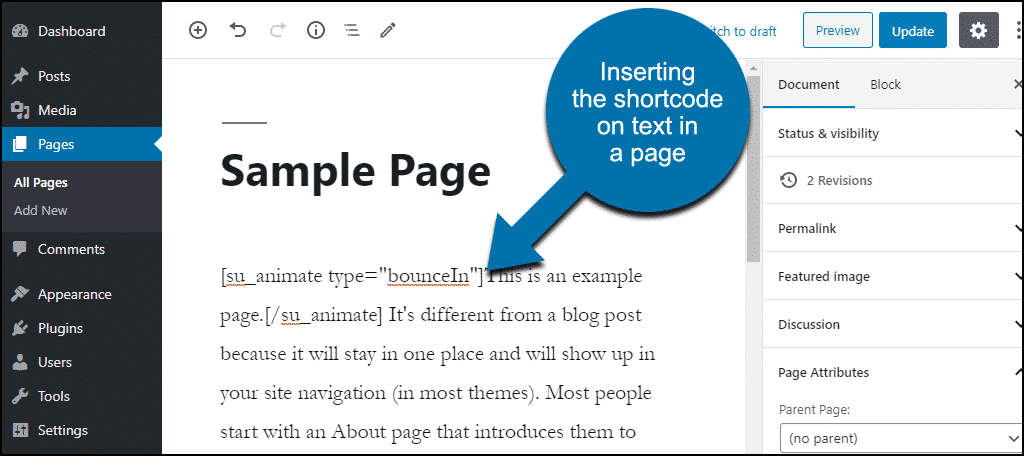
Since we’re animating a line of text in an existing block, we won’t use a shortcode block. We’ll add the shortcode to an existing paragraph block instead.
If you use the “classic” WordPress editor, you’ll use the same process we’re showing here.
The shortcode is su_animate. There is only one variable required, “type.” So an entire simple shortcode would look like this:
[ht_message mstyle=”info” title=”” show_icon=”” id=”” class=”” style=”” ][su_animate type=”bounceIn”]Line of text to animate.[/su_animate][/ht_message]
Take a look at the list of available types to see the different “type” options.
So surround the text you want to animate with the shortcode. Place [su_animate type=”bounceIn”] at the beginning of the text, and [/su_animate] at the end.
Now save or publish the page, and you’ll see your animated text at work.
I know, that’s a still image, what can I say? It doesn’t capture the text movement.
If you’re following along with this WordPress animation at home, you can see it on your own site.
Configuring Animated Text Duration Time
This is where being able to animate text without knowing CSS comes in handy. The code required to configure the duration and delay time is replaced by simple shortcode variables. (The CSS isn’t actually replaced, of course, we just don’t have to deal with it.)
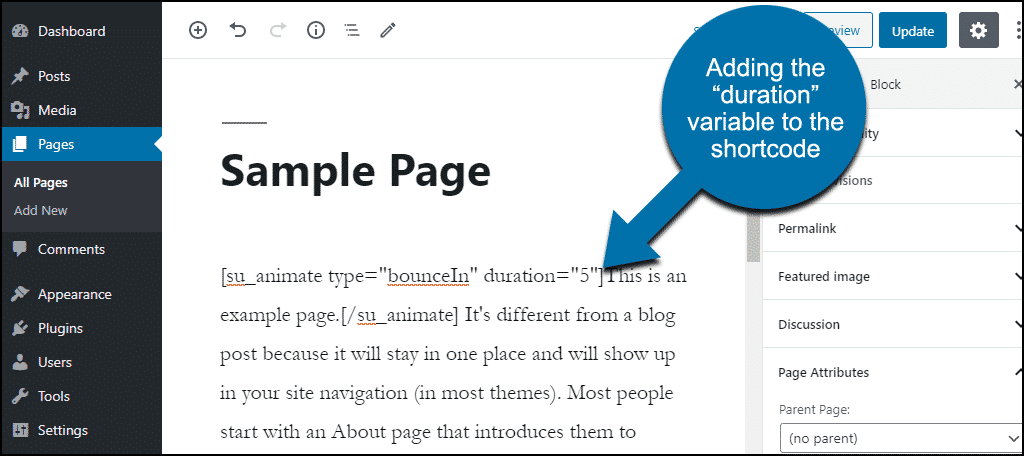
Okay, we’ll start with duration. As you can probably guess, that’s the amount of time the animation takes to run. We’ll use a value in seconds. So to make our text bounce last for five seconds, we set duration=”5″.
[ht_message mstyle=”info” title=”” show_icon=”” id=”” class=”” style=”” ][su_animate type=”bounceIn” duration=”5″]Line of text to animate.[/su_animate][/ht_message]
Make sure you add the “duration” variable after the “type” variable.
When you save or publish the page, you can see that the animation effect takes longer to play out. So increasing the duration doesn’t make the snappy effect that we saw in the first example continue longer. Instead, the effect takes place in slow motion.
Increasing the duration value can be used to create different effects. Whether you like those effects depends on the type of impact you’re trying to make.
The duration variable works with any number from 0 to 20.
Configuring Animated Text Delay Time
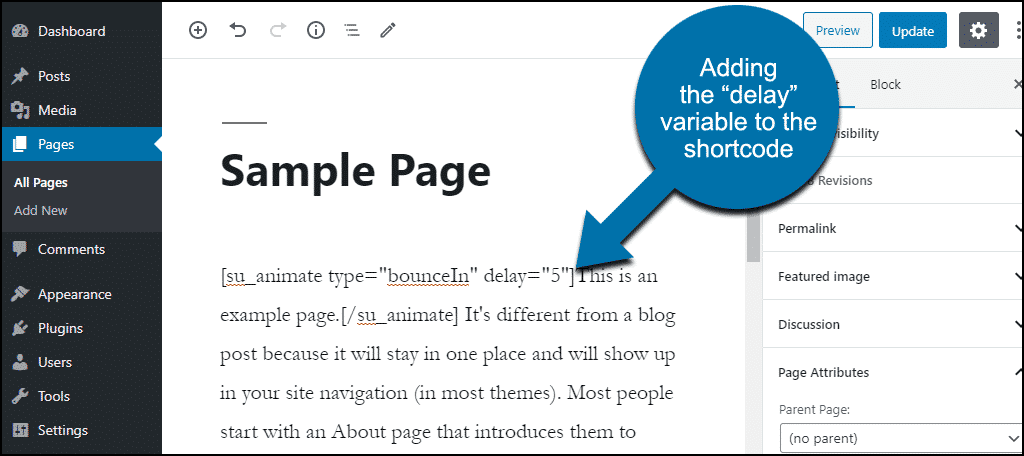
Changing the delay value controls when the animation begins. By default, when there’s no delay value set, the animation starts when the page loads.
The delay value let’s you create a pause before the animation begins. Just like the duration variable, delay uses a value in seconds. So to make our text bounce five seconds after the page loads, we set delay=”5″.
[ht_message mstyle=”info” title=”” show_icon=”” id=”” class=”” style=”” ][su_animate type=”bounceIn” delay=”5″]Line of text to animate.[/su_animate][/ht_message]
And again, we add the “delay” variable after the “type” variable.
An important thing to note is setting a delay time makes the text you’re animating invisible until that time elapses.
So in our example, the text doesn’t show up on the page until five seconds after the page load. That’s a long time to make a visitor wait for text that you want them to see.
Like the duration variable, delay works with any number from 0 to 20.
How to Use Both Duration and Delay When You Animate Text in WordPress
If you want to use both duration and delay together, you can. Just add both values to the shortcode:
[ht_message mstyle=”info” title=”” show_icon=”” id=”” class=”” style=”” ][su_animate type=”bounceIn” duration=”5″ delay=”5″]Line of text to animate.[/su_animate][/ht_message]
Can We Animate a Line of Text Within a Paragraph?
Kind of.
The Shortcodes Ultimate plugin puts the shortcode text into a <div> by default. So using the shortcode will insert space above and below the text.
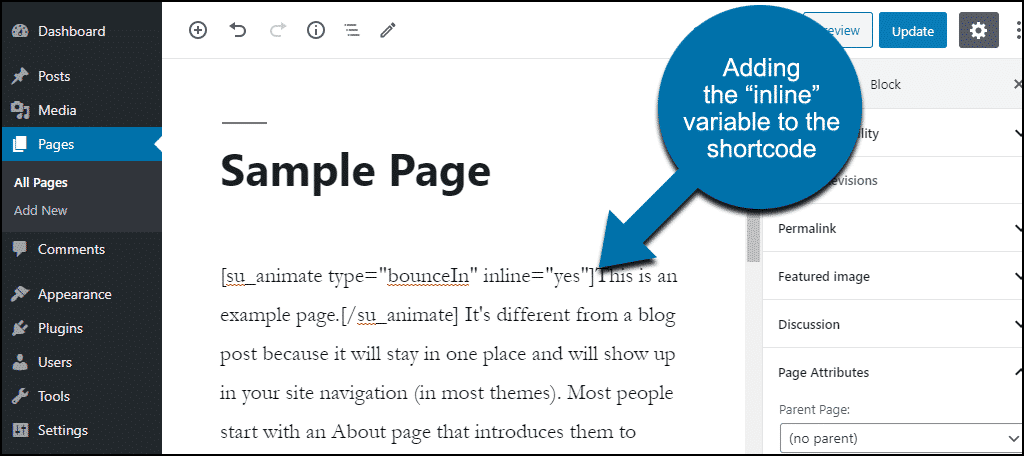
But there’s a variable called inline that places the shortcode in a <span> tag rather than a <div> tag.
To use it, insert an inline=”yes” variable.
[ht_message mstyle=”info” title=”” show_icon=”” id=”” class=”” style=”” ][su_animate type=”bounceIn” inline=”yes”]Line of text to animate.[/su_animate][/ht_message]
You may have to try different “type” values, because using the effect in a <span> changes the way some things look.
Hidden Bonus Animation
So far, we’ve just talked about animating text. But the shortcode can be used to animate almost any element on a page.
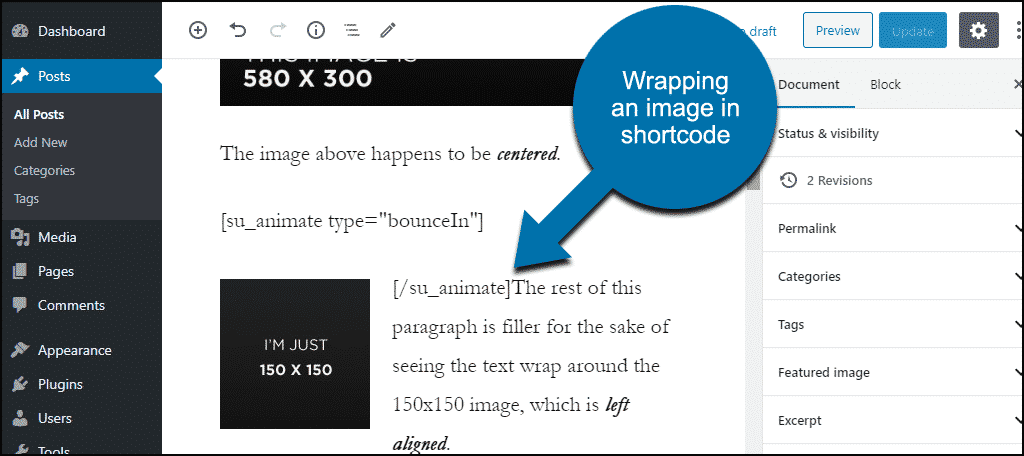
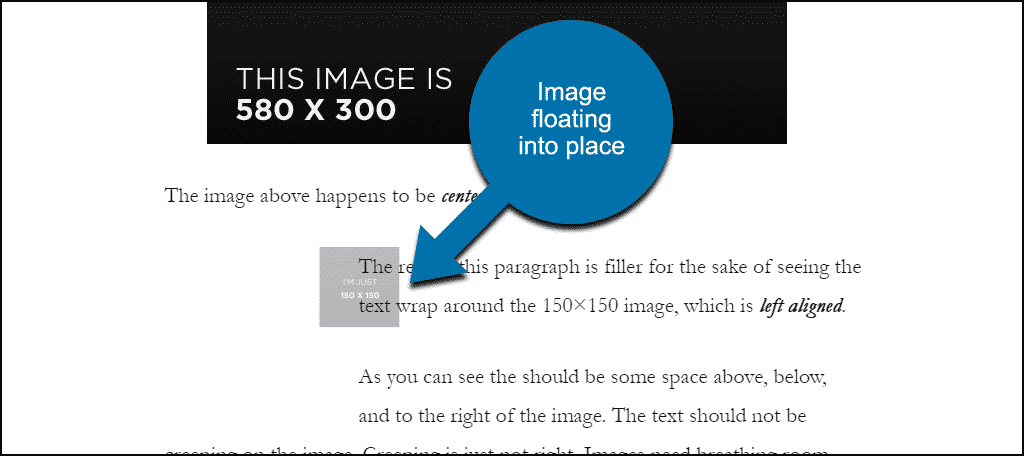
Here I put the opening of the shortcode in front of an image, then closed it after the image.
That makes the image swoop and bounce into place quite dramatically. It’s an impressive effect, give it a try.
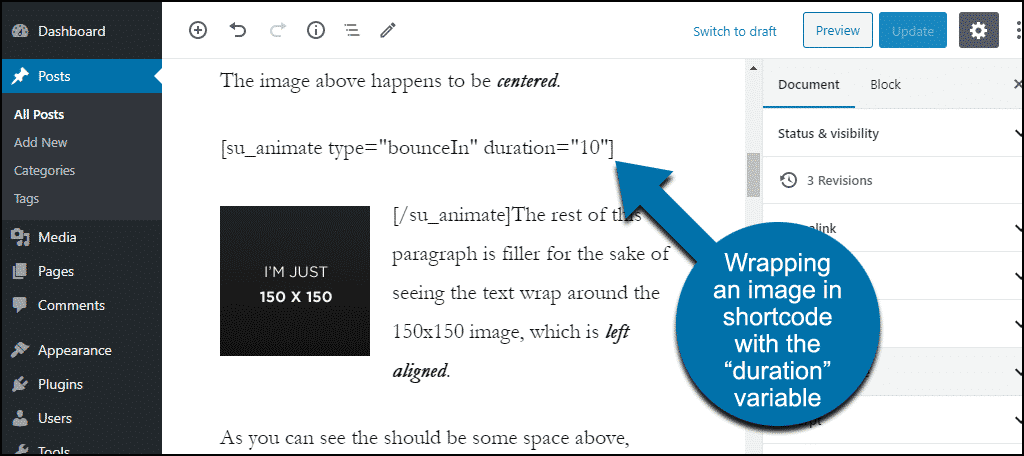
Adding a duration of 10 seconds makes it float into place more eerily.
And look, now I can finally get a screenshot of the effect.
Still a static image, I know, but you get the idea.
What Happens if You Uninstall the Shortcodes Ultimate Plugin
If you uninstall the plugin, pages and posts that used the plugin will be affected. The plugin shortcodes will stop working, so the shortcodes themselves will be displayed anywhere they were used.
Animation Without Persuasion for Any Occasion!
We’ve seen how easy it is to animate text in WordPress using Shortcodes Ultimate. It’s a cool effect, and like a lot of cool effects, one that we should probably use sparingly. But for drawing attention to a line of text, it’s hard to beat.
And when you use the animation shortcode on images, you can create some unusual and eye-catching effects. It’s fun to try to apply the animation shortcode to other page elements as well. But remember, use the effect sparingly. Too much of a good thing can start to get annoying and distracting.
Have you ever tried to add a CSS animation class to your site manually? Do you think you might try to work animation into your site now that you know it’s easier to do?
Let me know in the comments.


do you need to purchase the premium version of short codes to be able to use the animations?
Marcus,
No, animation worked for me with the free version.
I am going to try this. It seems super easy and would be cool to have it on my blog!
There are all kinds of fun things you can do in WordPress. 🙂