If you are a WordPress user who is not familiar with Advanced Custom Fields, then you have been missing out. Using ACF in WordPress will give you much more control over your content. It allows you to custom post meta to enrich content using structured data.
Over the years, there have been several plugins released to help you create custom fields in WordPress. There are also step-by-step instructions on how to create them using code and plugins that edit the functions.php file of your website.
That being said, today we are going to explore the Advanced Custom Fields plugin and take a look at what you can do with it. Before we do that, let’s look at exactly what custom fields in WordPress are and talk about them.
What are Custom Fields in WordPress?
Simply put, WordPress custom fields are metadata that is used to add information to posts and pages. What kind of additional information can you add? Well, with Advanced Custom Fields for WordPress, the sky is pretty much the limit.
See, by default, when you create a new post, page, or any content type in WordPress, it is saved in two different areas. These two areas are the content area and the information for that content area.
- Content Area: All the information you add to the WordPress editor. This will include all text, images, and formatting.
- Information Area: Things that get saved here include information like title, date, time, and author. This part of the saved information is called metadata.
This metadata is automatically added to every post or page you create. You can use custom fields in WordPress to create and store even more metadata. However, while there are some default custom fields in WordPress as mentioned, to add more custom fields without the use of a plugin is a process that requires you to add code to the functions.php file of your site.
This can be tricky, especially if you are a beginner and are not familiar with how to do this. Furthermore, using the Advanced Custom Fields plugin will allow you to not only add custom fields much easier, but will give you tons of other options built-in as well.
Why Add Advanced Custom Fields?
You can look at this from a number of different angles. You can use sports, animals, weather, destinations, or anything else you want. For example, let’s use a destination.
Say you are writing a post about somewhere you have visited, or something you are describing.For this example, let’s say you just finished visiting a hotel somewhere and you are writing about your experience.
In the WordPress editor, you have detailed your experience. You added text, images, maybe even some video. It is formatted how you like and you are ready to roll. However, you want to be able to add custom fields for certain information regarding the hotel. This is where ACF for WordPress comes into play.
Using the plugin, you can add advanced custom fields like:
- Rooms Available
- Meals
- Beds
- Floors
- Pools
- Garden
- Smoking
- Non Smoking
- Staff
- Front Desk Service
And anything else you can think of to give your reader an idea of all the amenities this hotel does or does not provide.
This concept can be applied to any post or page. Again, sports stats, weather outlook, or any other type of custom fields can be added using the Advanced Custom Fields plugin. You can even add custom fields to media if you choose.
Let’s take a look at the plugin and see what all it offers.
Advanced Custom Fields
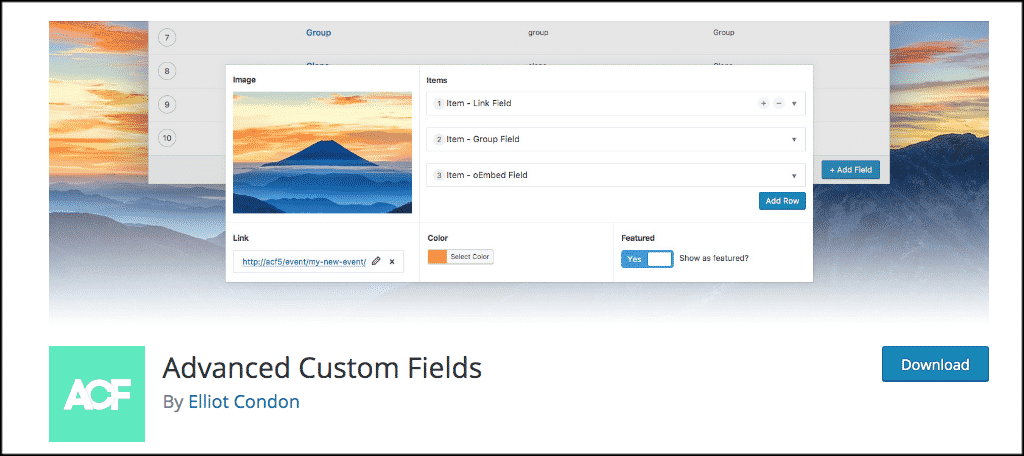
The Advanced Custom Fields plugin allows you to easily gain tons of control of your WordPress edit screens and all of the custom field data. Using the easy to understand and utilize builder, you can add custom fields in your WordPress site or directly from your post or page with just a few clicks of a button.
Perhaps the best part about the plugin is that it gives you the ability to add custom fields anywhere you want. After you have installed and activated the plugin, you can easily add fields to:
- Posts
- Pages
- Users
- Taxonomy Terms
- Media
- Comments
- Custom Pages
You will also be able to load and display your custom fields on any part of the page you prefer, as the plugin does not lock you into displaying them in a certain area.
This is the fastest, easiest, and smoothest way to add advanced custom fields to your WordPress website.
Let’s take a look at how to get the plugin installed and working.
Install Plugin
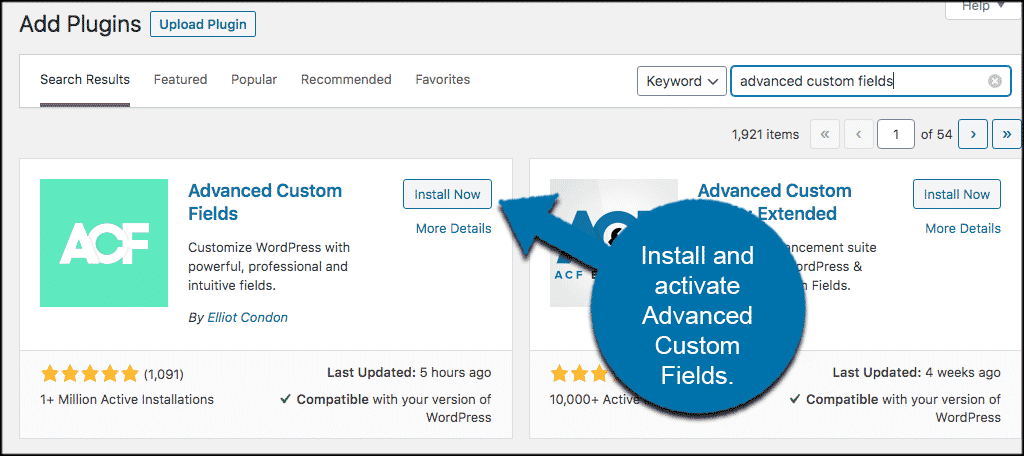
In order to start adding custom fields in WordPress, you first need to install and activate the plugin. You can do this by going to the Plugins page in your WordPress admin dashboard. Simply search the plugin name and install it from there.
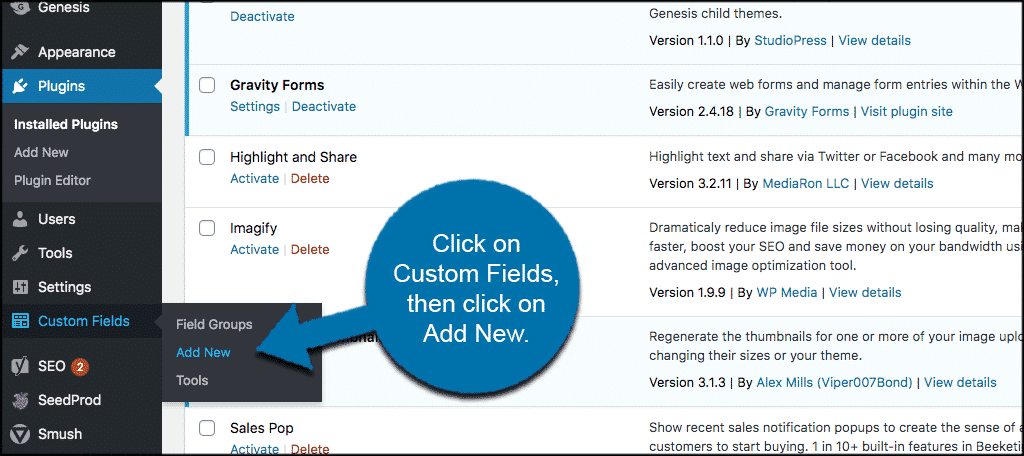
Once the plugin has been installed and activated, click on Custom Fields > Add New. You will see this located in the left side menu area of your dashboard after you activate the plugin.
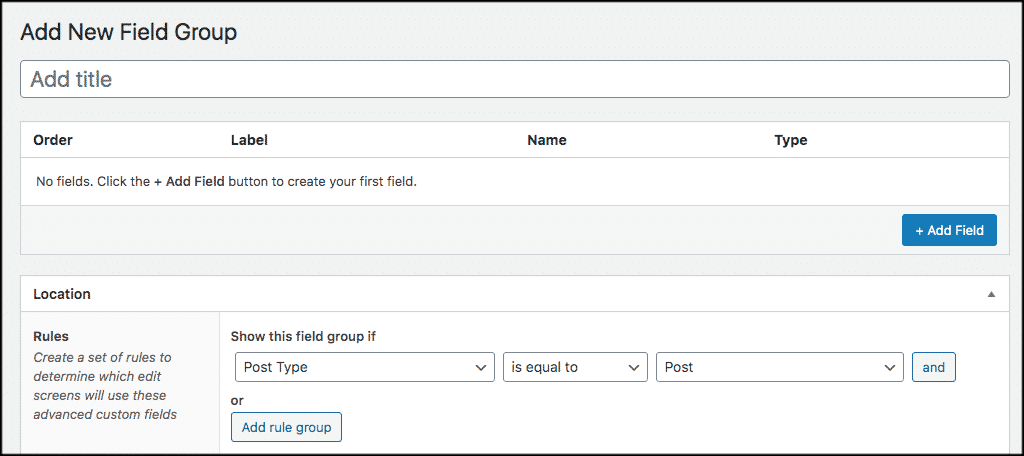
From here you will be able to add a custom field. Let’s go over that together.
Add a Custom Field
At this point, you should be on the page to add a new field. Let’s go over this together real quick. First you want to go ahead and add a title and then click on the “Add Field” button.
Once you click on the “Add Field” button, a drop-down menu will appear with some fields that you want to fill out the way you see fit.
At the top, you see Field Label, Field Name, and Filed Type. Go ahead and fill these in according to what you want.
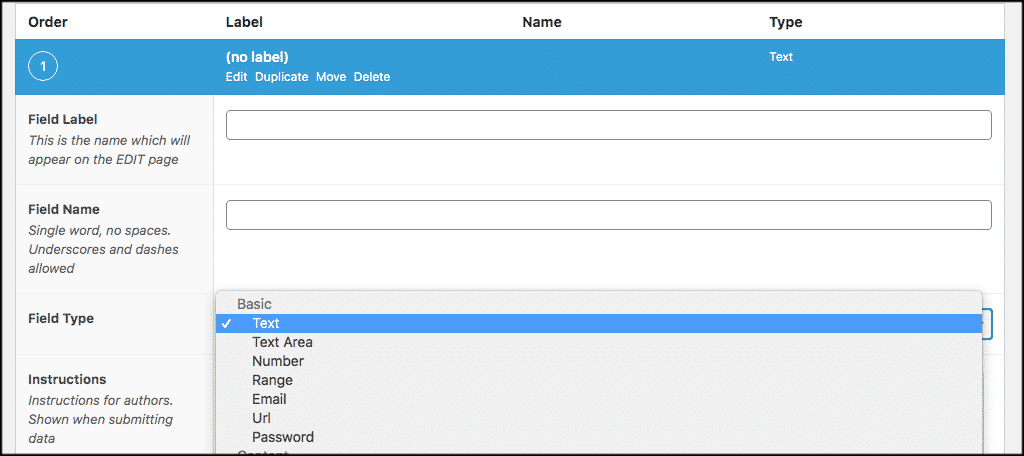
Note: Field Type is a large dropdown menu where you can select the type of field you want.
Now, scroll down some and fill in the instruction box, value, and placeholder fields.

Lastly, fill out the rest of the available fields. Again, these should be filled out according to what you want.
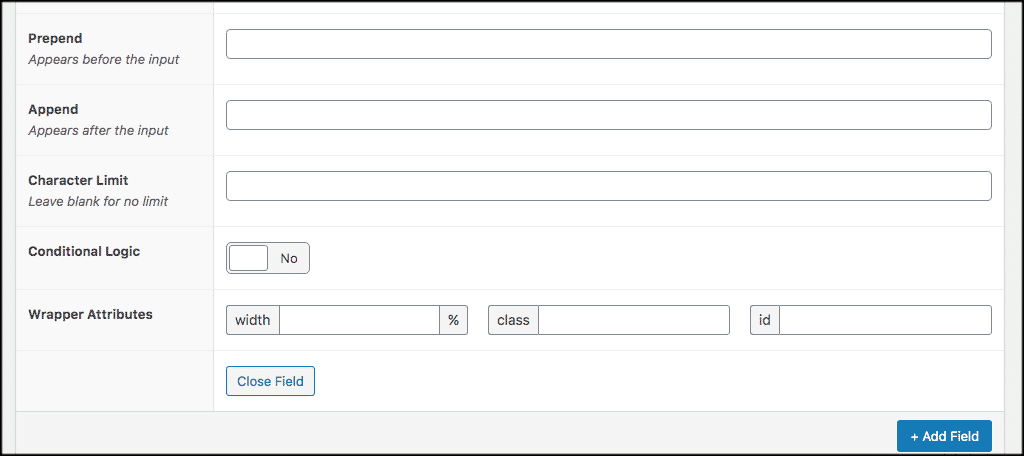
Note: If you want to add another field, then click on the “Add Field” button and simply add as many fields as you see necessary.
Add Field Details
Now that you have added the field, scroll down some to the next section. Fill in the location info how you see fit. This is where the field will display on your post or page. You have full control over this.
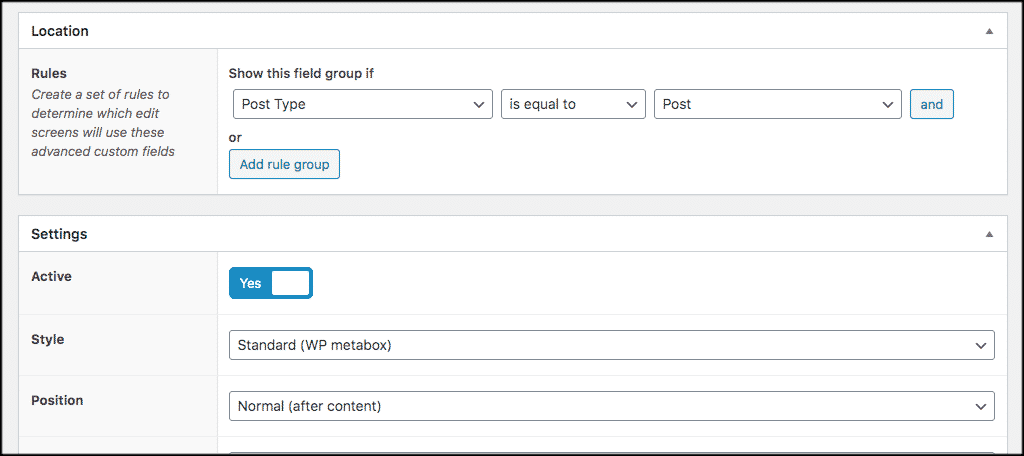
Continue on with the rest of the label placement, other positioning, and rule fields. Once you are finished, click on the “Publish” button and your field will be ready to use in a post, page, media, or whatever else you want to use it for.
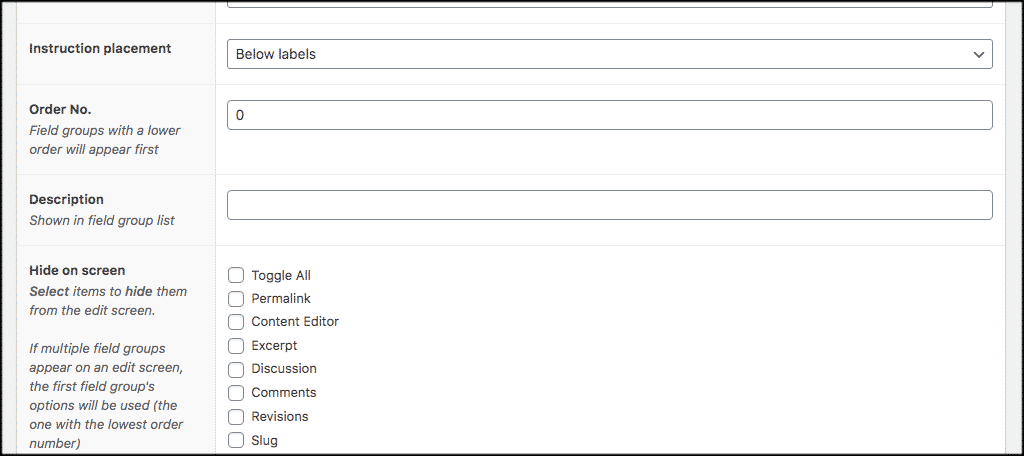
That’s it! You have successfully created a custom field to use in WordPress. The Advanced Custom Fields plugin makes it that easy.
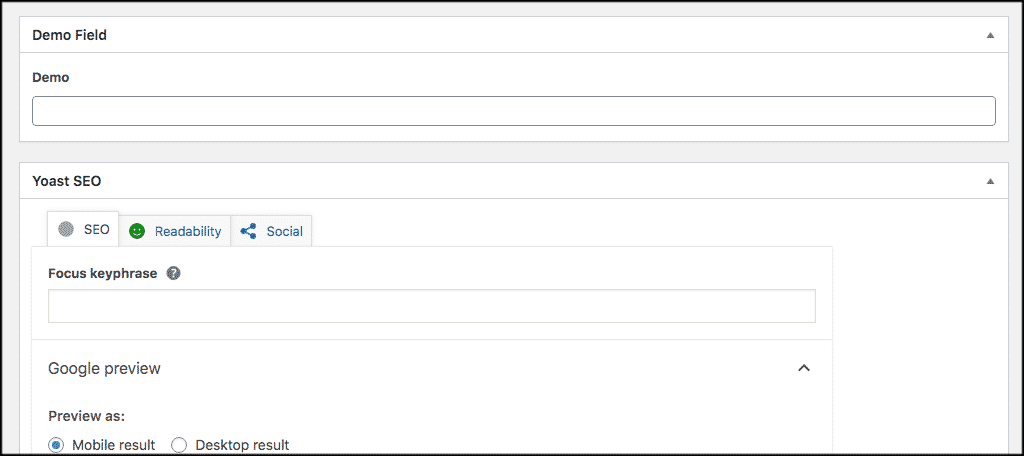
You will see that the field you created is now ready to use when you go to edit posts and pages. You can fill the field out according to the rules you used to create the type of custom field.
Does it Work in Gutenberg?
Interestingly enough, the ACF plugin does work even if you are using the Gutenberg block editor. There was a lot of backlash originally, as there was concern over how Gutenberg may handle these meta boxes. Especially since millions of WordPress website owners had used the ACF plugin to create custom fields for their website.
However, over time, it became known that the plugin would work with Gutenberg. That being said, you will need the add-on called Advanced Custom Blocks. This is only available in the pro version of the plugin. If you want to purchase it, then by all means go for it.
Final Thoughts
Adding custom fields to your WordPress site gives you a ton of control over content. The Advanced Custom Fields plugin makes this process easy by providing you a detailed builder within the plugin.
This builder can be used by almost anyone to add any type of custom field imaginable and use it on a variety of items within WordPress, including posts, pages, and media.
Have you been adding custom fields into your WordPress site using all code? Have you found that ACF is much easier and presents you with a lot more options?
