The search form built into WordPress is very basic. It may show a few relevant search results, but it isn’t very efficient when it comes to more inclusive searches. You could edit code to alter how the search field works, but not everyone feels comfortable making those kinds of changes.
Luckily, it’s easy to improve your WordPress search results by adding a custom search form to your website.
How to Improve the Search Form In WordPress With Ivory Search
In this tutorial, I’ll show you how to use the Ivory Search plugin to greatly enhance your website search. It allows you to create new custom search forms, as well as search WooCommerce products and images, files, and attachments.
You can even create different search forms to search for different types of content.
Finally, it lets you display your search forms anywhere on your site since it works in widgets and creates shortcodes. If you have been looking for a way to customize your WordPress site search, you’ve found it.
Let’s take a minute to install it, and then I’ll go over a few of the features.
Step 1: Installing the Ivory Search Plugin
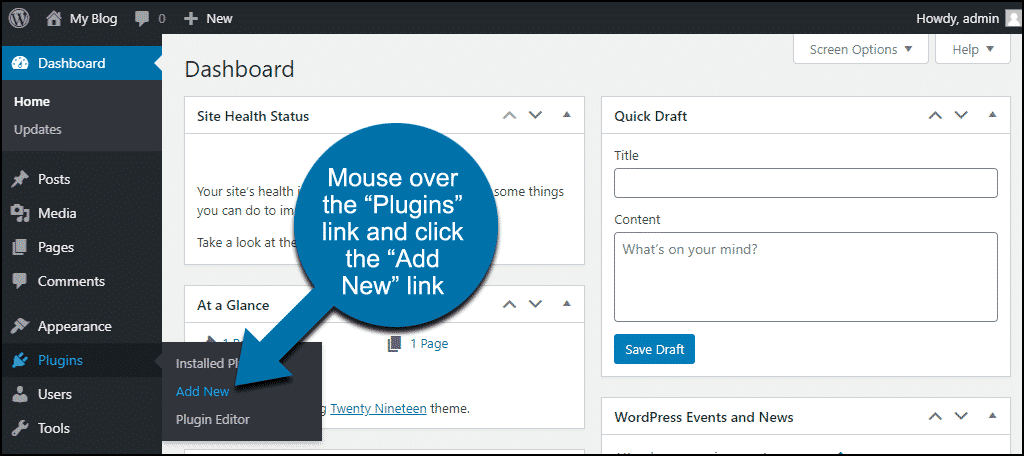
First, log in to your WordPress admin panel. Then mouse over the “Plugins” link and click the “Add New” link.
Then go to the “Search plugins” box, enter, “Ivory Search.”

When you find the plugin, click the “Install Now” button.

Now the plugin is installed, but it has to be activated before you can use it.
Finally, click the “Activate” button.

That’s all there is to it. Now let’s put the plugin to work.
Step 2: Configuring Ivory Search
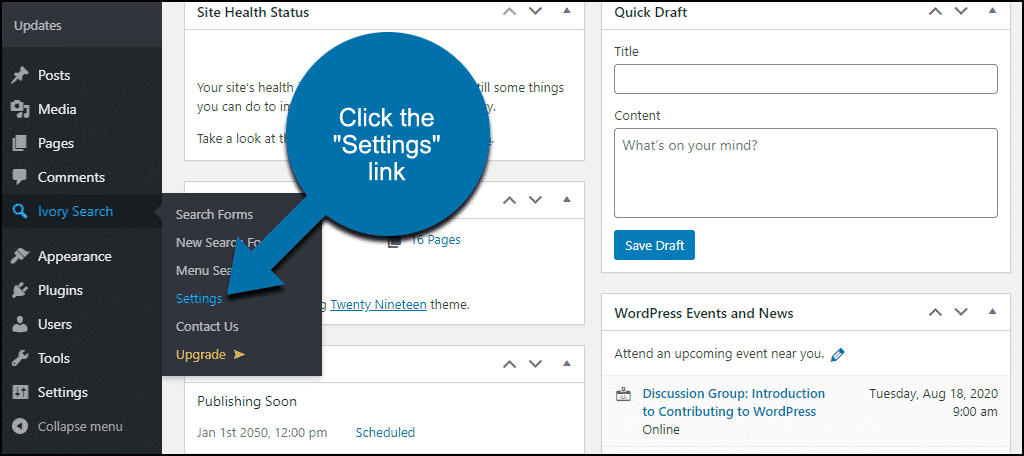
To begin, mouse over the “Ivory Search” link and click the “Settings” link.
You can start creating new WordPress search forms without changing anything in the settings. But there are a few things that you may want to change.
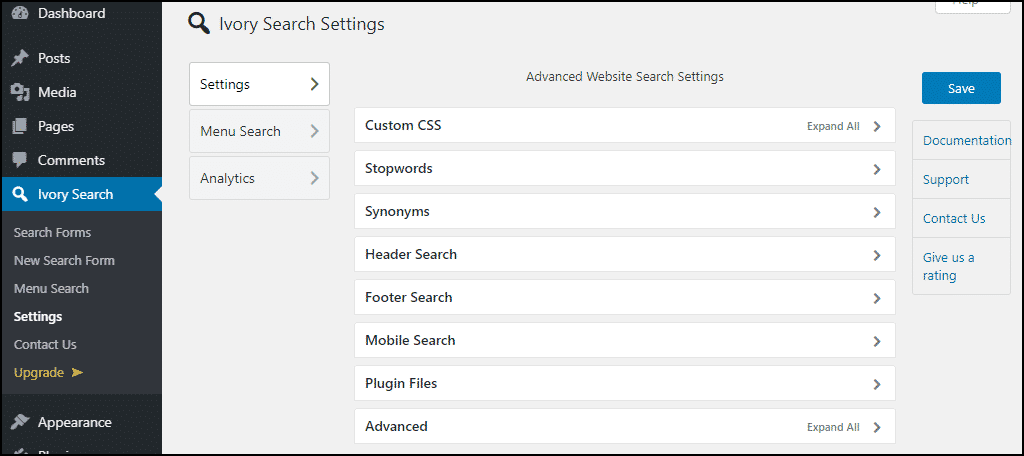
- Custom CSS – You can add CSS here if the forms generated by the plugin need some tweaking to fit your site. Think of it like the “Additional CSS” field in the WordPress theme customizer.
- Stopwords – Enter any words here that you want to exclude from search.
- Synonyms – This is kind of a cool feature. Entering images = pictures here will return results for both words when only one is searched. “Images” and “pictures” are just used as an example. You can pair any words that may be related to your site.
- Header Search – This toggles a search form on or off in the theme header—all of these default to off.
- Footer Search – Toggles a search form on or off in the theme footer.
- Mobile Search – Toggles a search form on or off in the mobile view of your site.
- You probably won’t need the controls in Plugin Files or Advanced. They deal with turning search off for the entire site and loading CSS and JavaScript files.
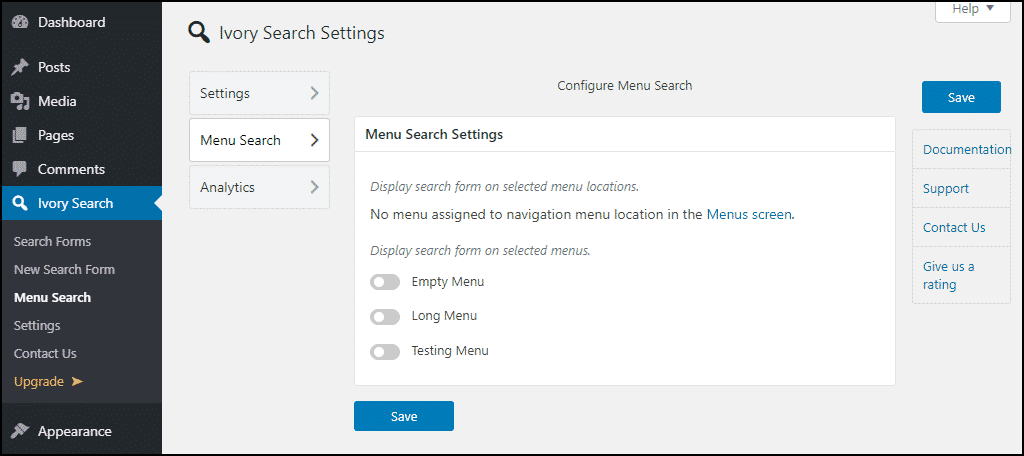
In the Menu Search section, you’ll find controls to add search to your site menus. We’ll go over adding search forms to widgets and posts and pages using shortcodes in a minute. But if you want to search in your menu, this is where you’d activate it.
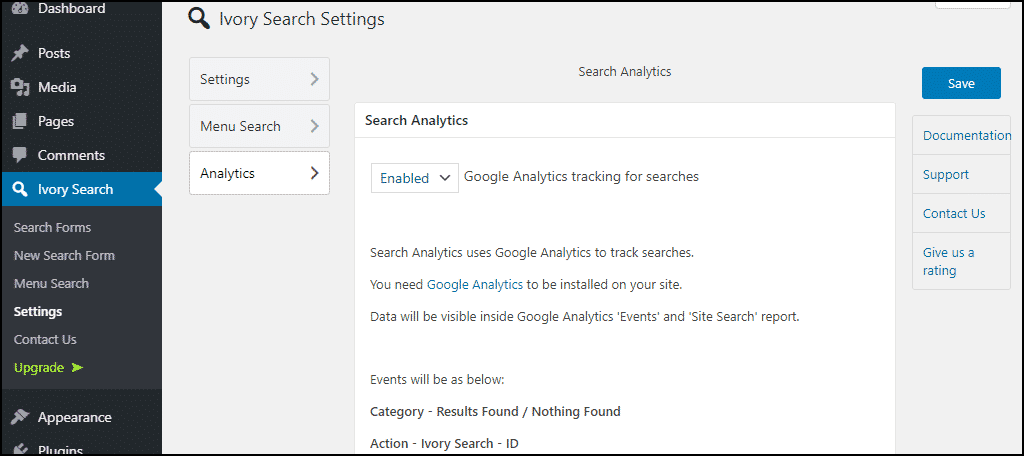
In the Analytics section, you control whether searches are tracked in Google Analytics. It’s enabled by default. But if you don’t use Google Analytics (or don’t want to see search data there), you should disable this.
Okay, let’s move on to the search forms themselves.
Step 3: Configure The Default Search Form
In the “Ivory Search” section of the left column navigation, click the “Search Forms” link.
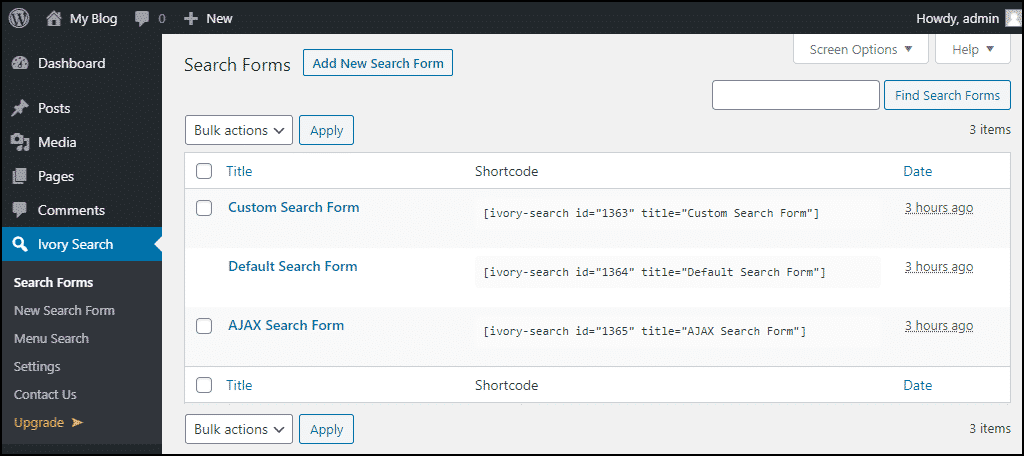
By default, there are three search forms to use:
- Custom Search Form – This is the standard form (what you’d get if you created a new form) customized to search image files.
- Default Search Form – The default search form settings control the existing, built-in WordPress search form. So making changes here changes the behavior of the WordPress search.
- AJAX Search Form – An AJAX search form displays search results as you type in the form. A nice option, but bear in mind that it consumes more website resources than a standard search form.
Note: Due to the high amount of customization that this plugin offers, there’s no way to cover it all in a single tutorial. Instead, I highly recommend examining what each option can do.
Let’s take a look at a few edits you can make to the Default Search Form.
The standard WordPress search does not include media files. So a search for “remix” on our test site returns a post that contains the word “remix,” as expected.

But there’s an image name that includes “remix,” too. By editing the Default Search Form, we can include images in the search results.
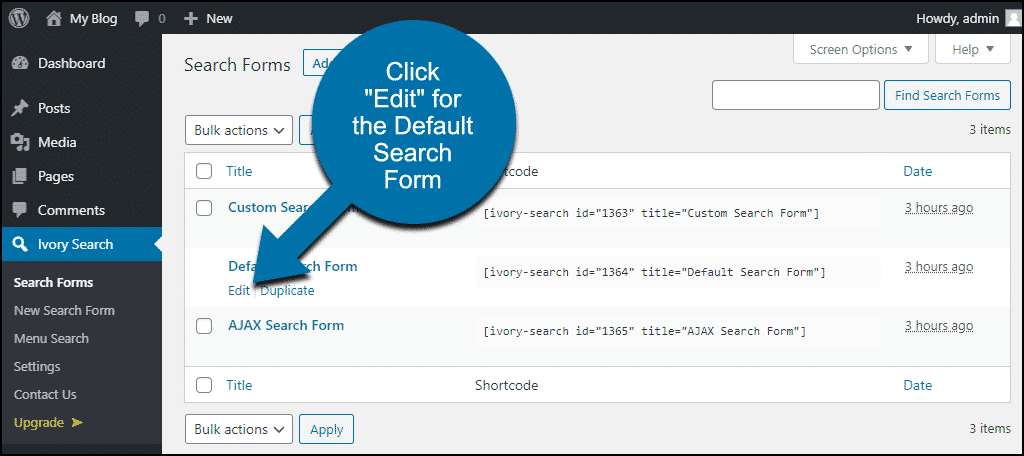
Click “Edit” for the Default Search Form.
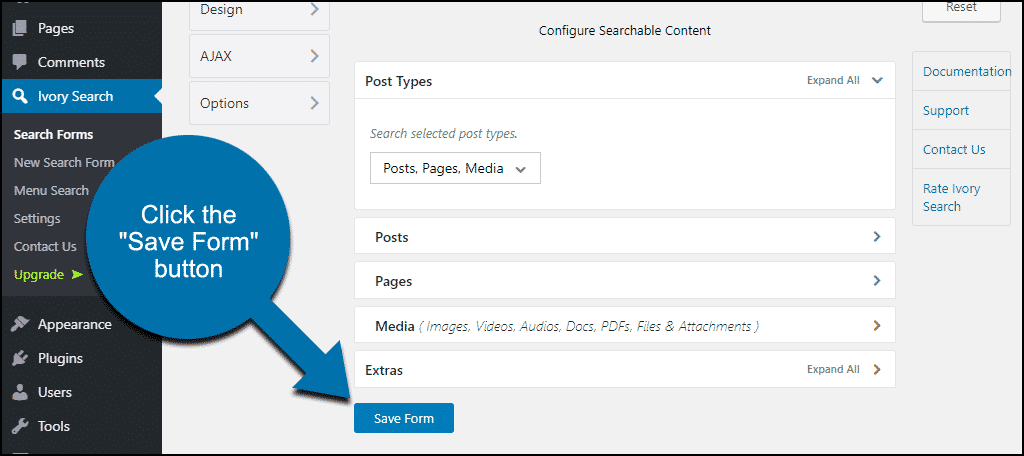
Then click the “Post Types” section. In the “Posts, Pages” drop-down, click “Media” to toggle it on.
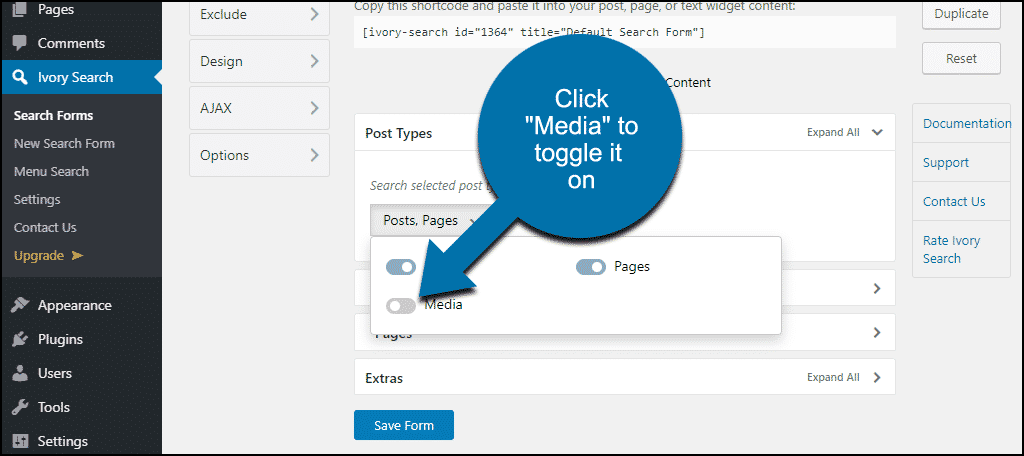
By flipping this switch, a new media option will appear. This allows you to select the media type that searches can pull up (images, audio, videos, etc.).
Click the “Save Form” button.
Now, if we search “remix,” we see the image file included in the search results.

Let’s look at how to add the search in WordPress.
Step 4: Displaying Your Custom WordPress Search Forms in Widgets
In the left column navigation, mouse over the “Appearance” link and click the “Widgets” link.
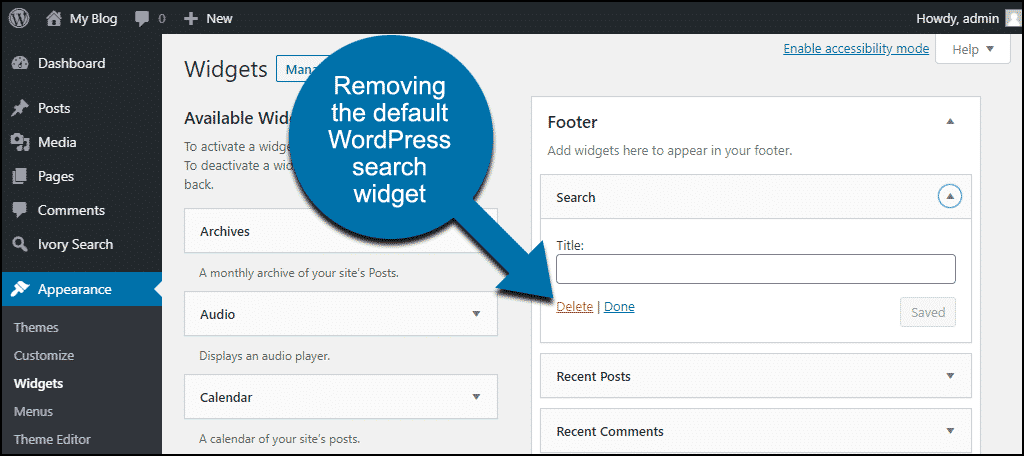
The first thing we want to do is remove the WordPress search widget. We’re adding our own search form, and we don’t want two search forms in the footer.
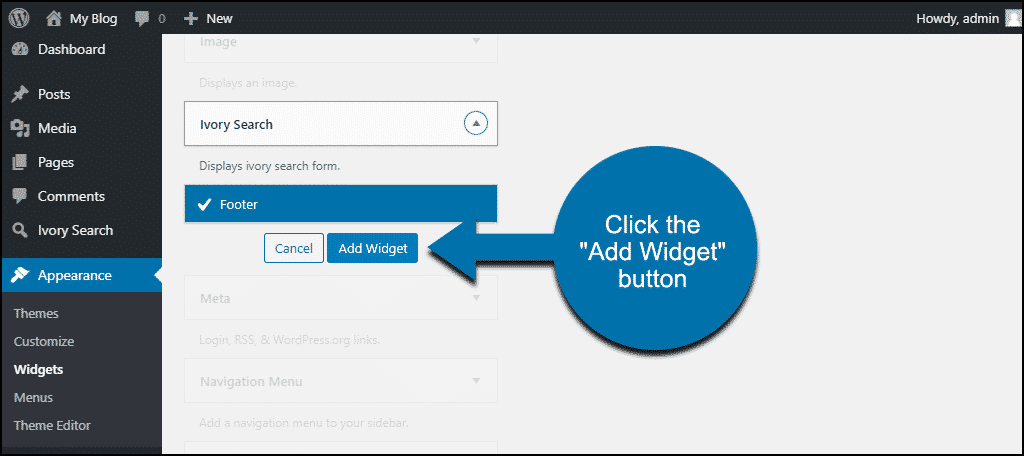
Scroll down and click to open the Ivory Search widget. Then choose the widget area where you want to add a search form. Our test site theme only has a footer widget, so we’ll click the “Add Widget” button to add it there.
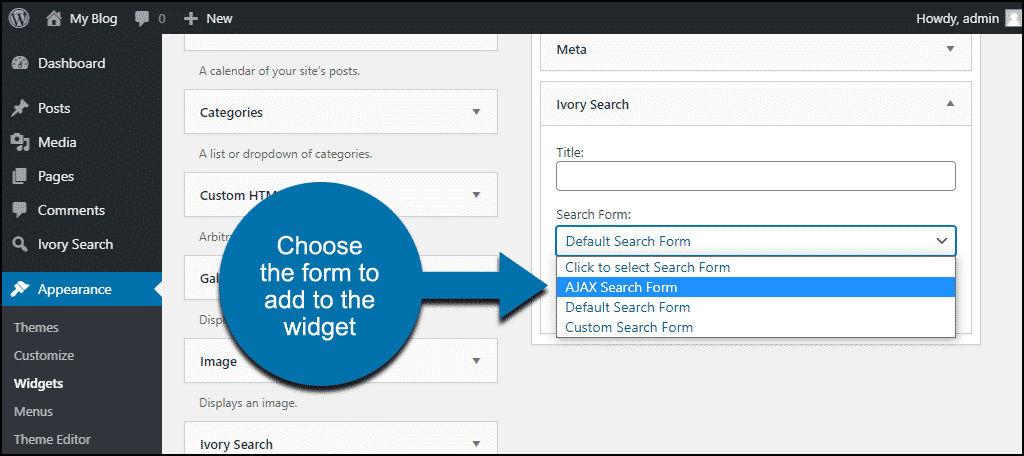
Now you can add a name to the widget, and choose one of your existing search forms to be displayed. Since we haven’t seen it yet, let’s use the AJAX form.
Click the “Save” button.
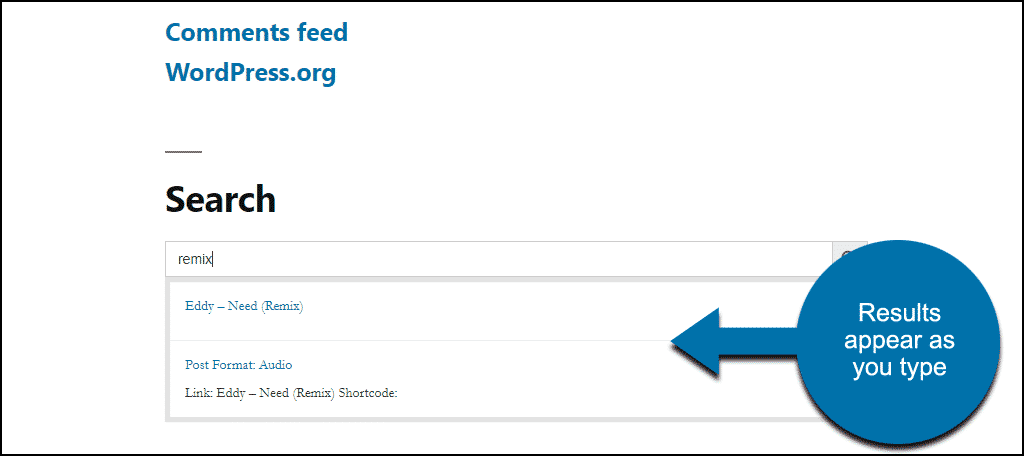
Now, if we go to the widget area of our site, the AJAX search is there. You can see the search results appear as you type.
Step 5: Displaying Your Custom WordPress Search Forms Using Shortcode
You aren’t limited to widget areas. Instead, you can place a search form anywhere.
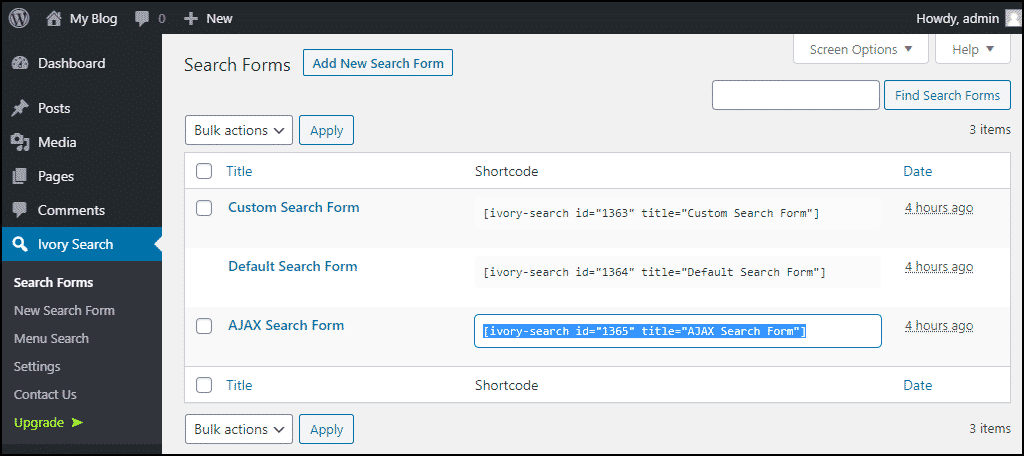
In the “Ivory Search” section of the left column navigation, click the “Search Forms” link. You’ll notice that each form has a shortcode associated with it.
Then just copy the shortcode for the search form you want to display.
Then paste it into a page or post.
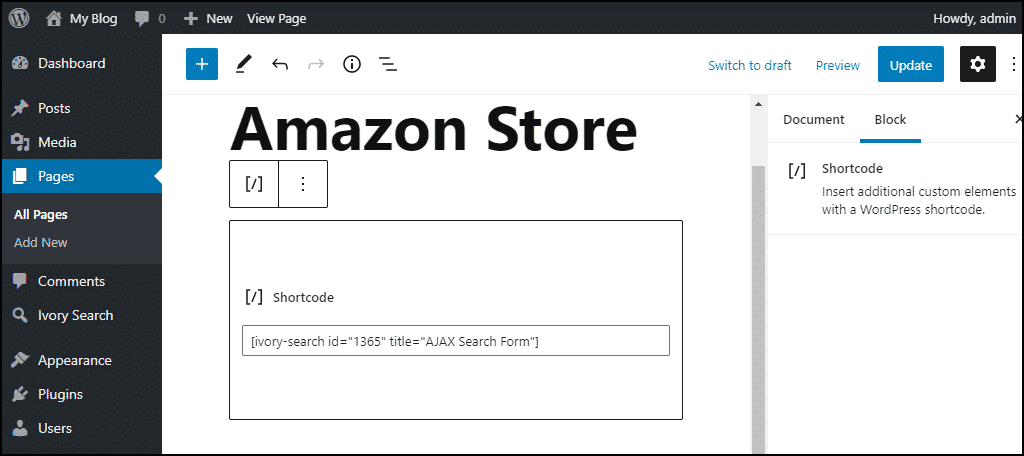
Now when we save the page, the search form appears.

Step 6: Creating Different Search Forms for Different Content Types and Taxonomies
A valuable feature of Ivory Search is its ability to create forms that search for very specific things. To see what I mean, we’ll edit the AJAX form we were just working with. But you can find these controls in any of the default forms, and any new form you create.
The area we want to look at is the “Extras” section. Open it up, and you’ll see several controls. Some of them are only available in the paid version of the plugin. But there are still a lot of features you can use for free.
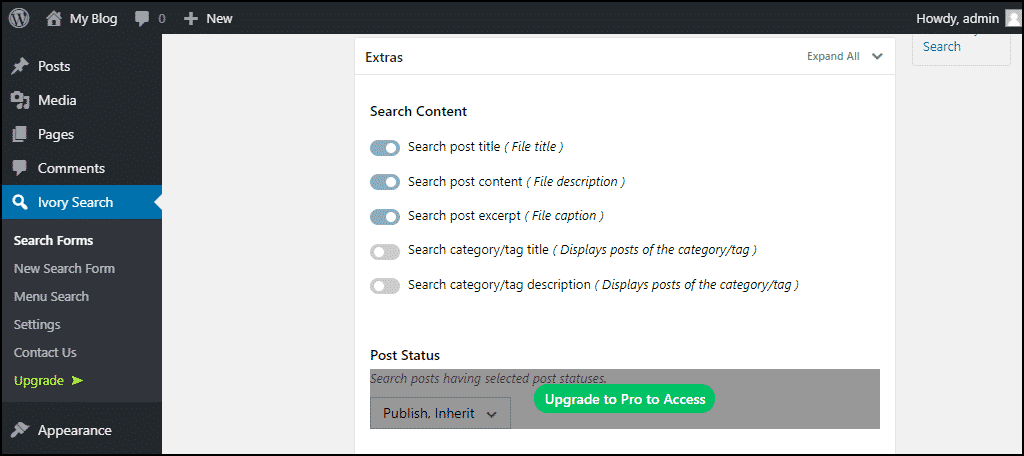
By enabling or disabling the options, you can create your own custom search. There is an endless number of combinations.
- Search post titles, contents, or excerpts.
- Category titles and/or descriptions.
- Posts with or without password protection.
- Even posts within a specified date range.
Okay, there aren’t an endless number of combinations, I was exaggerating. But it’s a lot of combinations. 😉
What Happens if You Uninstall the Ivory Search Plugin?
If you uninstall the plugin, pages, and posts that used the plugin will be affected. Any search forms that you have created, will be deleted. Yet, the shortcodes you add will remain, but instead of functioning, they will appear as text.
Thus, you will need to spend time deleting them before your visitors see the.
A Good WordPress Search Form Is Key
Getting visitors to your site is only the first step. Instead, the real fight is keeping those visitors. And a comprehensive and effective search system will help do that. After all, there’s no point in filling your site with great content if it can’t be found.
Have you ever needed a customized search on your website? Have you used any other WordPress search customization plugins?


https://wordpress.org/plugins/advanced-search-form-builder/ This plugin is closed.