Do you want to add your Google My Business reviews to your WordPress site? It’s easy to do, and all it takes is a few minutes of your time. I’ll guide you through the process step by step. We’ll use the Google Reviews Widget plugin to get the job done.
If you’ve put a lot of care and feeding into your Google My Business profile, you’re on the right track. It’s one of the most effective ways to spotlight your business in Google search. If you’ve worked hard for reviews, make the reviews work for you by displaying them on your website.
The process begins on your WordPress website, so let’s install the plugin.
Installing the Google Reviews Widget Plugin
Log in to your WordPress admin panel.
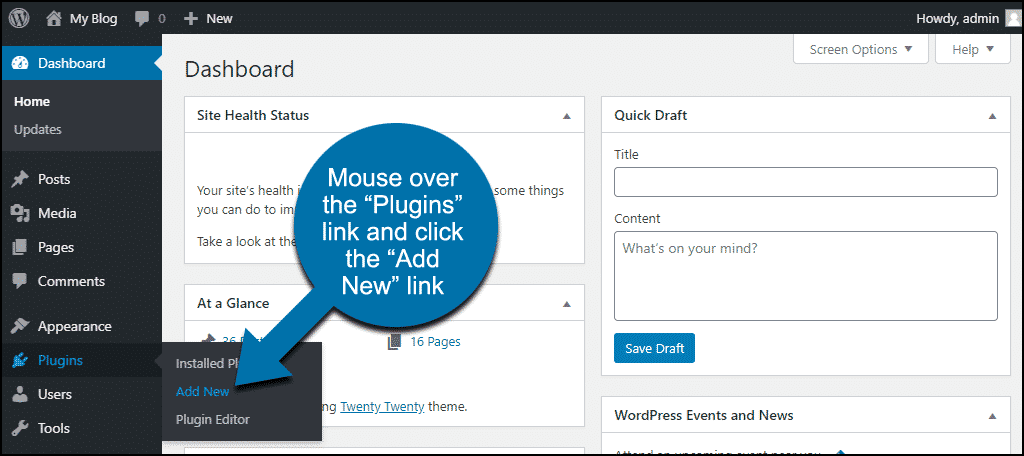
In the left column navigation, mouse over the “Plugins” link and click the “Add New” link.
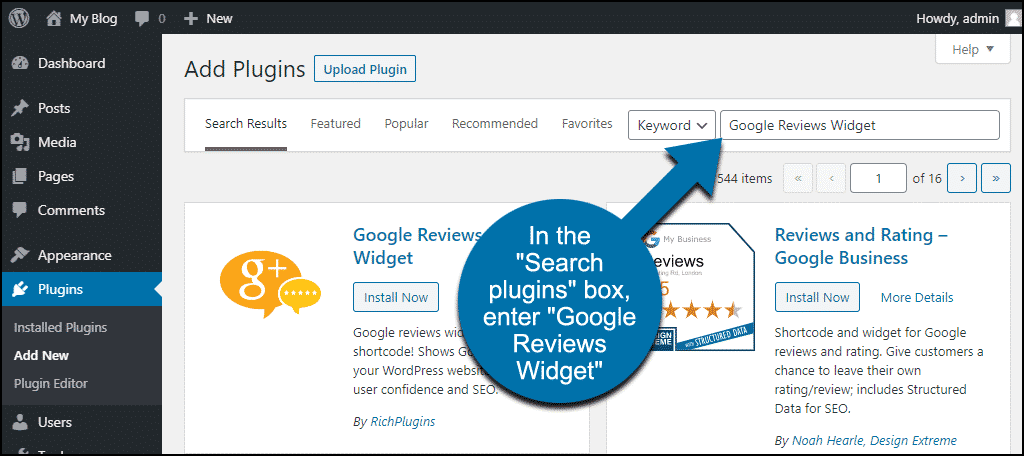
In the “Search plugins…” box, enter, “Google Reviews Widget.”
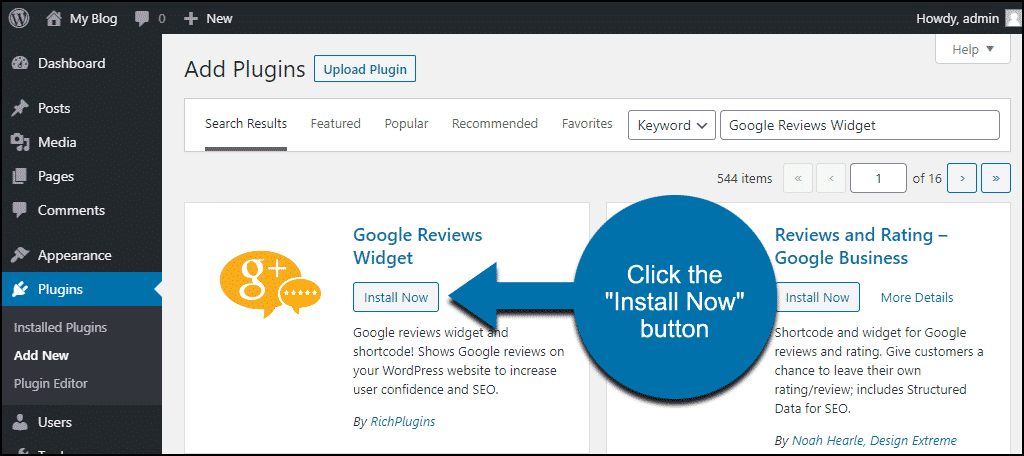
When you find the plugin, click the “Install Now” button.
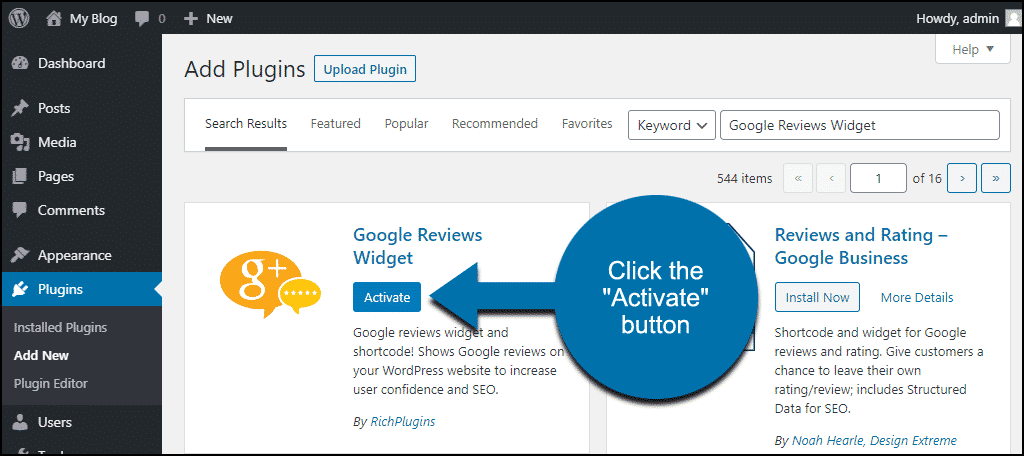
Now the plugin is installed, but it has to be activated before you can use it.
Click the “Activate” button.
That’s all there is to it. Now let’s put the plugin to work.
Configuring Google Reviews Widget
We’ll need a couple of things from Google before we can embed Google reviews with the plugin. First, a Google Places API key, then your Google Place ID.
Getting the API key means delving into the murky waters of the Google Developers Console. But if you follow these steps, it should be smooth sailing.
How to Get a Google Places API Key
Log in to your Google console. That link should land you in the “APIs & Services” section.
If you’ve never created a project before, you’ll have to create one now. (If you have an existing project, you can skip to Click the “Enable APIs and Services” button.)
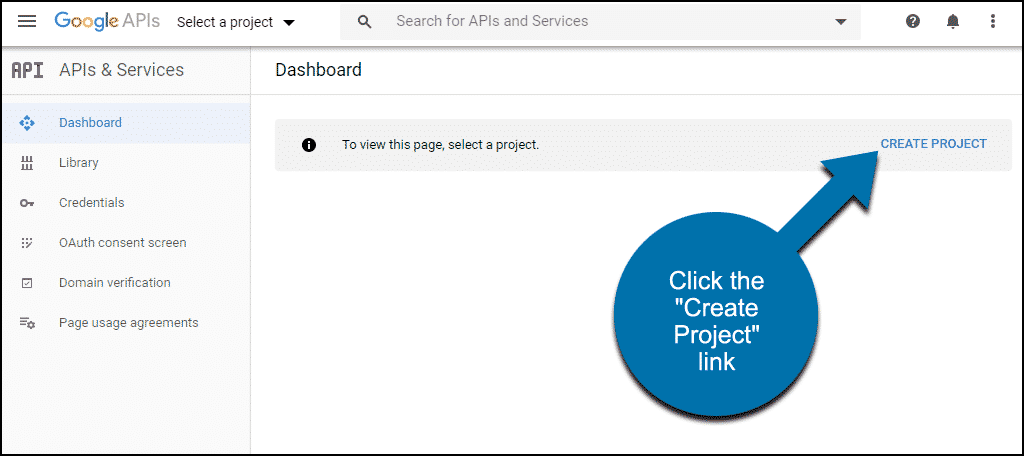
Click the “Create Project” link.
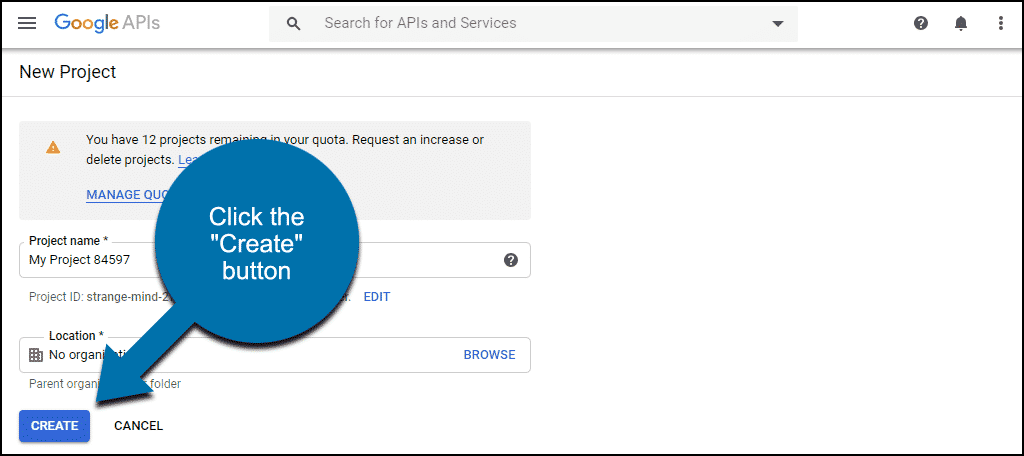
Give the project a name, or just leave the default name.
Click the “Create” button.
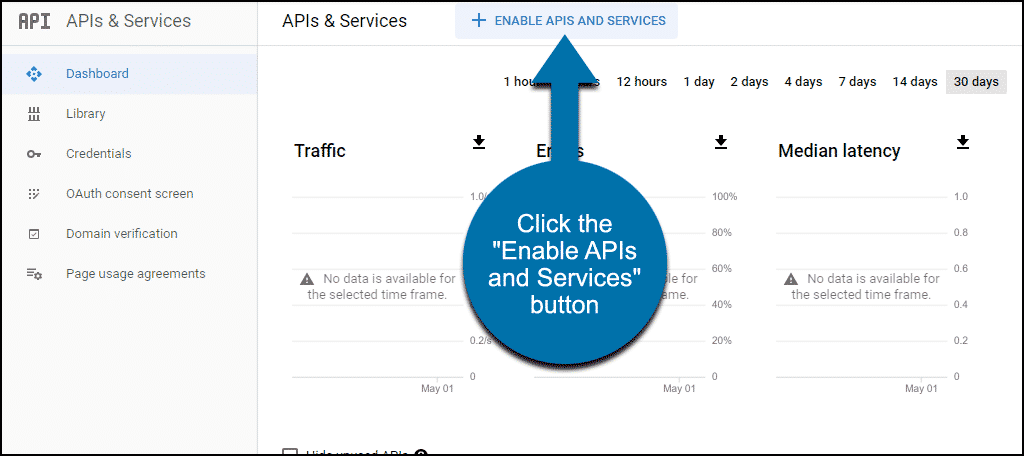
Click the “Enable APIs and Services” button.
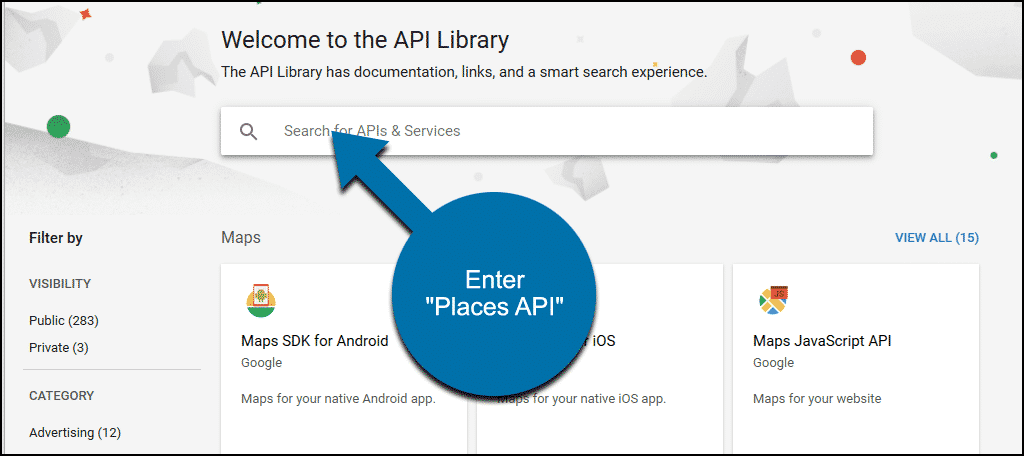
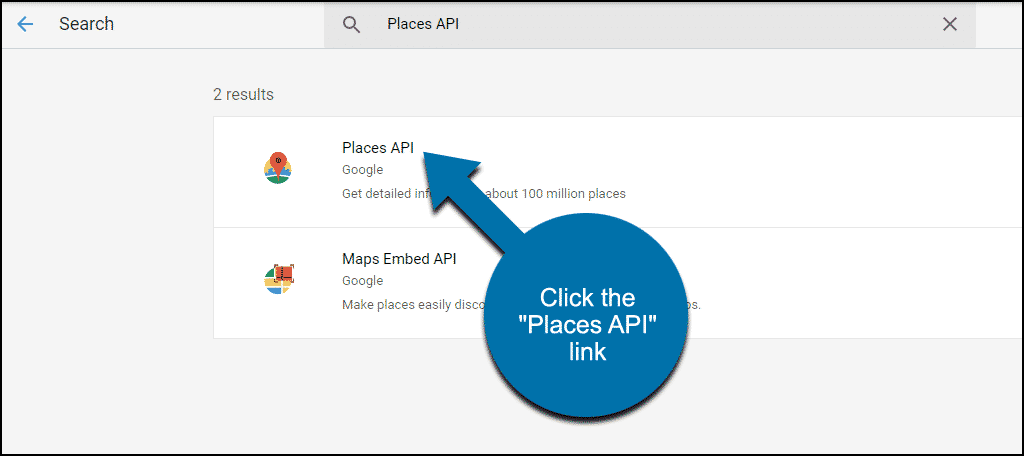
In the search box, enter “Places API.”
Click the “Places API” link.
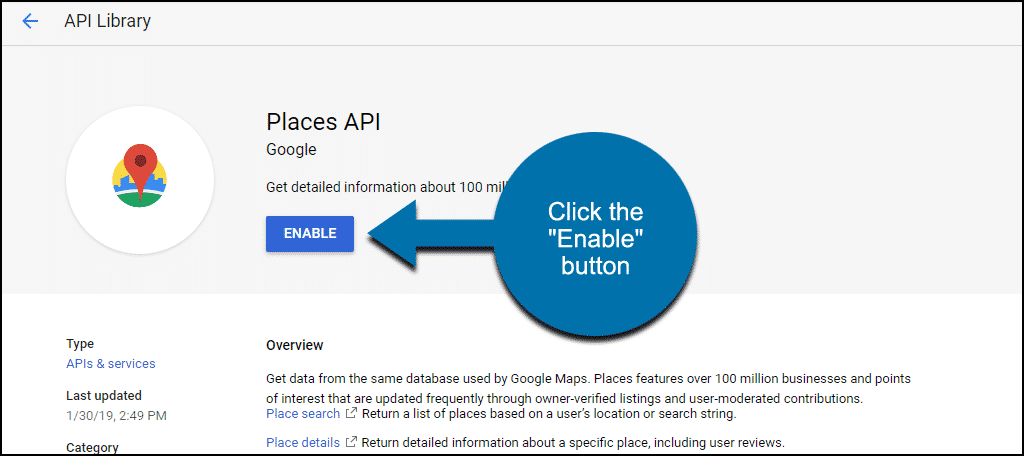
Click the “Enable” button.
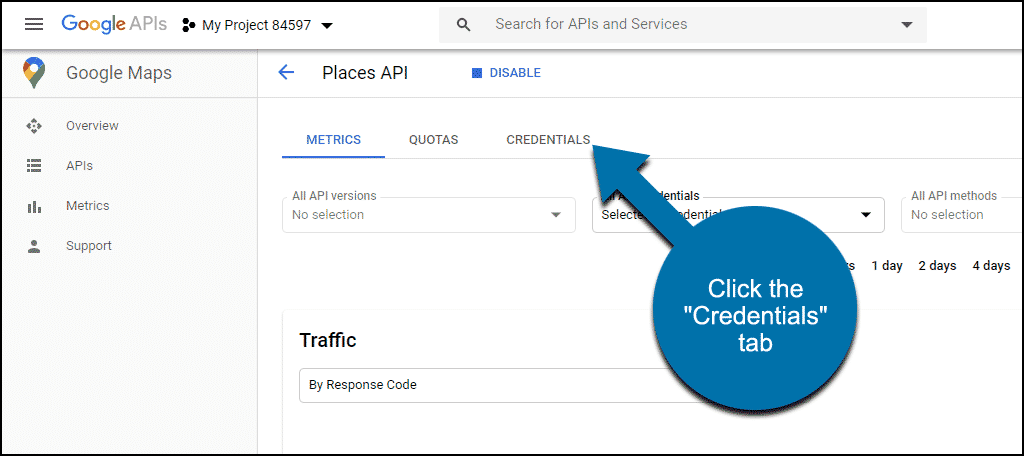
Now click the “Credentials” tab.
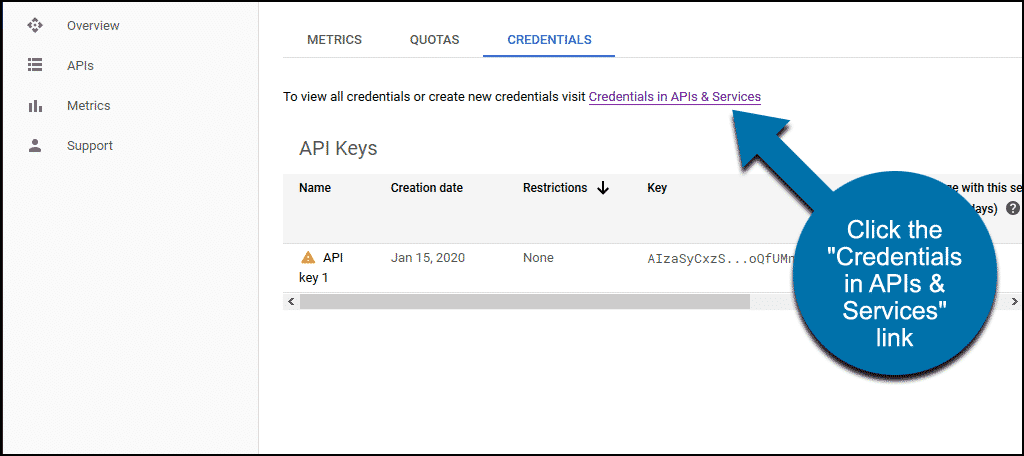
Click the “Credentials in APIs & Services” link.
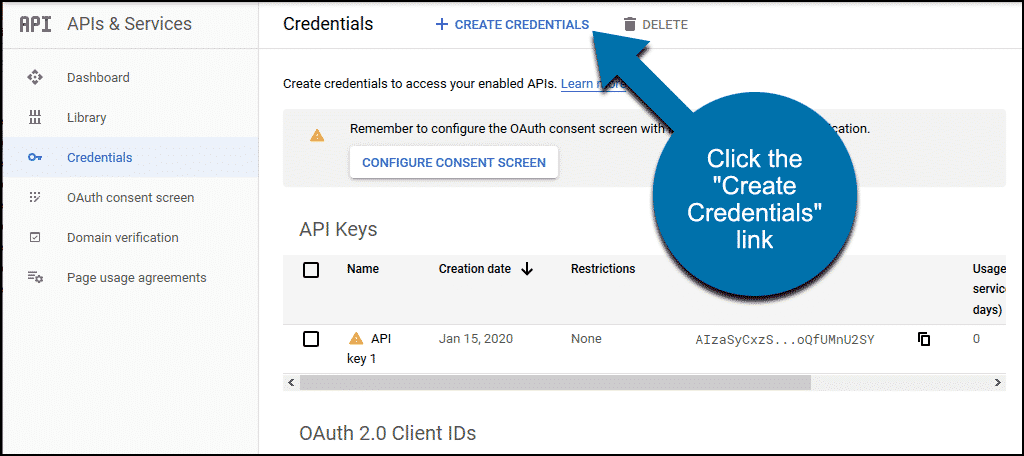
Click the “Create Credentials” link.
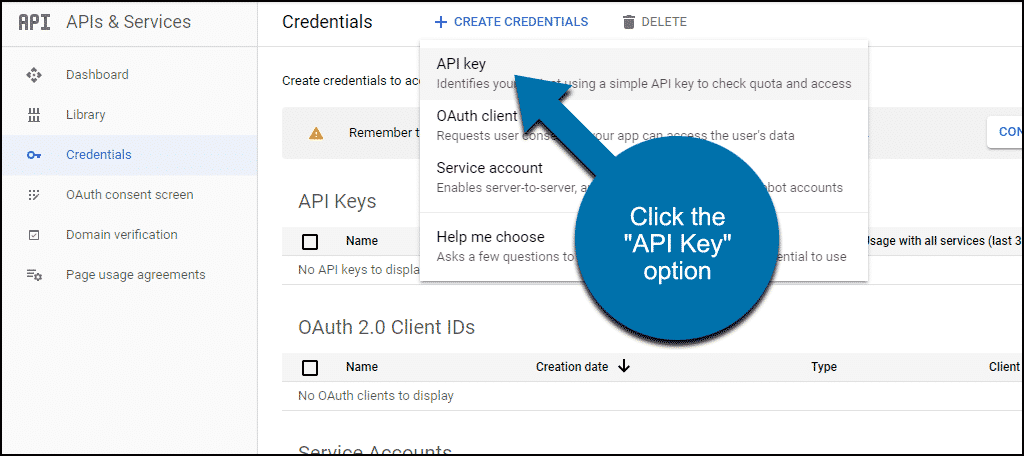
Finally, click the “API Key” option.
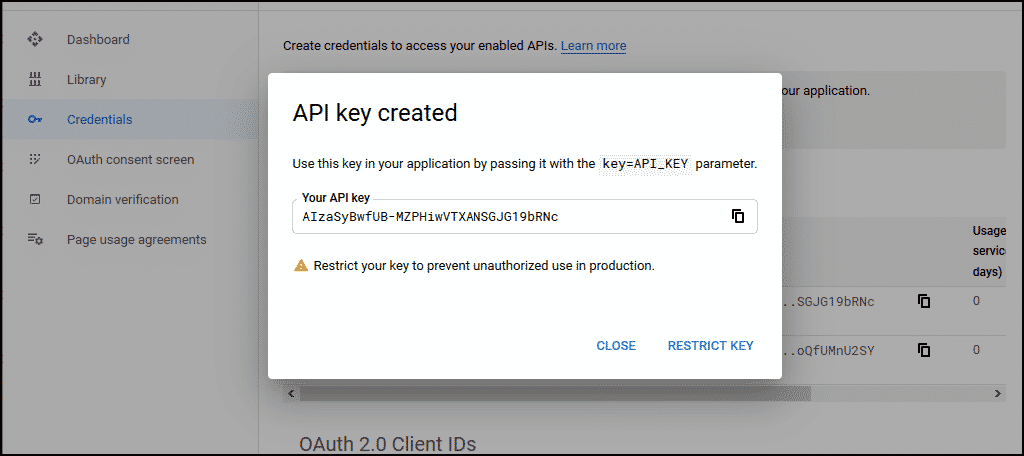
Your API key will be generated.
Note: Don’t restrict the API key. If you do, it won’t work with this plugin.
Copy the API key. We’re going to enter it into the plugin.
How to Add Your Google Places API Key to the Google Reviews Widget Plugin
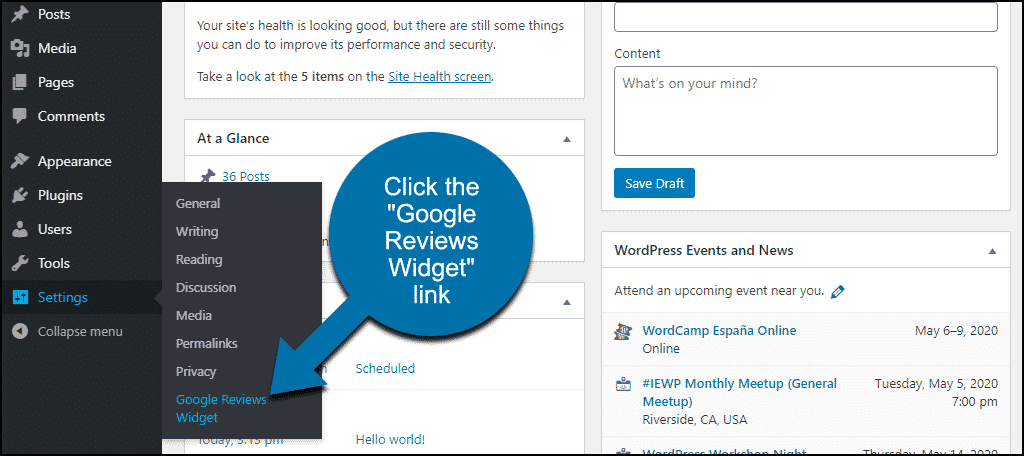
In the left column navigation of your WordPress admin panel, mouse over the “Settings” link and click the “Google Reviews Widget” link.
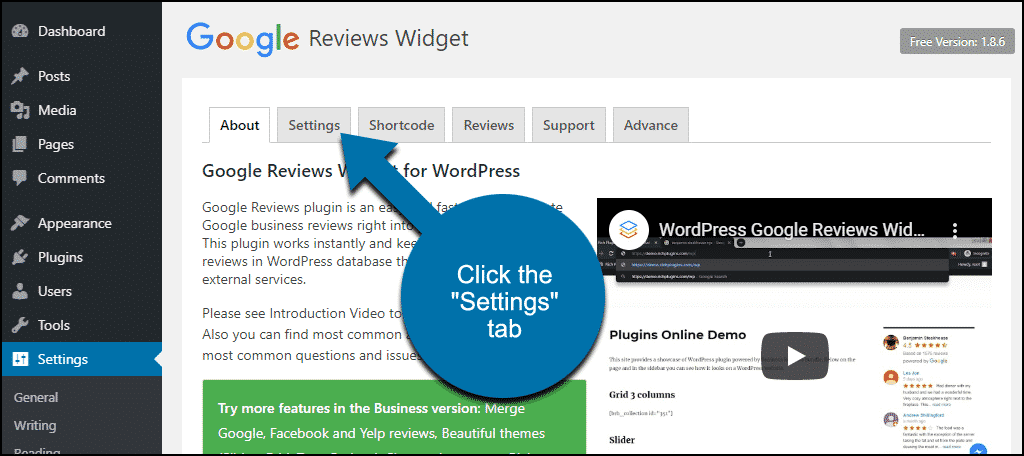
Click the “Settings” tab.
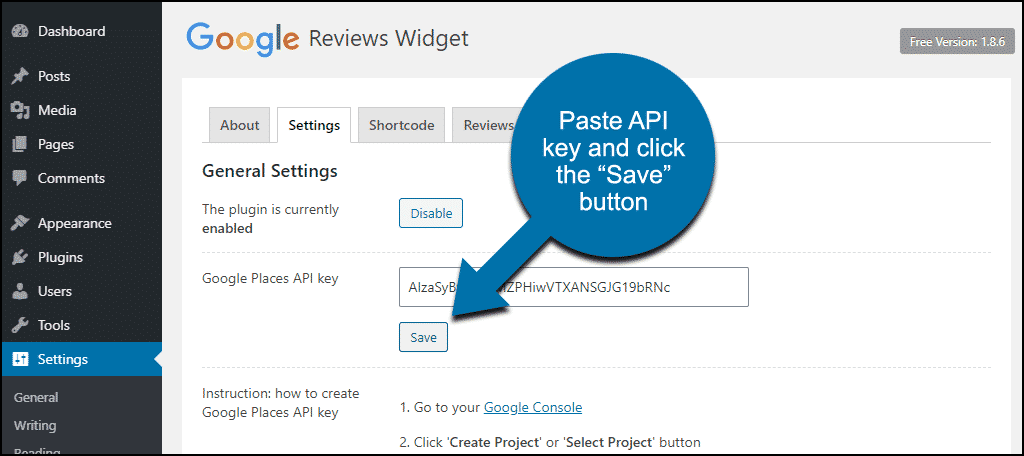
Now paste your API key into the “Google Places API key” field and click the “Save” button.
So far, so good? Okay, let’s grab the second piece of the puzzle.
Where to Find Your Google Place ID
In order for the API to know which business reviews to display, we have to provide what’s called a “Place ID.” The Place ID is connected to the Google My Business account.
Luckily, finding your Place ID is a bit easier than it was to get the API.
Go to the Google Maps Platform Place IDs page.
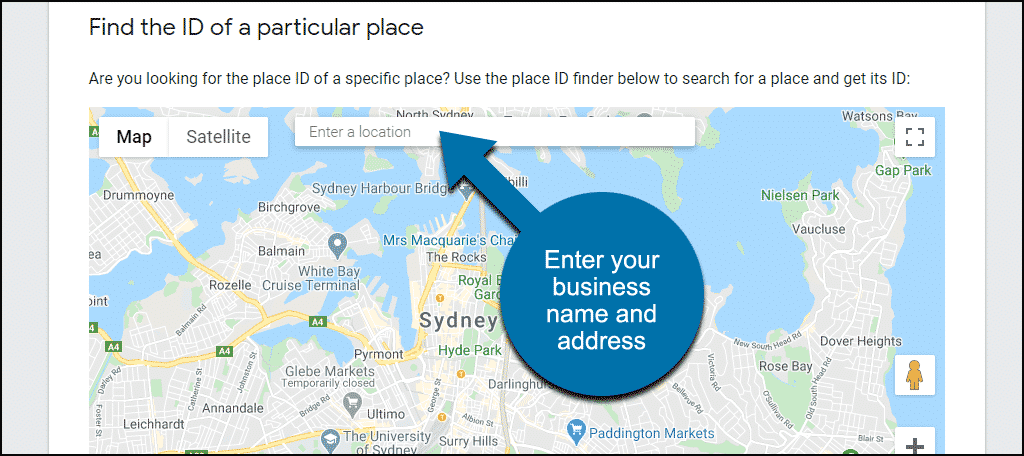
In the “Find the ID of a particular place” section, enter your business name and address.
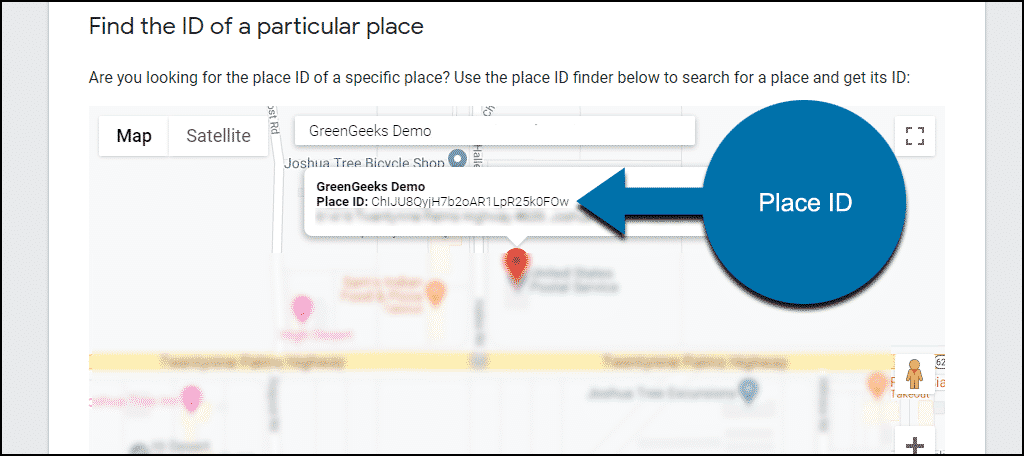
A popup will open, and the Place ID will be displayed.
Copy the Place ID.
Next, we’ll set up the widget to get the WordPress Google reviews up onto our site.
How to Add the Google Reviews Widget to Your Website
All right, now we’re finally getting down to business. The plugin creates a widget, but you can also use a shortcode to place the reviews anywhere on your site.
First, let’s look at how to set up the widget in WordPress.
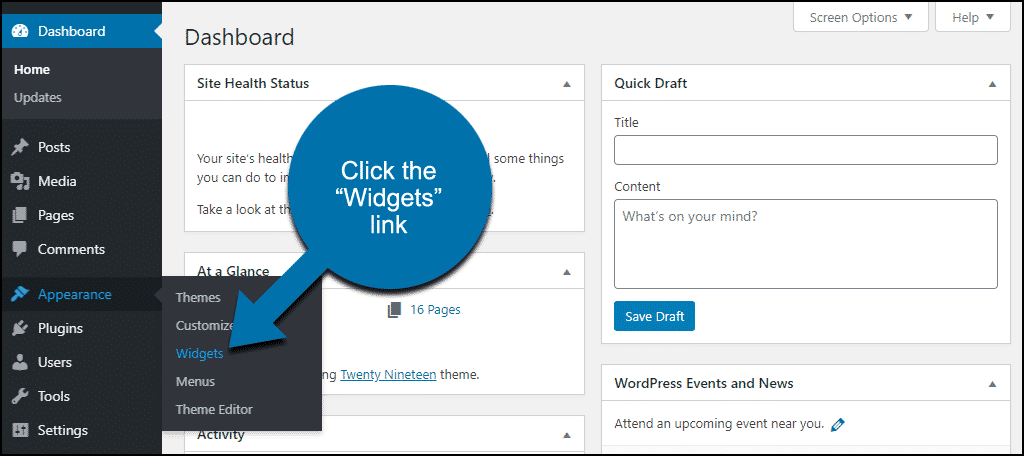
In the left column navigation, mouse over the “Appearance” link and click the “Widgets” link.
Scroll down until you find “Google Reviews Widget.”
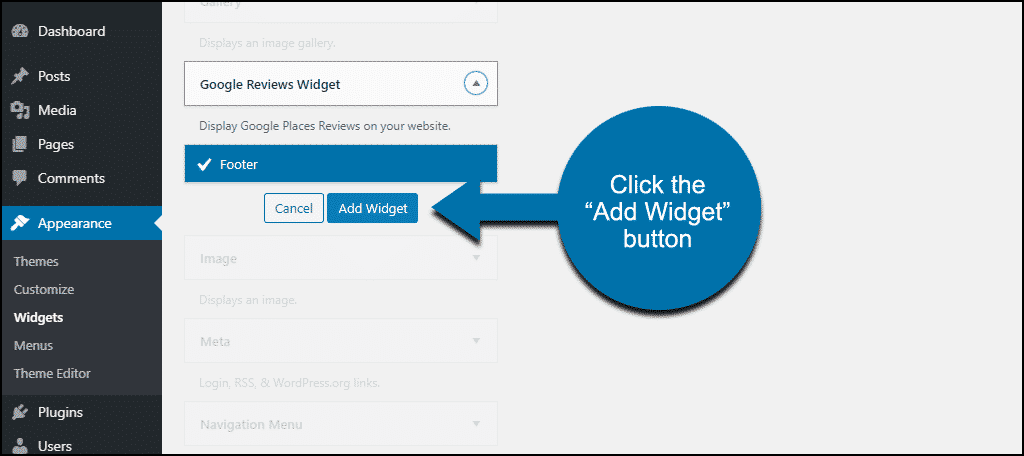
Click the widget and choose where you want it to appear. My demo theme only has a widget area in the footer, so that’s where the widget is going.
Click the “Add Widget” button.
Though, you can also just drag-and-drop where you want the widget to show.
The widget configuration screen will open up.
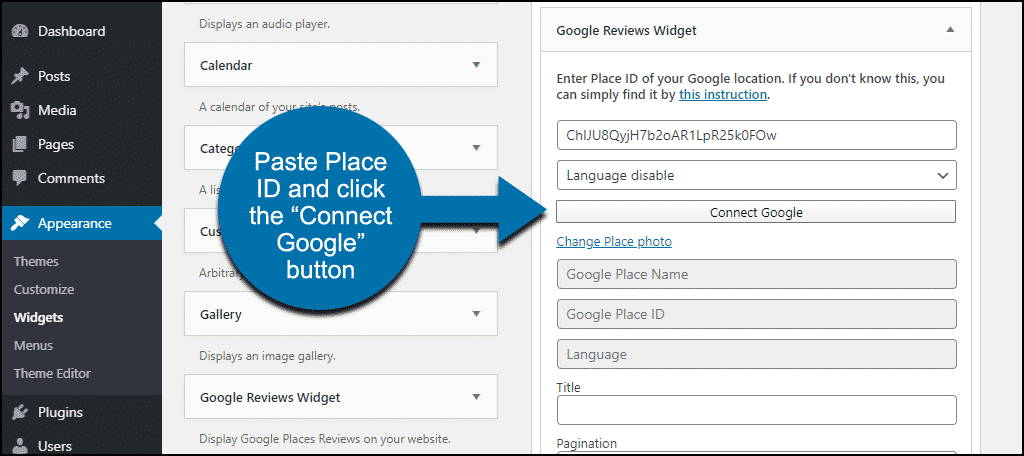
Paste the Place ID that we copied earlier into the “Place ID” field.
Click the “Connect Google” button.
Your Google Business info should be populated into some of the widget fields.
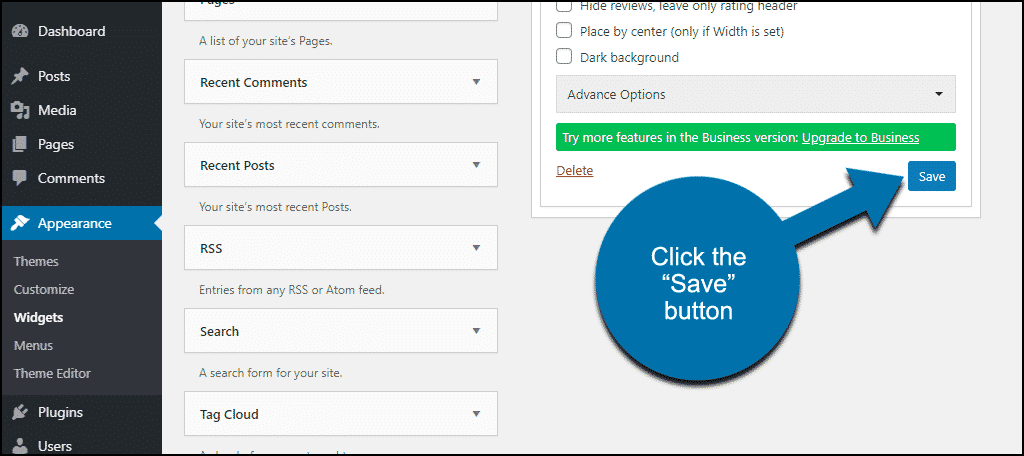
Scroll down and click the “Save” button.
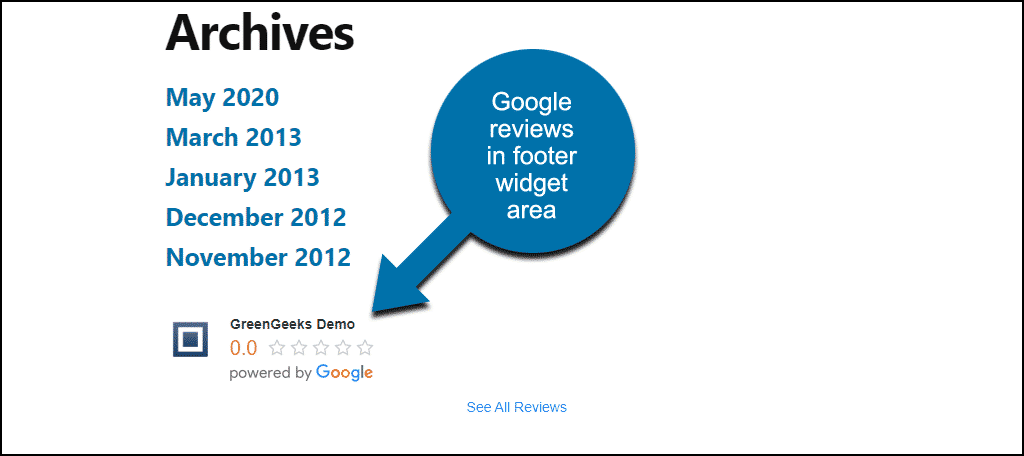
Now the reviews should be visible in the widget area you assigned them. In our case, the footer.
I added a review to the demo business shown here a couple of hours ago, but apparently, it isn’t public yet.
Let’s see if I can add the Place ID for some other business and display their reviews on my site…
Well, look at that, it works.
As you can see, several reviews are displayed. The plugin imposes a character limit, so the reviews look consistent. The number of reviews to show and the character limit is configurable in the widget settings.
An Important Note About the Google Places API Key
Unless you have a billing account on the Google Cloud Platform, you’re limited to one API query per day. I know that’s inconvenient when you just want to test (or demonstrate) a plugin like this one.
But you might consider setting up a billing account for Google Cloud. In most cases, you won’t incur any charges.
If you’re thinking that Google APIs used to be free to use, you’re right. And for most of us, they are still free. Because when you add billing information to a Google Cloud account, you get $200 free usage of the Places API every month. (That $200 also applies to Maps and Routes. And you get a $300 Google Cloud Platform credit that’s good for 12 months.)
But, of course, to access those credits, you have to have a payment method attached to your Google account. There’s no way around it now if you want to use the Google APIs.
According to Google, “Based on the millions of users using our APIs today, most of them can continue to use Google Maps Platform for free with [the $200] credit.” So adding a payment method probably won’t result in any charges unless you’re running a large or very busy site. In which case, you’d have to admit that it’s reasonable to pay for access to an API.
How to Display Google Reviews Using a Shortcode Rather Than a Widget
If you want to display your reviews outside of a widget area, you can do it using a shortcode.
In the left column navigation of your WordPress admin panel, mouse over the “Settings” link and click the “Google Reviews Widget” link.
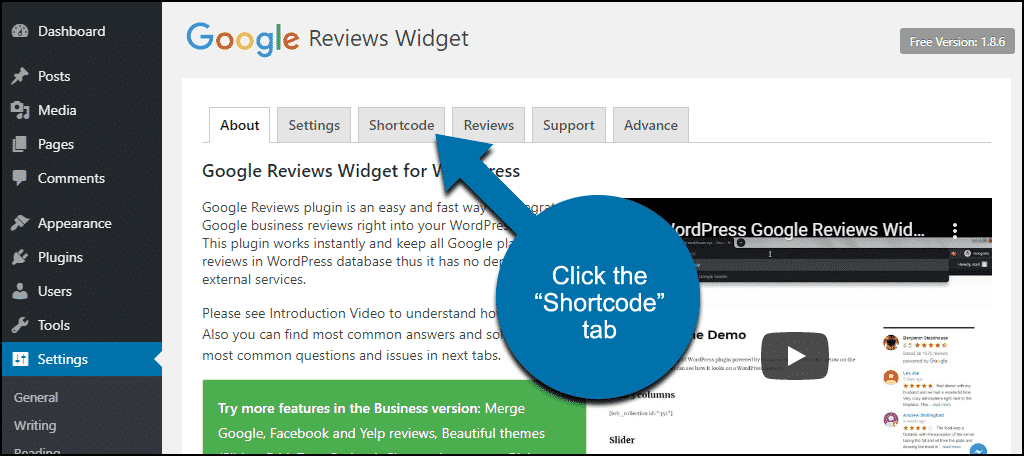
Click the “Shortcode” tab.
As you can see, the set up is similar to what we did for the widget.
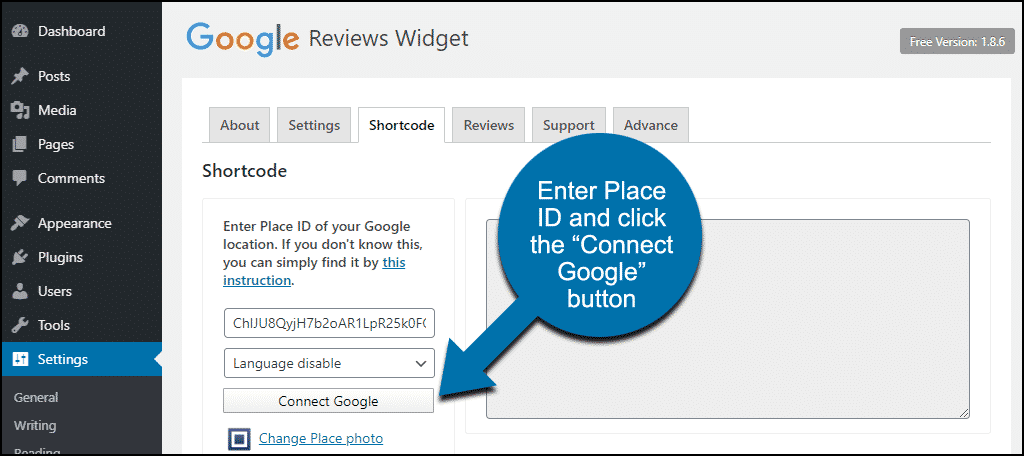
So to generate a shortcode, enter your Place ID into the “Place ID” field.
Click the “Connect Google” button.
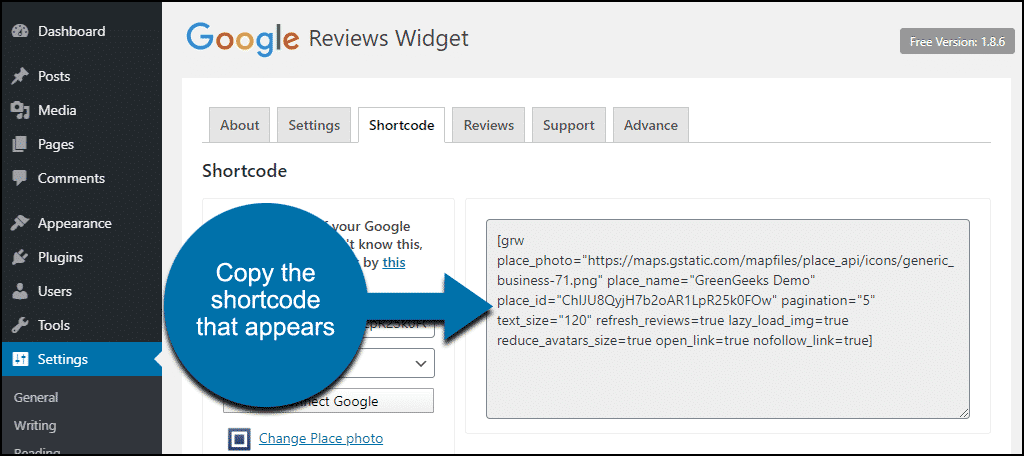
The shortcode (which is pretty long in this case) will be generated in the box on the right.
Copy the shortcode.
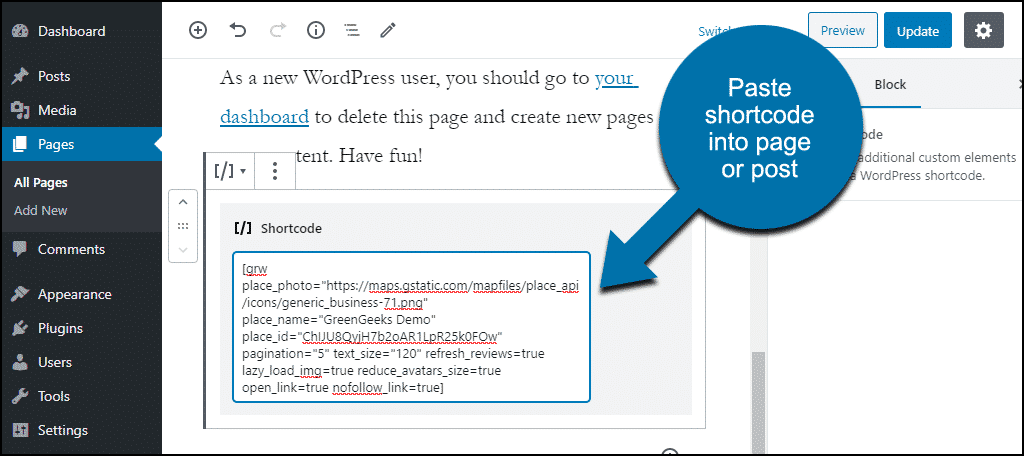
Create a new page or post or open an existing one.
Insert a shortcode block and save or update.
If you don’t use the WordPress Gutenberg editor, just paste the shortcode like any other text using the “classic” editor.
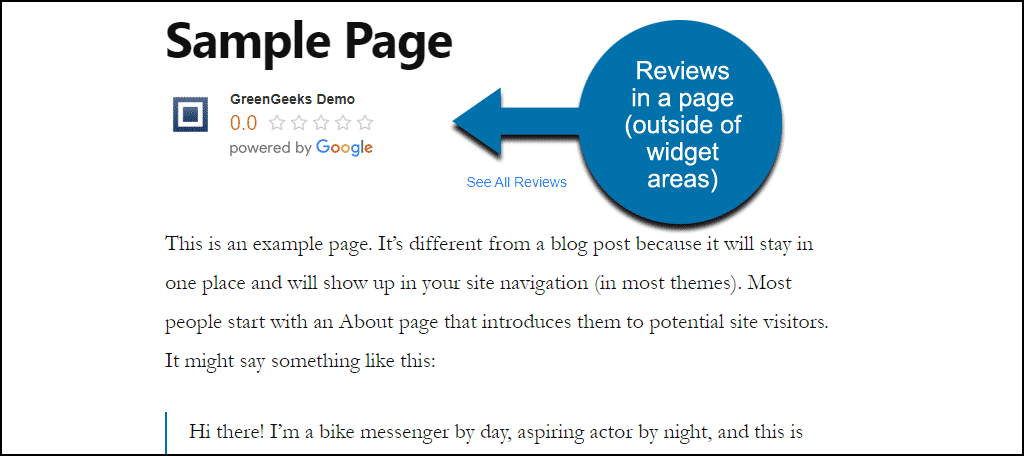
Now the review section will be displayed on the page or post.
That’s Not All the Plugin Can Do
But wait, there’s more! If you like the way the plugin works, they also make versions for Facebook and Yelp reviews.
If you really like the plugin, there’s also a paid version that gives you access to more features. (For all three review sites, Google, Facebook, and Yelp). The premium version doesn’t limit the number of reviews displayed, and it generates some structured data markup.
But maybe the best feature is the ability to add a button so visitors can leave reviews from your site.
What Happens if You Uninstall the Google Reviews Widget Plugin
If you uninstall the plugin, widgets, pages and posts that used the plugin will be affected.
- The widget created by the plugin will be deleted.
- The plugin shortcodes will stop working, so the shortcodes themselves will be displayed anywhere they were used.
Google Is Your Friend. Most of the Time.
My girlfriend just walked past the desk here and asked me what I was working on today. I told her it was an article about a Google review widget for WordPress, and she rolled her eyes.
I had to get an API from Google once; it was impossible! I was clicking around and guessing.
Sometimes you just have to click around and keep guessing until you find it.” Hopefully, this article took the guesswork out of finding the data needed to set up the Google review plugin widget. 😉
In fairness to Google, they do offer about a million products and services. There’s no way to make everything easy to find in that kind of ecosystem. But you’ve got to wonder about the complexity of just about everything they offer sometimes.
I just received an email that says, “Google Cloud Organization is now available for your domain,” and I’m not sure I even want to know what that is. Do I need it? Don’t I already have it? It’s hard to tell with Google sometimes.
And we talked about the payment method requirement being a downside to using Google APIs. It’s up to you to decide whether the upside is worth it. I believe it is, but then I don’t make enough use of Google APIs to have to pay for them.
Your mileage may vary.
Reviews Give Your Business Credibility and Promote Trust
Reviews are good for your website SEO. Especially star reviews, which can get picked up and shown in Google search results. So the advantages of including your reviews on your site are many.
SEO aside, reviews tend to increase trust. In fact, 84% of us trust online reviews as much as we do personal recommendations. And also keep in mind how many people trust elements like Facebook reviews as well.
This means you may want to consider alternatives to engage the audience.
You can’t beat consumer trust when it comes to your business. So get your reviews onto your site as soon as you can. They don’t have to come from Google. Use any site or service where customers can review your business.
The methods to get the reviews onto your website will vary. But what’s important is that the reviews are there, and visitors can see them.
Have you set up your Google My Business account? (If not, why not?) Do you display reviews on your website? Let me know in the comments. I’d love to hear from you.

