Images are one of the most effective ways to engage an audience on the Internet. Graphics play such an integral role online, services like Snapchat and Instagram are able to thrive. What about adding a gallery carousel to your WordPress website?
A gallery is great to show off products, services, or your own artwork. They are instrumental in many online portfolios, especially for graphic designers.
In this tutorial, I’m going to show how to add a simple carousel to WordPress which may have a big impact on your guests. All it takes is the right plugin to boost the functionality of your content.
How to Create an Image Gallery Carousel in WordPress
By default, WordPress comes with an easy and basic gallery. However, it doesn’t have a lot of the pizzazz and flair you might want to put into your posts and pages. For this, I’m going to use WordPress Carousel.
This plugin comes with a modern design for websites, several methods for showing off images, and most importantly, it’s fully responsive. What I like is the slew of tools that come with it.
- Drag and Drop Interface
- Autoplay Toggle
- Touch Swipe (Mobile)
- Infinite Looping
- Support for Custom CSS
- Supports Images and Products
Another thing to note is how this carousel makes use of WordPress shortcodes. Once you create the carousel, it will generate a shortcode that you can place on any post, page, or text widget. Thus, giving you complete control over its placement.
Step 1: Install WordPress Carousel
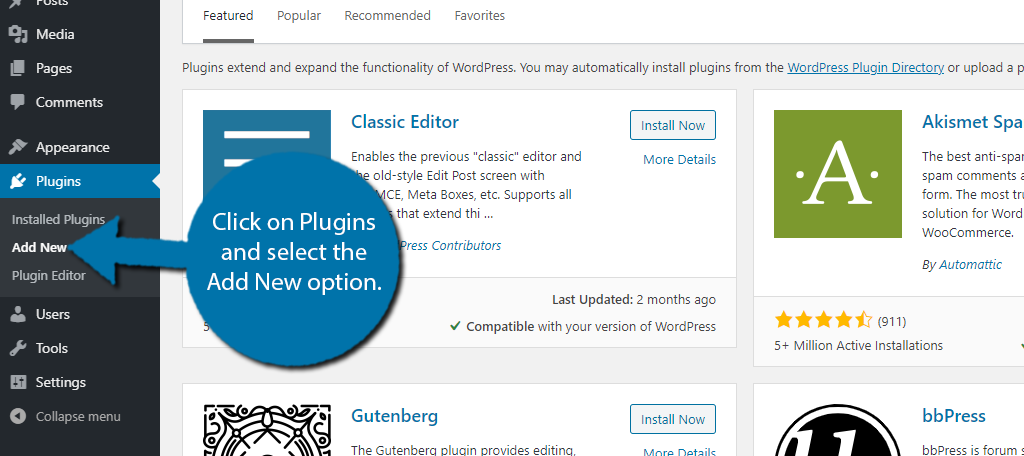
Let’s start by clicking on Plugins and selecting the Add New option on the left-hand admin panel.
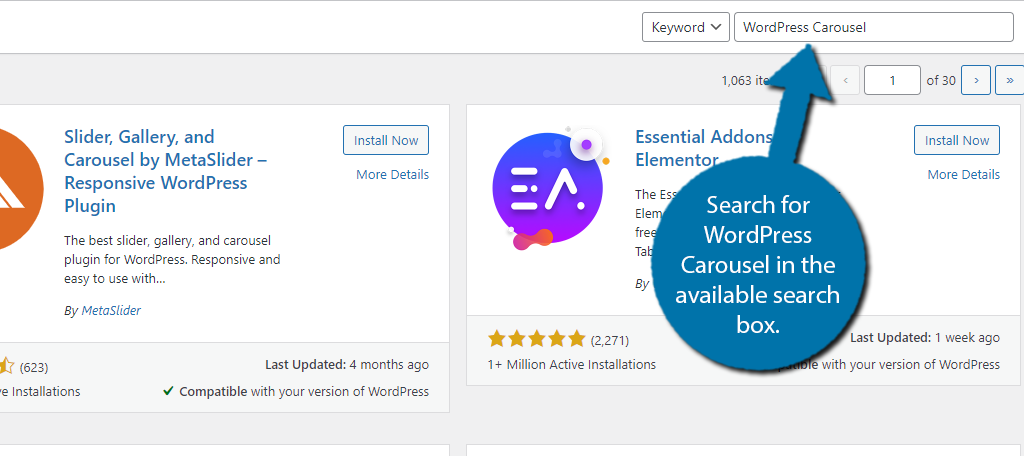
Search for WordPress Carousel in the available search box. This will pull up additional plugins that you may find helpful.
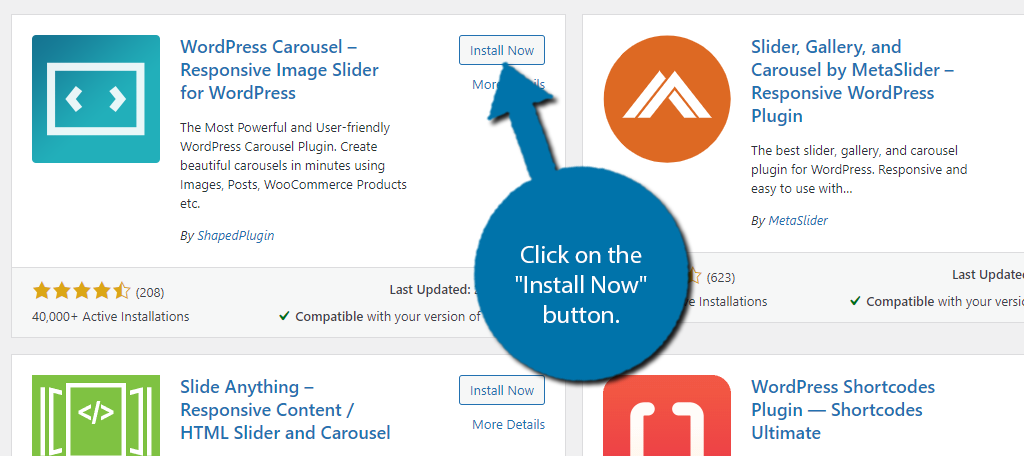
Scroll down until you find the WordPress Carousel plugin and click on the “Install Now” button and activate the plugin for use.
Upon activation, you will be presented with a help video to get started. This gives you a full overview of the plugin and is worth the watch.
Step 2: General Settings
In truth, there are not many settings and everything is active by default, but let’s go over a quick run down before we begin.
Click on WP Carousel and select the Settings option.

The first option is a small check box that will delete all of the plugin data if you choose to delete the plugin. This is recommended if you never plan to use it again, but you probably don’t need to worry about this at the moment.
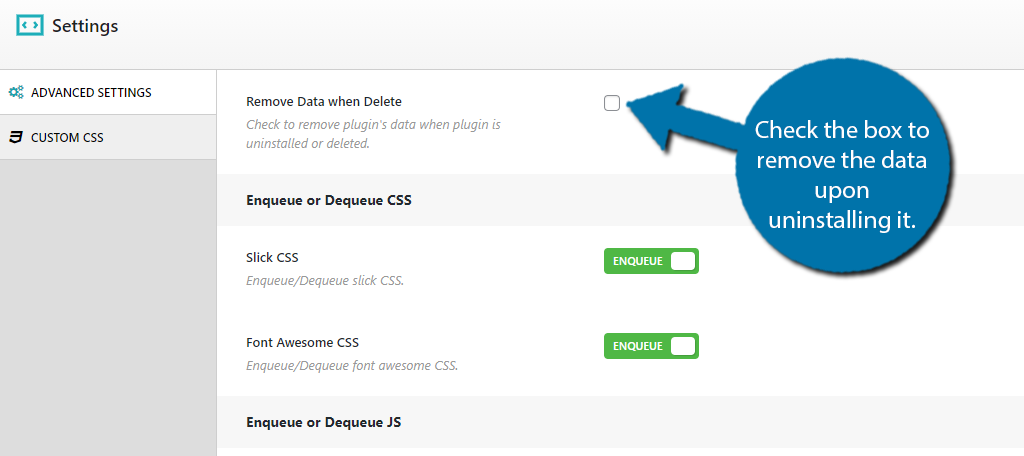
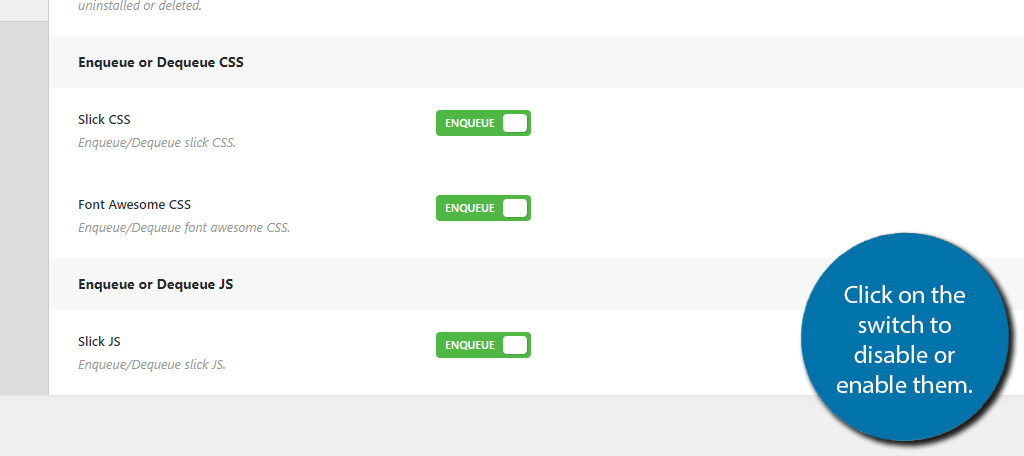
The next three options are all on by default, they enable options for CSS and JS code. There’s no disadvantage to leaving them on, even if you do not plan to use them.
Simply click on the switch to disable or enable them.
This is also where you can add custom CSS. If you currently use some on your website, there’s no doubt that you are going to want to add some here to match the layout of your pages.
To do so, click on the Custom CSS option.
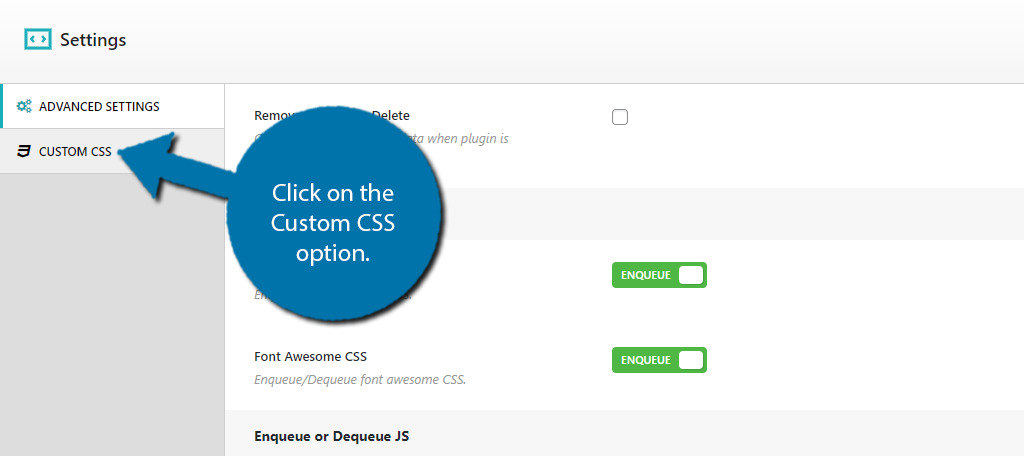
Like most plugins, you will have a small text box that you can use to add additional CSS to the plugin. Add it and click on the “Save” button.
Either way, you’re ready to start building.
Step 3: Choose carousel Type & Add Images
Building a carousel is really straightforward. You select what type of carousel it is, add that type of content to it, and customize a few settings. It doesn’t get much easier than this.
Click on WP Carousel and select the Add New option.
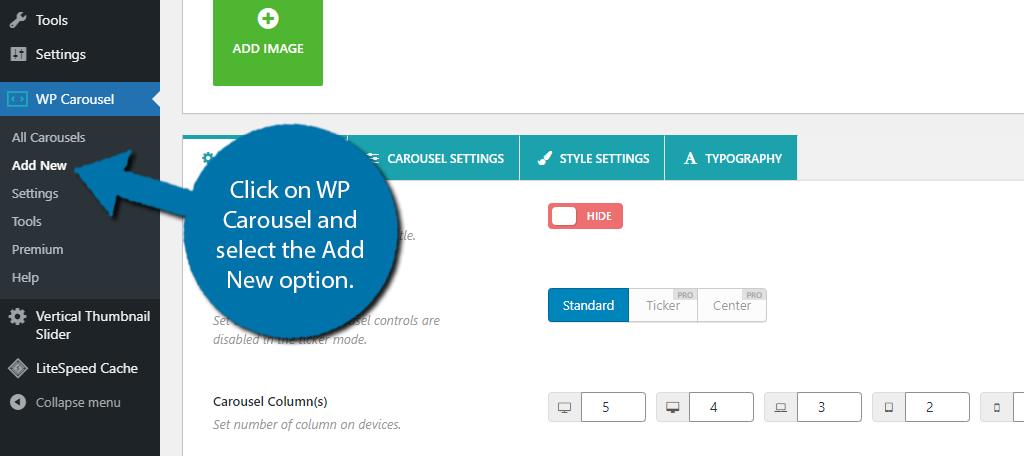
At the top, you can add a title. Since you can have multiple carousels, I highly encourage you to be descriptive. This way, you can easily find the carousel later should you want to make changes.
The first real option is to choose the carousel type.
You can choose an Image, Post, or Woo Product option in the free version. If you have the pro version, you can also choose the Content and Video options.
For this tutorial, we are using an image carousel.
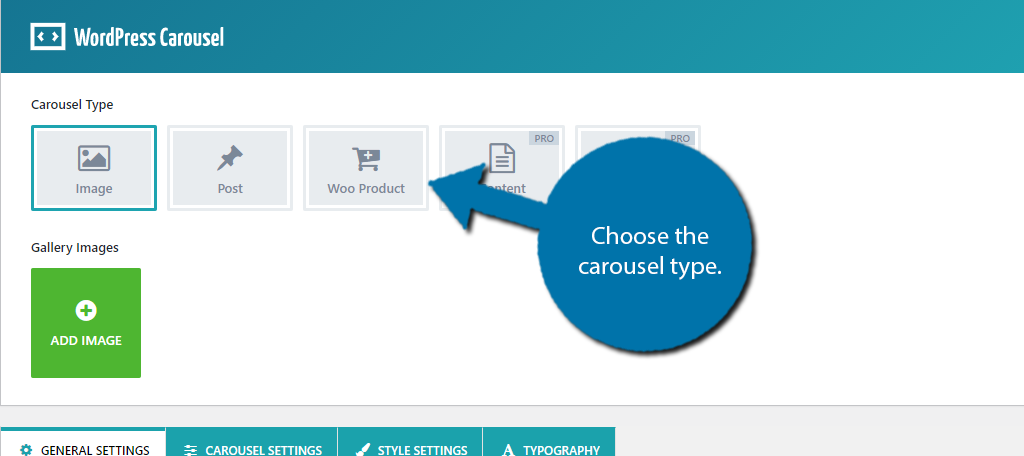
Below this, click on the Add Image button to choose files from your media library. You can also upload new ones as well.
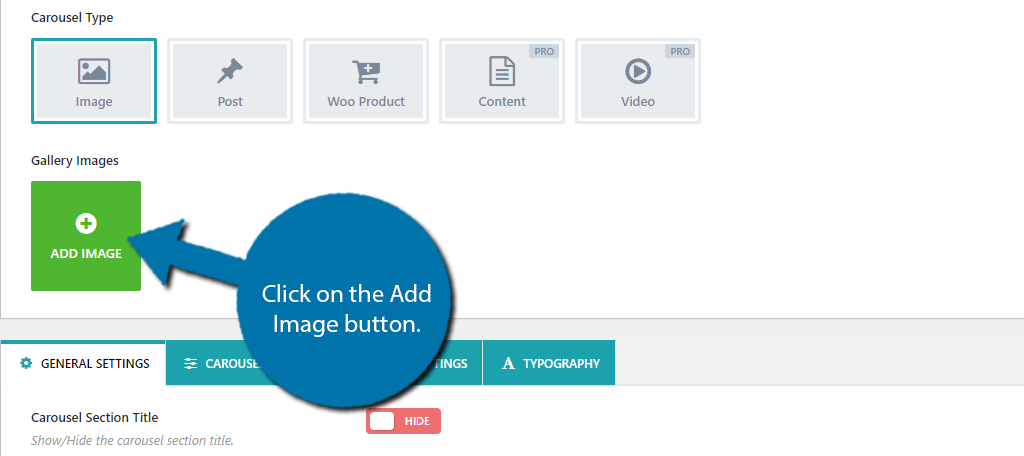
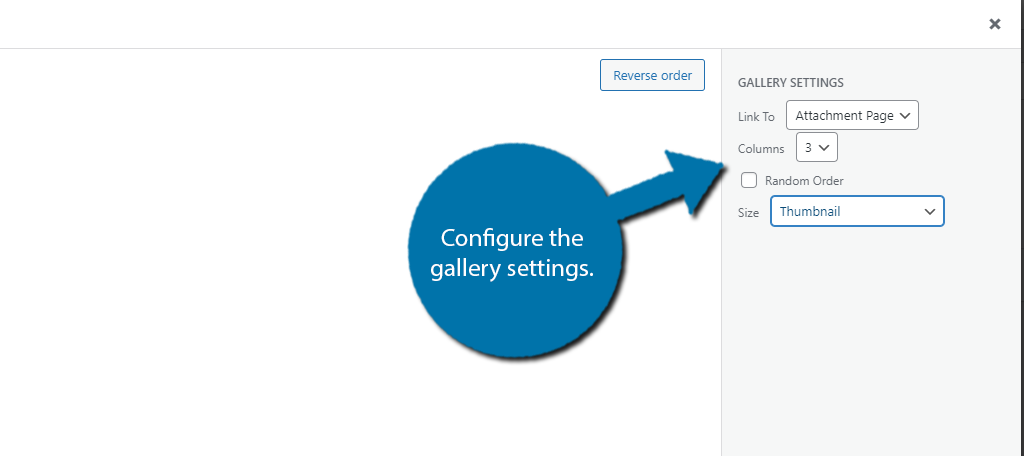
You will have the option to configure a few options like what the image links to, the number of columns, and the size of the image (in terms of WordPress sizes).
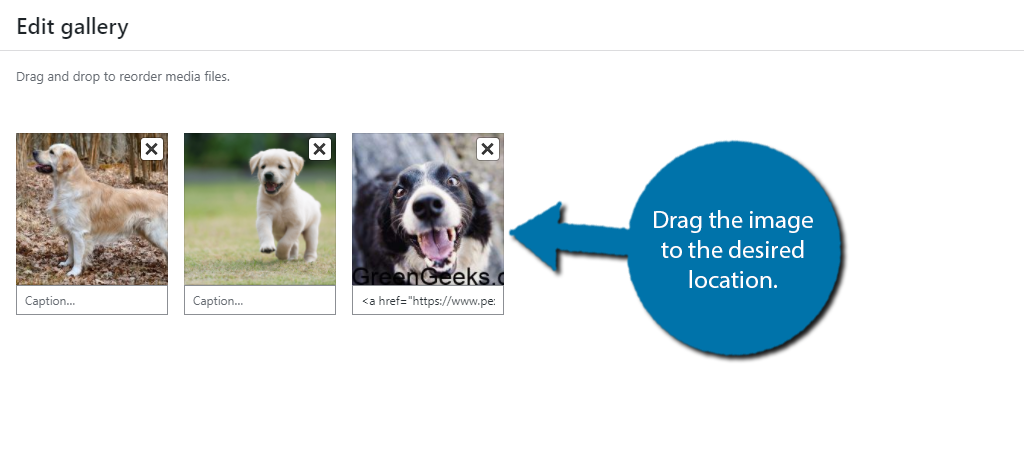
Repeat these steps to add multiple images to the carousel. Once, you have multiple images, you can actually rearrange them by dragging them to the desired location. You can also delete them by click on the black “X” in the corner.
Step 4: Carousel Settings
Below the image section, there are more settings for that specific carousel, which is why they are not in the previous settings section.
It’s divided into four tabs: General Settings, Carousel Settings, Style Settings, and Typography (Pro Version Exclusive).
General Settings
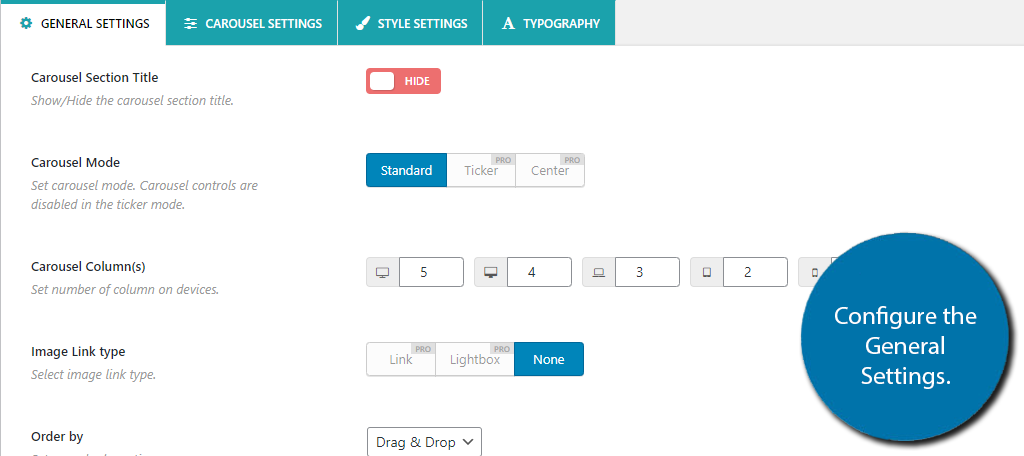
The General sections include a few simple settings such as:
- An Option to Hide the Title
- Carousel Mode
- Number of Columns on Each Device Type
- Image Link Type
- Order By
- Preloader
I would say the most important option is the columns per device. This is to help mobile and tablet users that have limited screen space. This can make the gallery carousel look weird or lacking on some devices if it is not set up properly.
Carousel Settings
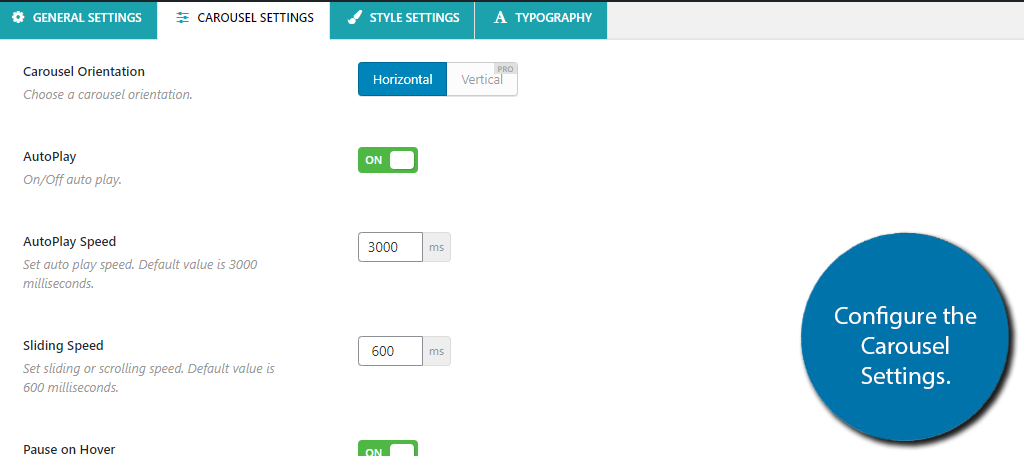
The carousel settings deal with the way the carousel behaves. This includes things like the speed of the carousel, how visitors navigate, pagination, and a few other settings.
The settings are pretty simple to understand, so it shouldn’t be a challenge to go through them.
Style Settings
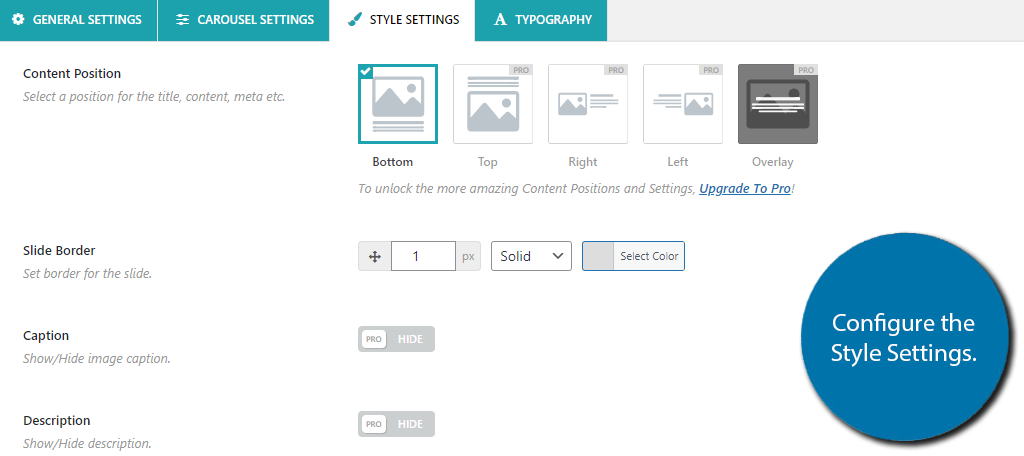
This section is all about the appearance of the carousel. However, the styles are locked behind the Pro version, thus you only have one choice.
Though, there are other settings like the border and images settings that you can configure.
Typography
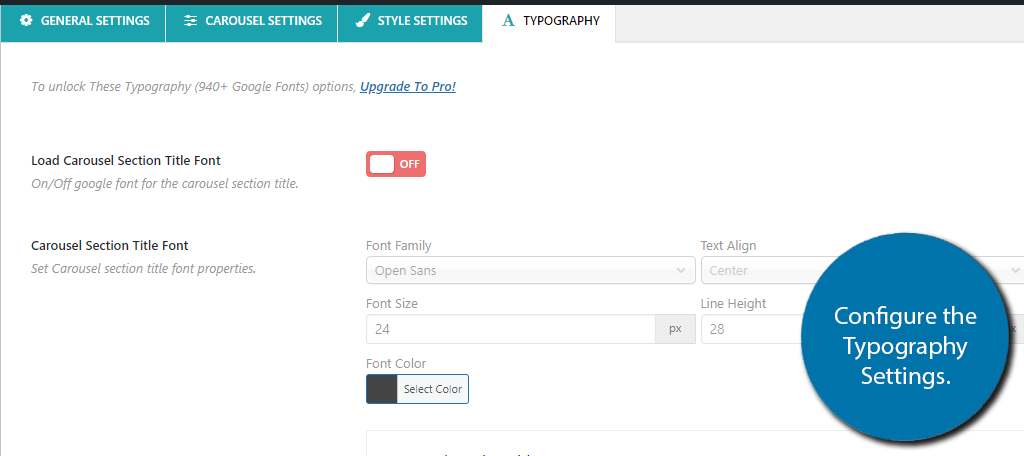
The typography settings deal with the font presentation on the carousel. This includes the font type, size, alignment, and color. It’s pretty straightforward, but there’s one problem, the settings are only for the Pro version.
Remember to save any changes you make.
Step 5: Display the Carousel
With the carousel all set up, all that’s left is to actually display the carousel in WordPress. This is easy to do with shortcodes.
At the bottom, you will find the shortcode and the PHP code.
Copy the shortcode.
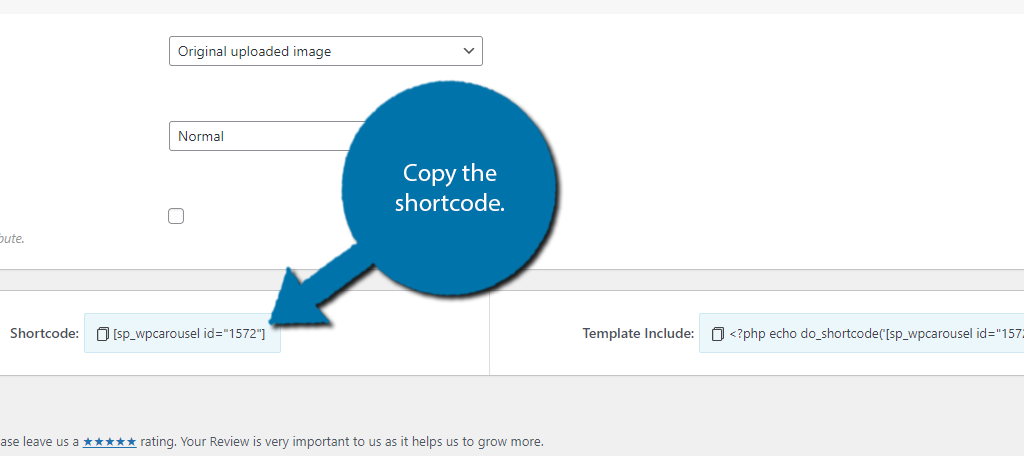
Go to any post, page, or text widget and paste the shortcode. After doing so, save the changes and view the gallery carousel on your website.

If you’re happy with the appearance, congratulations, you are done. If not, you can go back to the settings and begin editing them to make it look perfect. It’s easier with the carousel in use because you can check what it looks like once you save the changes.
Remember you can create multiple carousels for different content, so take advantage of it.
Galleries Galore
This is just one example of an excellent plugin. There are a ton of excellent carousel and image gallery plugins available in WordPress. In fact, this might be the most numerous plugin category. That said, WordPress Carousel is among the best.
It’s simple to use, full of customizable options, and fully responsive.
What kind of gallery plugin do you use on your website? Did you find the plugin easy to use?
