Having a guest author in WordPress is great and it offers benefits to both sides. In fact, the best way to describe it is as a symbiotic relationship. They get a link back to their website while you get another article to pique the interest of readers.
But how do you add a guest author to WordPress without setting up an account or registration? If you want guests to come back and continue writing, most of them will want some kind of recognition.
In this tutorial, I’ll show you two simple ways of using WordPress to add an author without an account or website profile.
But first, you need to make sure you allow guest posts in WordPress. There are a few ways you can set this up, so it all depends on how you want external writers to create content for you.
Personally, I prefer using front-end types of forms. It’s easy to set up and lets you accept draft posts without the writer creating an account on your website.
The Benefits of Guest Writing
Guest writing is beneficial for both sides, for quite a few reasons.
For starters, the website a guest writer writes for gets new content. Let’s face it, regardless of what you may have heard, content is still king. The more you have the better and the higher quality it is is even better.
The person who does the writing always receives some type of compensation. Most commonly this is in the form of a link back to their website in a promoted fashion. Sometimes this may even include a shout-out on social media platforms. It’s a great way to grow quickly.
Other times, some guest writers will only work for a fee, but this is really only applicable on larger websites and for very recognizable writers.
Having other writers on your website also adds credibility to your own brand. After all, why would someone else be willing to write on your website if they didn’t believe in the name or quality of the site?
There’s no downside to guest writing.
How to Add A Guest Author to WordPress
Method 1: Using the Guest Author Plugin
Today, we’ll use the Guest Author plugin. It’s relatively new compared to others, but it’s a very simple system that doesn’t take much to include a guest author’s name as well as his or her URL.
It’s one of the quickest WordPress guest author plugins you can use.
Step 1: Install Guest Author
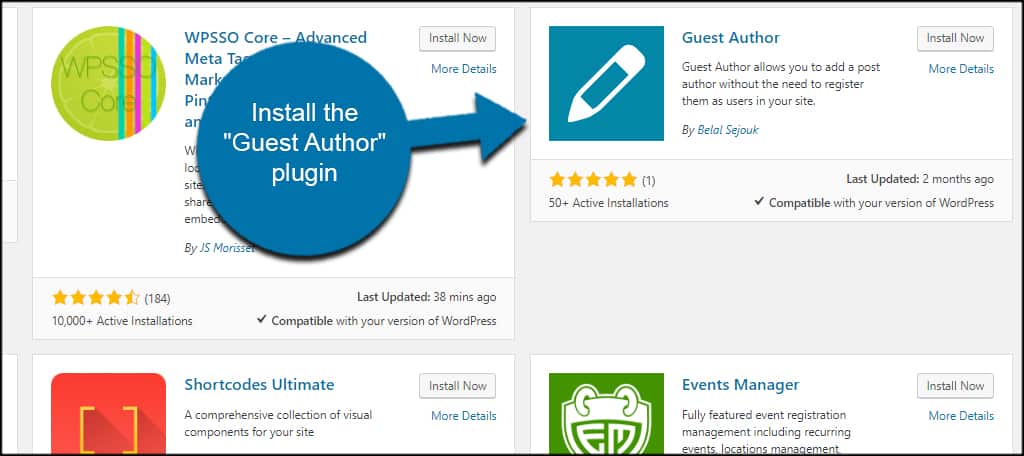
Install the “Guest Author” plugin in WordPress. Because so many plugins will show when searching for “guest author,” make sure you install the one by Belal Sejouk.
Step 2: Configure the Guest Writer
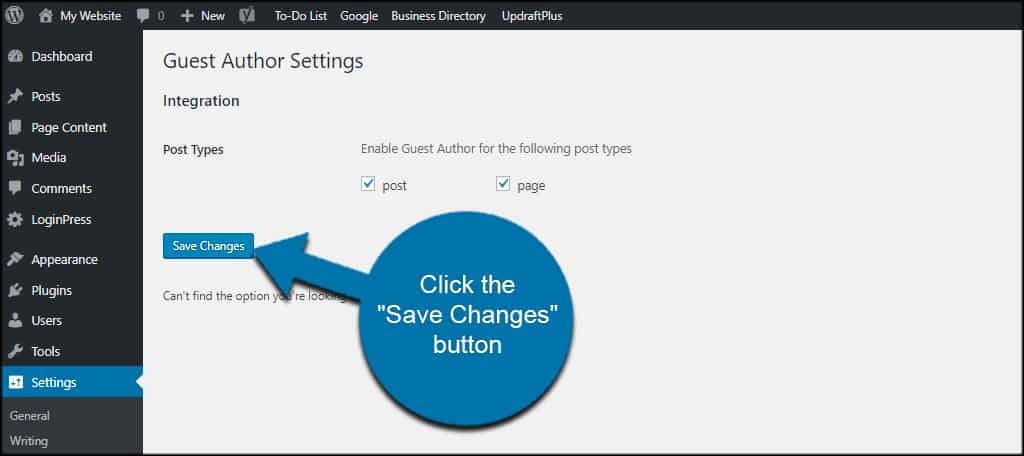
Go to Settings and click, “Guest Author.”

The only settings you can change are whether to show the tool in posts, pages, or both. This is all personal preference regarding how you want to operate the website.
For this tutorial, I’m going to leave them at default. This means I can modify the author on both pages and posts.
Click the “Save Changes” button if you make any modifications.
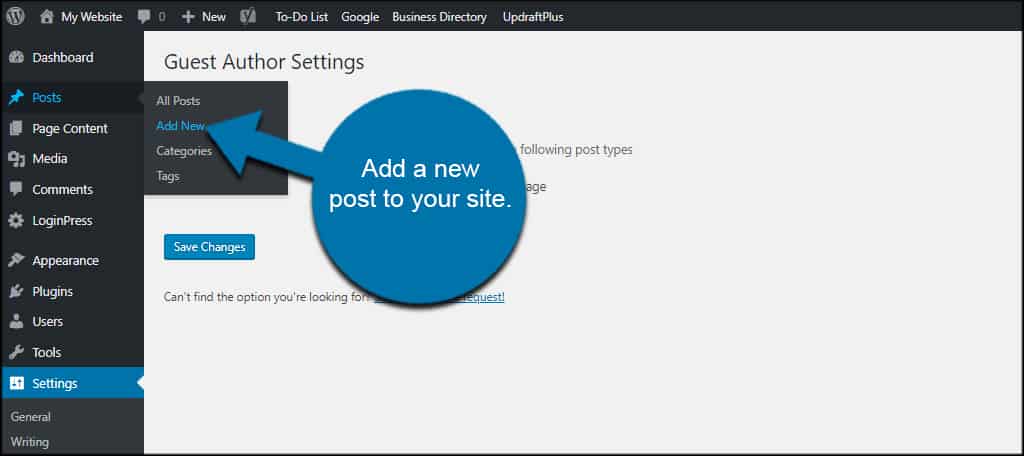
Add a new post to your site.
Go to the “Author” section by scrolling down the post. It may be one of the last things in the post creation screen.
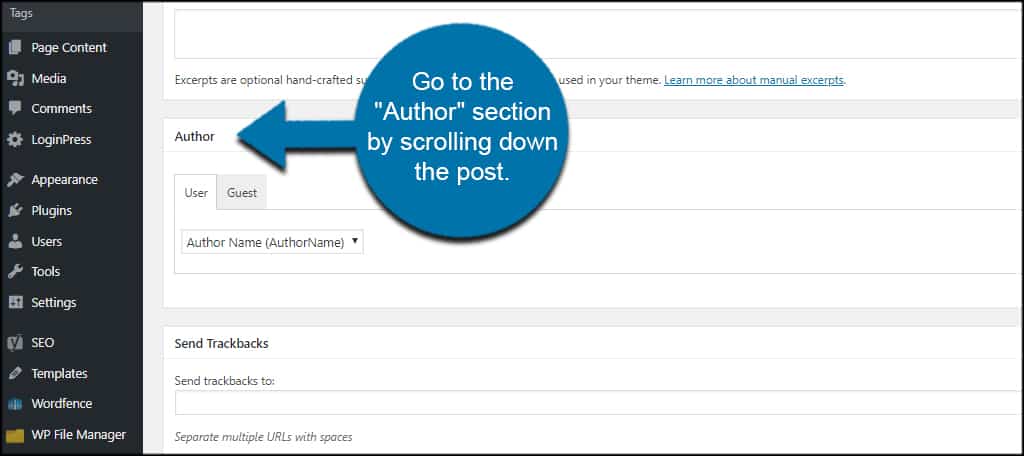
By default, WordPress adds the author to posts according to logged-in users. If the post isn’t from a guest blogger, you’ll want to keep this as default.
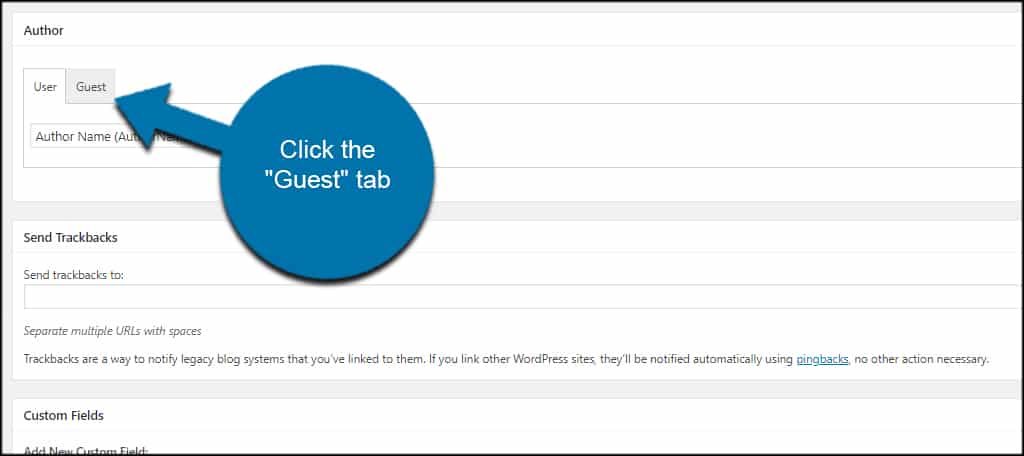
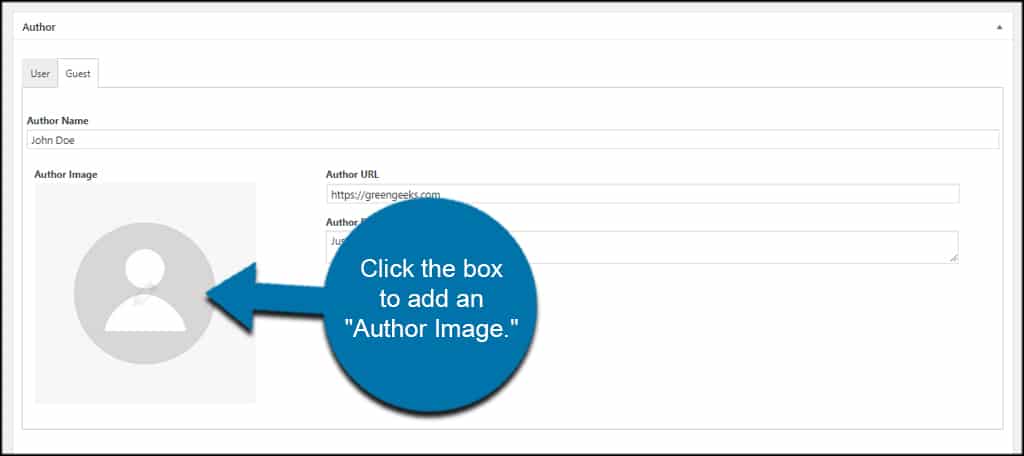
Click the “Guest” tab if you’re adding a guest author’s content.
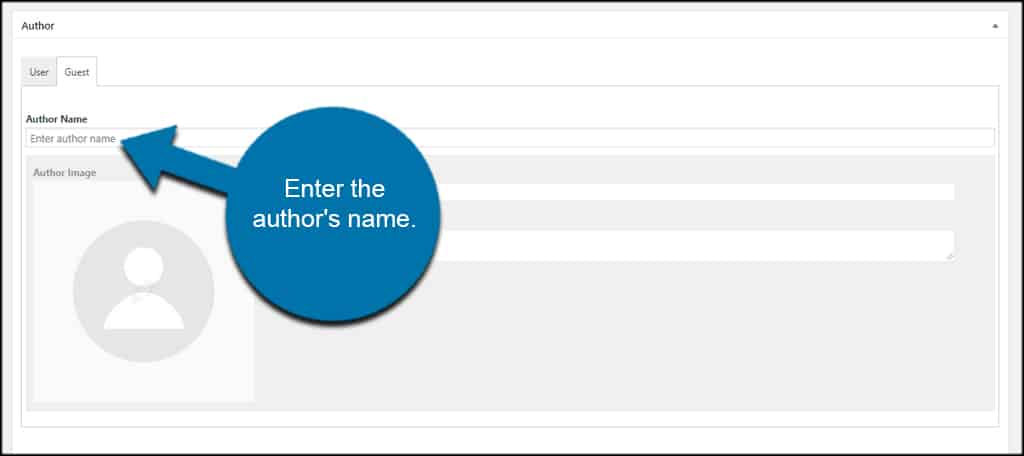
Enter the author’s name.
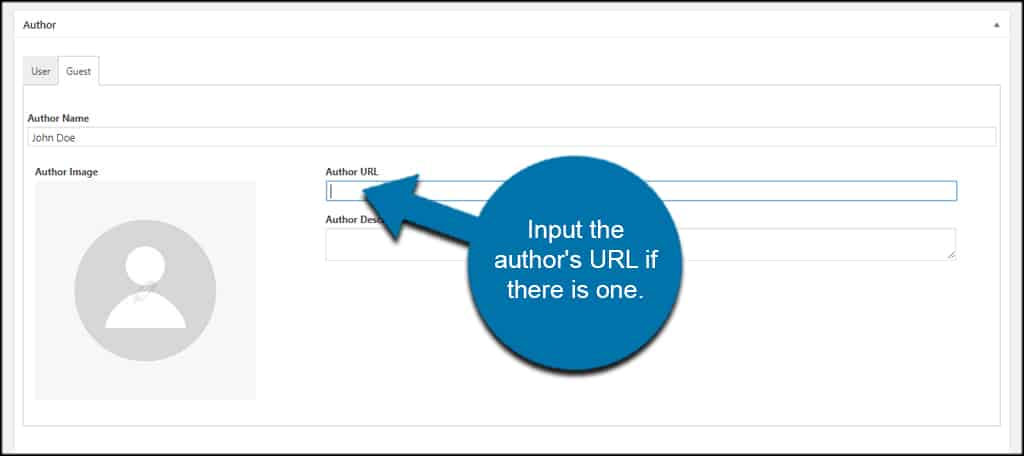
Input the author’s URL if there is one. This could be a website, social media profile or anything else the guest author wants to be associated with the name.
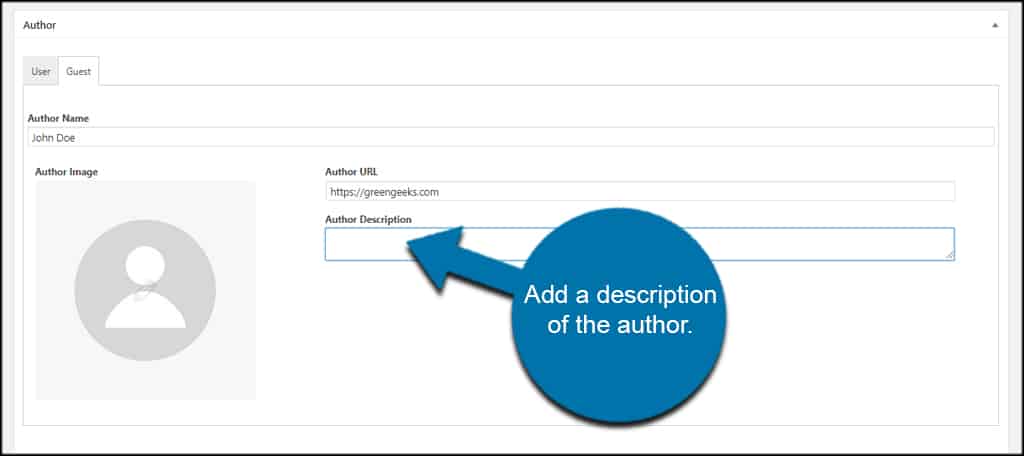
Add a description of the author. This is kind of like a short bio section.
Click the box to add an “Author Image.”
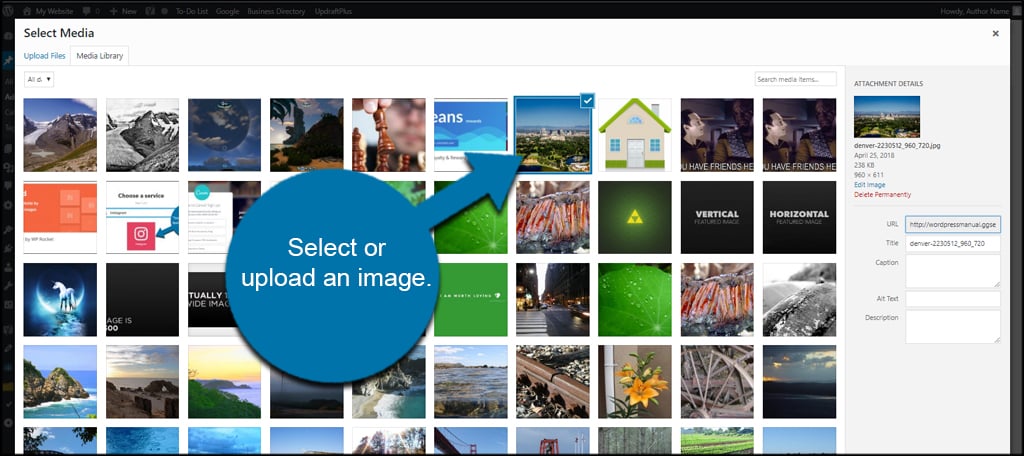
This will open your WordPress media library. Just select or upload an image like you normally would to the website.
Once you publish the post, the guest author box will appear.
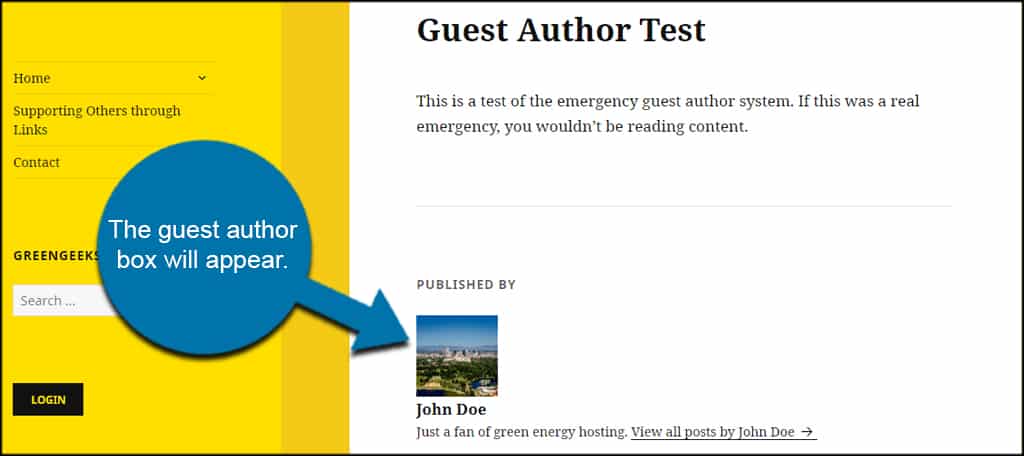
The URL of the author is attached to his or her name in the byline of the post. The name in the author box is not the link.
Known Issues
As this is a newer plugin, it’s still in development. Unfortunately, it doesn’t work well with various themes. For instance, the image does not appear when using the ColorMag theme. However, it works perfectly in the ColorNews theme.
So it’s a bit of hit and miss at the moment for support. However, you can modify the posts yourself to include the data in the theme.
Use the Custom Fields section in the post to fine-tune how the box appears.
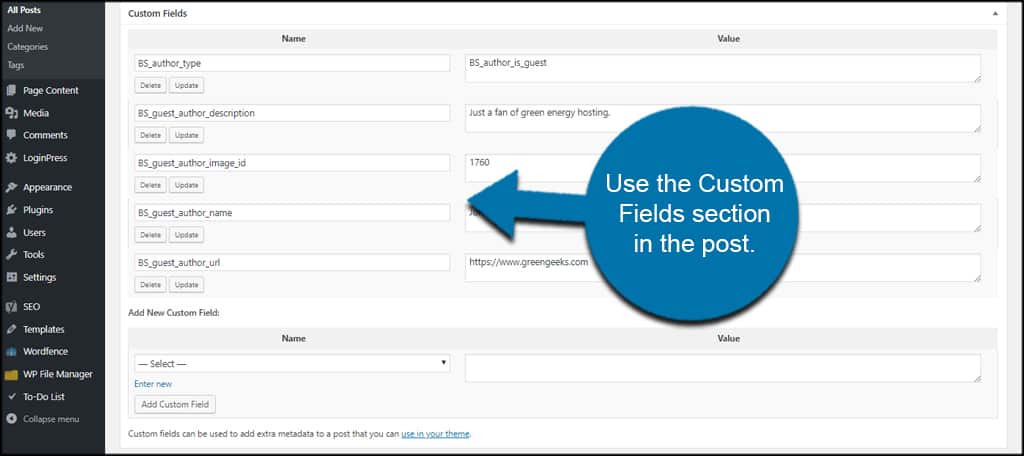
For instance, you may have to add the custom field for author images manually for your theme. You may also want to consider modifying the code of your theme to use the custom fields listed.
Method 2: Using Custom Fields and Manual Coding
The second method to set WordPress to add an author to a post is by coding it manually. You will need to use custom fields in order for this to work, though.
Edit your theme’s functions.php file. You can do this with FTP programs like FileZilla, using File Manager in cPanel, or through the WordPress editor. For the sake of this tutorial, I’m just going to use the cPanel option.
Step 1: Locate the Functions File
The first thing you need to do is locate your theme’s functions file.
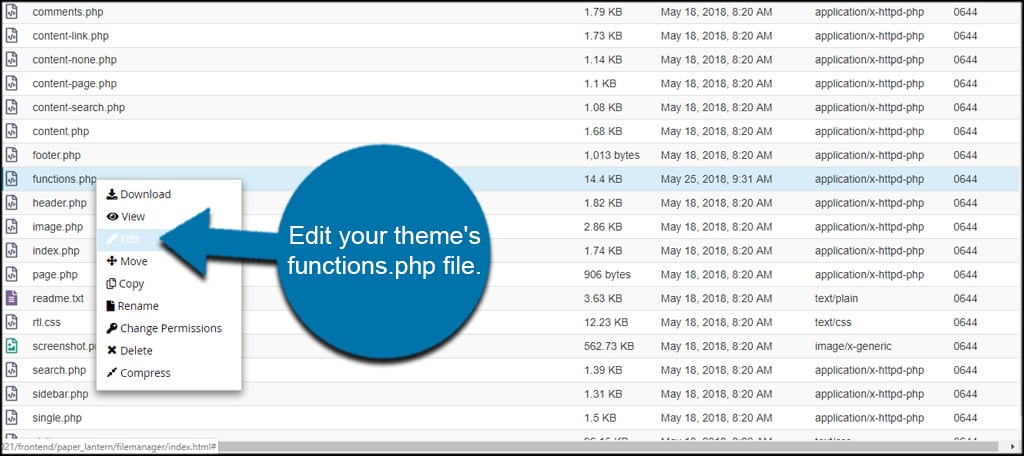
Step 2: Add Code
Paste this code into functions.php:[ht_message mstyle=”alert” title=”” show_icon=”” id=”” class=”” style=”” ]add_filter( ‘the_author’, ‘guest_author_name’ );
add_filter( ‘get_the_author_display_name’, ‘guest_author_name’ );
function guest_author_name( $name ) {
global $post;
$author = get_post_meta( $post->ID, ‘guest-blogger’, true );
if ( $author )
$name = $author;
return $name;
}
[/ht_message]
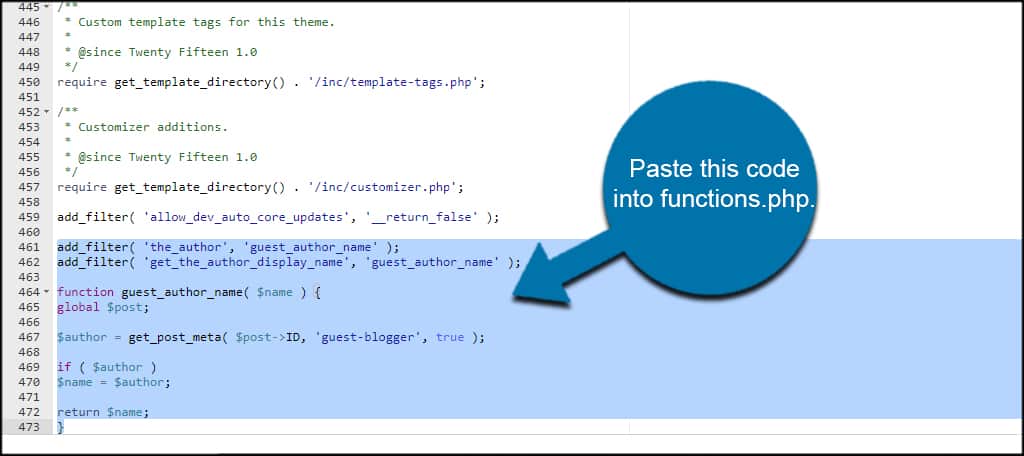
Once you save your changes, the theme will allow a new custom entry for the guest author’s name.
Take note of the “guest-blogger” portion of the above code. This is the name of the custom field you will use when adding the author’s name. Simply set the value of this custom field to the name itself.
Consider Returning the Favor
As I said at the start, being a guest author has advantages for both sides, thus, you should consider returning the favor. Getting links back to your website is very important and can greatly speed up how fast your website grows, especially in the early days.
In fact, I highly recommend guest writing at any opportunity you get when starting a website.
That said, try to make sure you do it on websites that have visitors with similar interest to your own website. Let’s face it, I doubt you will get many new readers from a knitting blog if your focus is automobiles.
Give Guest Authors Support
Supporting your guest authors and bloggers is a great way to improve networking and mutual recognition on the Internet. Find the best methods that will help you promote those who create content for your site.
Remember, if they don’t gain any new followers, they probably won’t write for you again. Hence, you need to make sure to properly promote any links back to their website. If all else fails, use your social media presence as well.
How often do you allow guest authors to create content? What kind of impact have guest authors made on your site?

Awesome Plugin for Multiple/Guest Author and very Responsive Development team.
How do i get guest author bio pic from custom field ?
Sorry if this is a dumb question… How does the guest author log in to the site to make the post ? Can they do this from the front end?? What does that look like and where do they go to make the post??
I have built a page for a local village council using Divi, and want to use the blog page as a place where two or 3 people (Maire, Head of Communications, Associations President) can easily post news and interest stories. The rest of the site will be static as I can only edit it during the winter months when not working, so this is the best solution to add live updates. Any help or suggestions gratefully received.
They simply log in as usual and the Author setting gives them access to only certain things.