The way you track invoices in WooCommerce can be different, depending on the type of store you are running and what information you need. That being said, a great way to get order information and packing slips is to use the WooCommerce PDF Invoices and Packing Slips. This plugin will provide you with an easy to read invoice PDF.
By default, WooCommerce tracks orders and gives you somewhat of a basic order information layout that includes customer name and other information. However, we know that WooCommerce invoices are kind of limited, so there are a lot of different third-party plugins to extend functionality when it comes to this.
What is an Invoice PDF?
An invoice PDF is an invoice you receive for tracking and recording purposes that are provided to you in the file format. You can then take this file then email, print, or save it on your computer to help you keep track of records.
There are a couple of different ways to get a generated PDF invoice every time someone creates an order on your store website. One of the best ways to handle this is to install a plugin that will generate not only the invoice PDF but also a packing slip PDF that you can print and use when shipping to customers.
Let’s dive into the plugin we are going to use today and then get it set up together.
WooCommerce PDF Invoice and Packing Slips
WooCommerce PDF Invoice and Packing Slips is a WooCommerce extension plugin that automatically adds a PDF invoice to the order confirmation emails sent out to your customers. The plugin comes with a basic template that you can modify while adding your own business information.
It also gives you the ability to create and modify team plates if you know how to write a title code. Not only does it generate a detailed invoice PDF, but it also provides a package slip for your customers. You can print that out and send it to them.
The plugin is part of the massive WooCommerce ecosystem that allows you to quickly and easily sell physical and digital goods online. The WooCommerce PDF Packing Slips plugin comes with a lot of features, none of which will slow your site down.
Some of the main features include:
- The ability to Automatically attach invoice PDF to WooCommerce emails of your choice.
- Download the PDF invoice from the main admin order page.
- Generate PDF invoices and packing slips in bulk when needed.
- Fully customizable HTML/CSS invoice templates.
- Download invoices from the “My Account” page.
- The ability to run sequential invoice numbers.
- Available in over 15 languages.
And that is just the tip of the iceberg. Basically, this plugin gives you everything you need and more to create detailed invoices and packing slips to keep track of orders properly in WooCommerce.
Let’s jump right into the plugin setup and get you going.
Note: The setup tutorial below assumes that you already have WooCommerce installed and running on your website.
Setting Up PDF Invoices and Packing Slips
Step 1: Install and Activate the Plugin
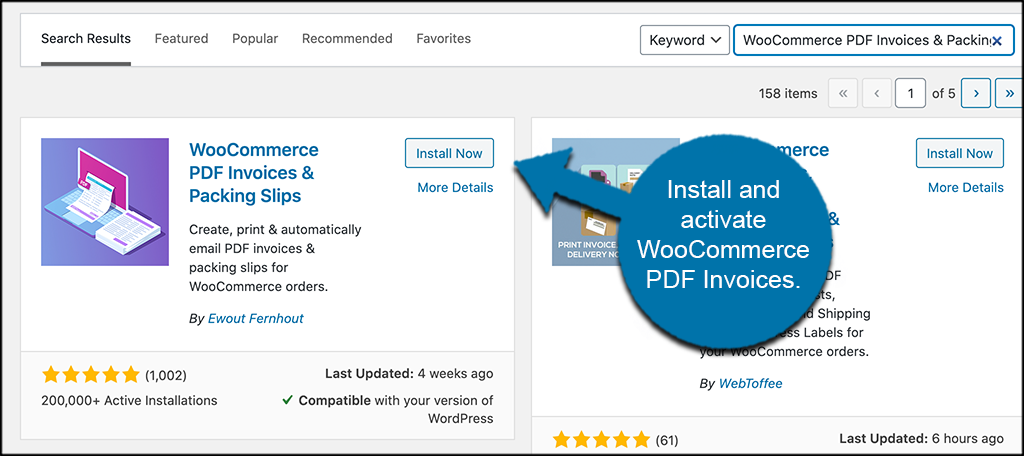
In order to start generating PDF invoices and packing slips, you first need to install and activate the plugin. You can do this by heading over to the Plugins page of the WordPress admin dashboard.
You will see a search field on that page. Search the plugin by name. When it pops up, go ahead and install and activate it from there.
Step 2: Access the PDF Invoices System
Once the plugin has been installed and activated, you need to access the system so we can get it set up and running properly. To do this, click on WooCommerce > PDF Invoices.
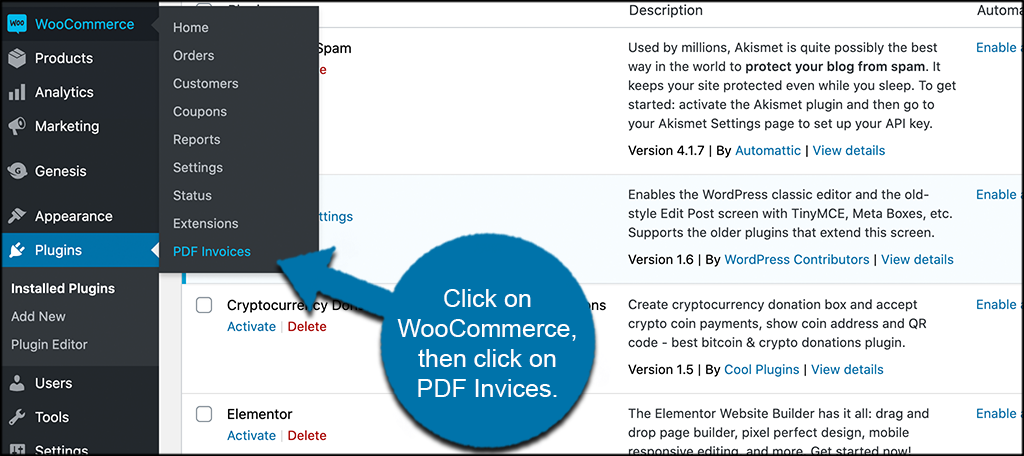
You will see this is a new and available option to click through once the plugin has been activated.
Step 3: Configure PDF Invoices
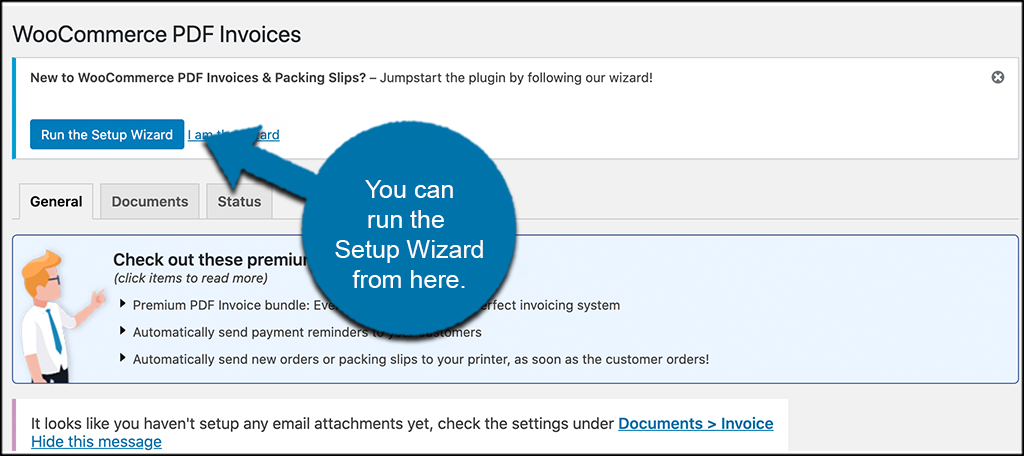
At this point, you are on the main configuration page for the invoice PDF plugin. You have a couple of options here for set up. You can run the setup wizard they provide, or you can simply go through the configurations yourself.
If you want to run the setup wizard, simply click on that button link when you see it.
I am actually going to go through the settings with you below.
You will notice there are three tabs on this configuration page. They include:
- General
- Documents
- Status
General
These are all the general settings for the PDF invoice plugin. Go through them and fill out everything according to what you want for your WooCommerce shop.
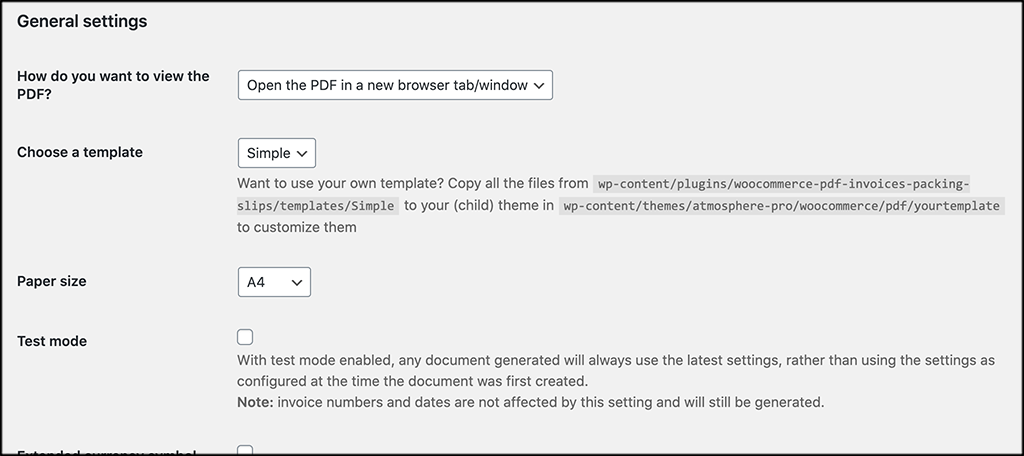
This includes items like templates, shop name, description, logo, address, and basically all the other info you want showing on the invoice PDF.
Documents
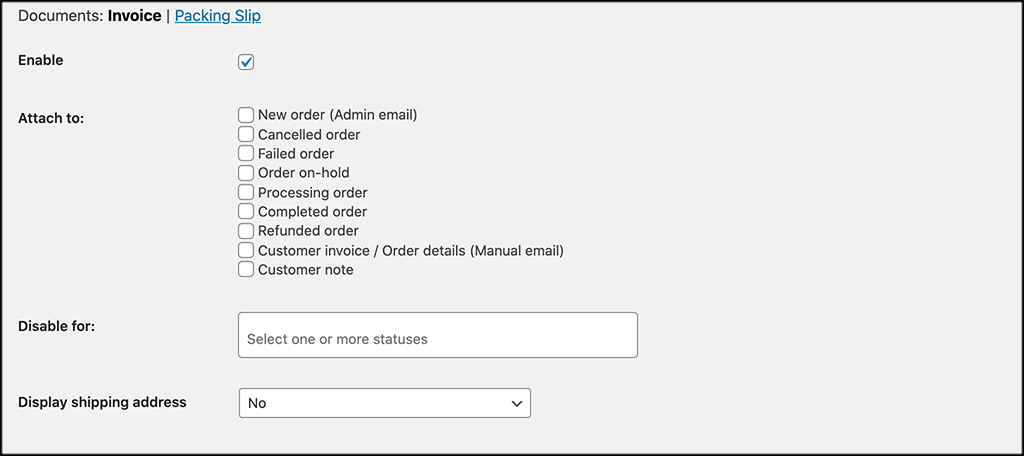
Now click on the “Documents” tab. Under this tab, you can see there are two clickable links. One his for invoices, the other is for packing slips.
On the “invoices” link you see a lot of information and configurations that you can attach to your invoice. This will also include where to attach it, as well as adding dates and invoice numbers.
Go ahead and go through all this and create the configurations you want.
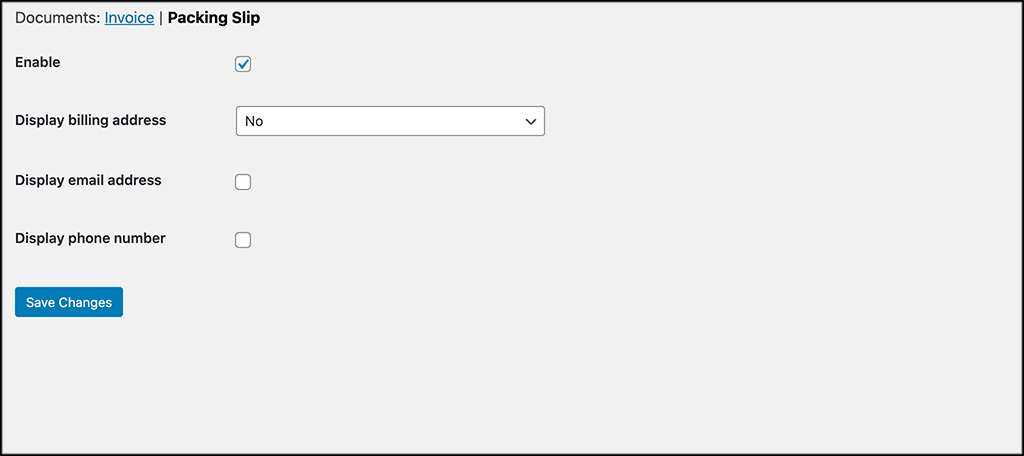
Now, click on the “packing slip” link. The same concept applies. Select the information you want to be displayed on a customer packing slip.
Status
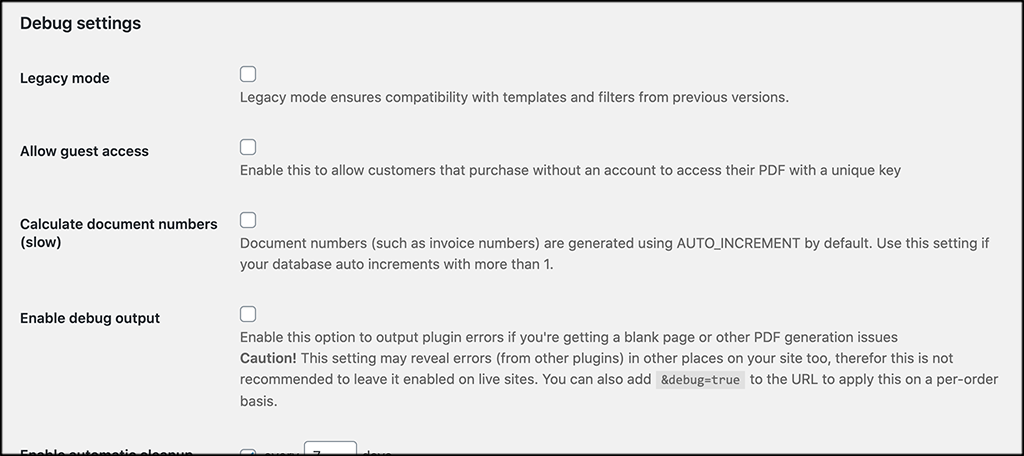
Finally, click on the “Status” tab to finish configurations for the plugin. You will see there are a few options to choose from. And at the bottom of the page, you can view the network status for the plugin.
That’s it! WooCommerce PDF Invoice and Packing Slips is now fully set up and will automatically start working on customer orders.
Next time a customer places an order on your shop, an invoice PDF, along with a packing slip (both of which are filled with the information you wanted from settings) will appear on your “Orders” page with the rest of the order.
Creating an Invoice PDF for Past Orders
Once the above configurations are all set, then the plugin will begin adding forms to all new orders. However, you can also generate both PDF invoices and packing slips for past orders.
Simply go to the “Orders” page in WooCommerce. Click on any order you want to create an invoice PDF or packing slip for.
Scroll down a little within that order to the right and you will see button options for both.
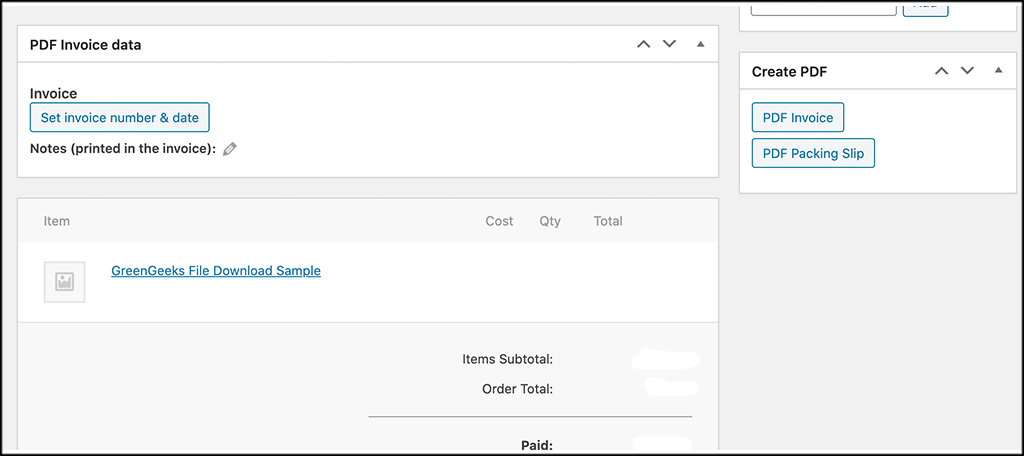
You can see that you are also able to set an invoice number and date if needed. This helps with tracking your past invoices using paper numbers.
Simply click on any of those buttons to generate and create the specified item and you are all set.
Final Thoughts
WooCommerce provides us a fantastic option to install and immediately start selling physical and digital goods from our own online store. That being said, oftentimes you need to add an extension to the plugin so that you can have more functionality in one place or another.
In this case, we want to create full packing slips and invoice PDFs. The plugin above is an easy way to get this all done without having to write any custom code of your own.
Simply install and activate the plugin, set it up accordingly, and it will begin automatically working from there.
Have you been tracking orders in WooCommerce with any type of PDF invoice? Have you found that it can be hard to track orders with the default info only?

Hello,
Is it possible to show the final amount including the stripe fee in the pdf invoice? i.e. Stripe Fee and Stripe Payout: the amount that goes to my account.
thanks a lot in advance
Hi Nina,
There may be an option like that in the pro version of the plugin. However, Stripe fees are always detailed within your Stripe account, and not usually on packing slips.