One of the best ways to sell books is through Amazon. It’s the largest book retailer in the world, both for print and eBooks. If you’re an author who sells books on Amazon, there’s an easy way to pull your Amazon listings into your WordPress website.
If you’re not an author, you can still make money selling Amazon best sellers with an Amazon affiliate account. Amazon calls its affiliate program Amazon Associates, and it’s free to join.
If you’re an author you should also be an Amazon Associate. That way when you link to your book using your affiliate ID, you can get paid twice. For the book sale and the affiliate referral fee on the book sale.
The great thing about the Amazon Associates program is your referral link applies to whatever your referred visitor buys. So if someone follows your book link to Amazon and buys your book and a pair of shoes, you get the referral fee for the book and the shoes.
You’re even paid a referral fee for the shoes if they don’t buy your book.
So whether you’re an author or not, you can sell books on Amazon using your WordPress site. The company will pay dividends.
There are a lot of Amazon Associates plugins for WordPress. But since we’re focusing on books, we’ll use the Mooberry Book Manager plugin.
Installing the Mooberry Book Manager Plugin
Log in to your WordPress admin panel.
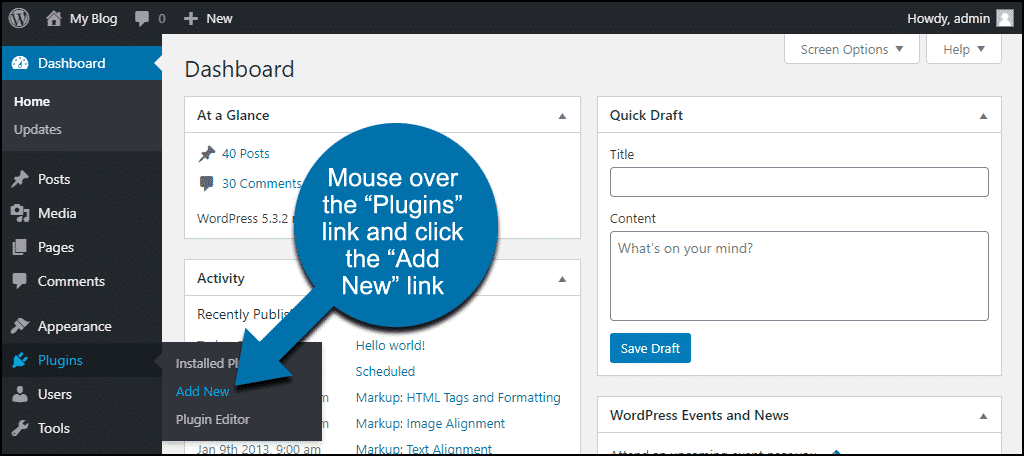
In the left column navigation, mouse over the “Plugins” link and click the “Add New” link.
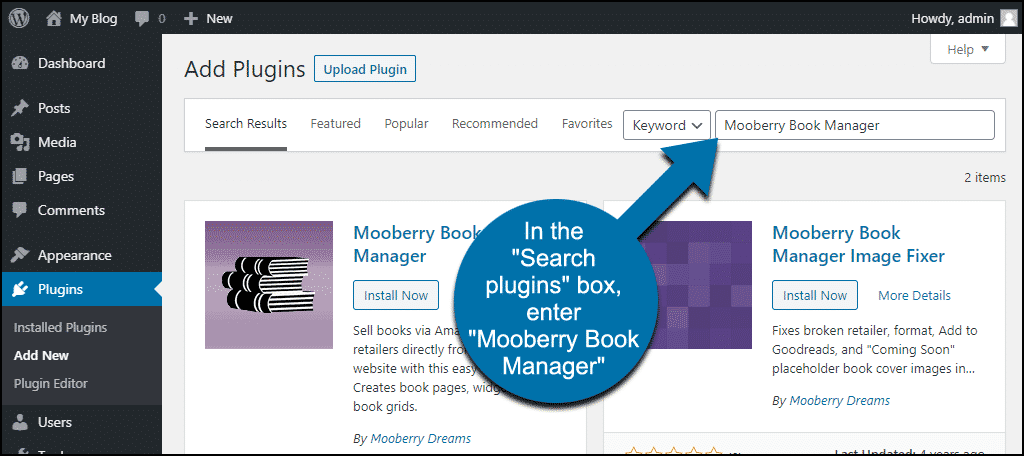
In the “Search plugins…” box, enter “Mooberry Book Manager.”
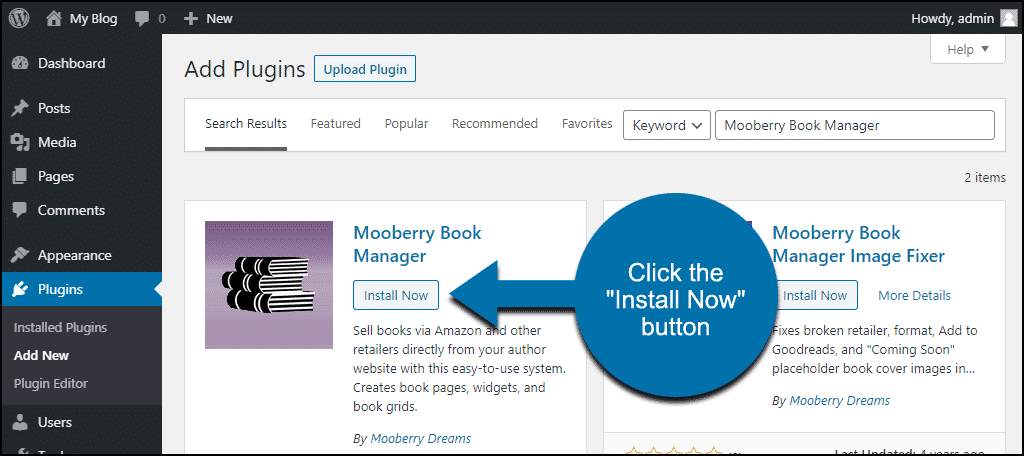
Once you have located the plugin, click the “Install Now” button.
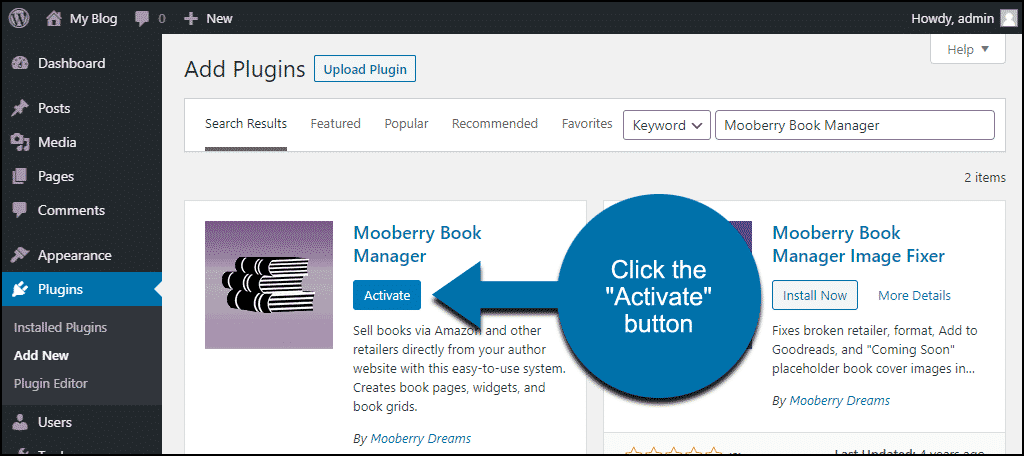
Click the “Activate” button.
Creating a Book Grid With Mooberry Book Manager
Mooberry displays books in two ways, in a grid on a page or post, or in a widget. We’ll start with a grid.
It may seem odd to add a grid before we have added any books. But when we add a book, you’ll see why we’re doing it this way.
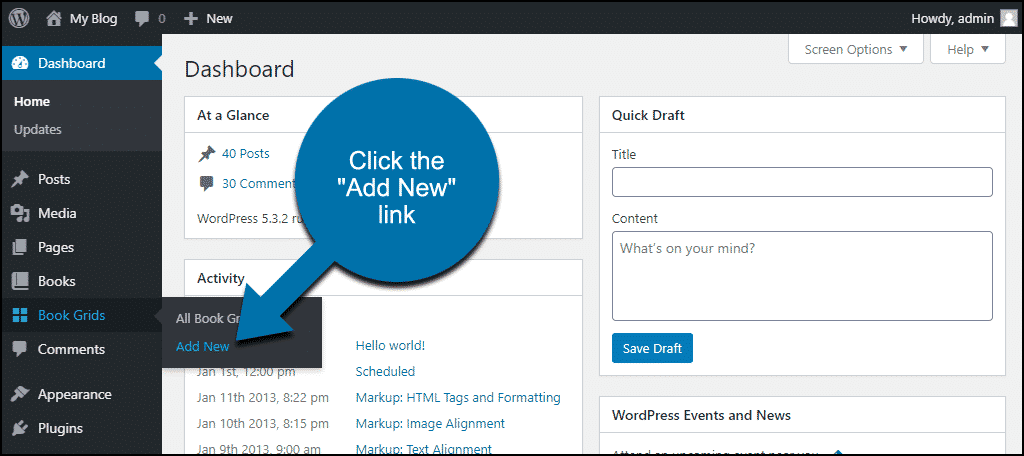
In the left column navigation, mouse over the “Book Grids” link and click the “Add New” link.
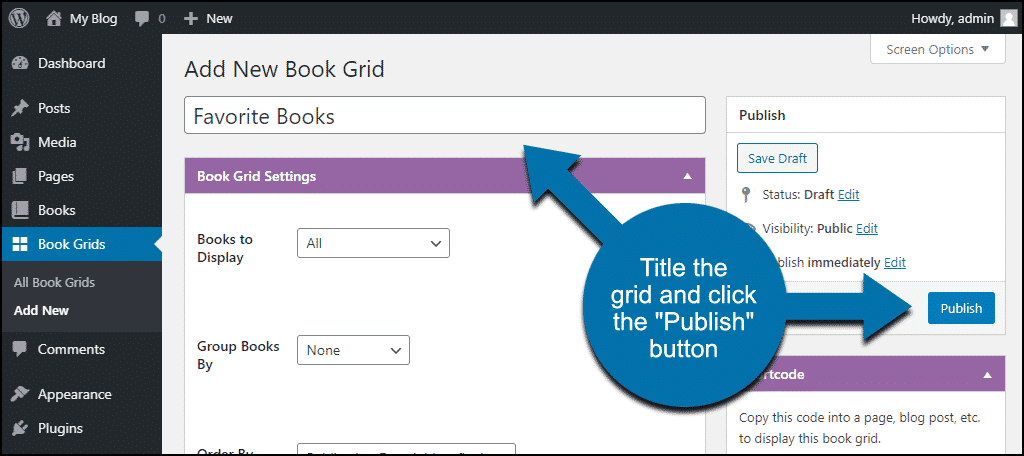
For now, we’re just going to give the grid a title. But you can see there are a number of configuration options to control how books are displayed in a grid.
Give your grid a title and click the “Publish” button.
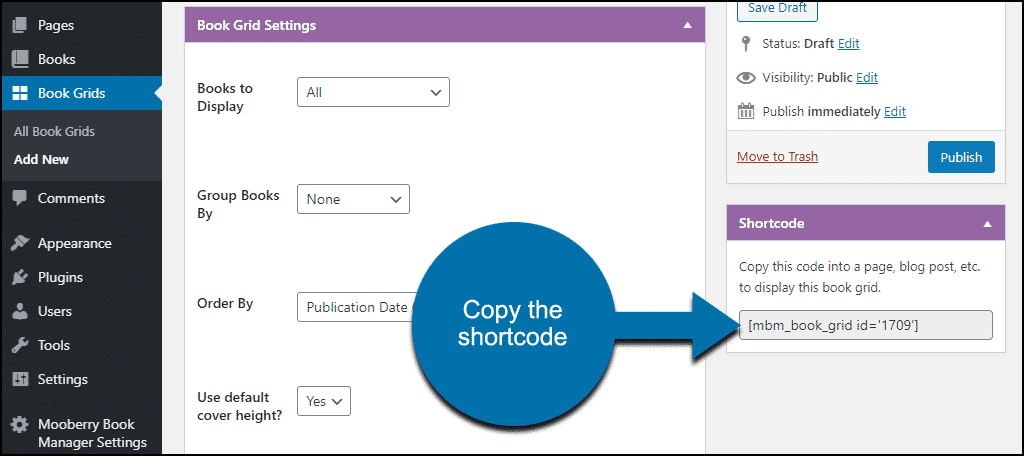
Now copy the shortcode.
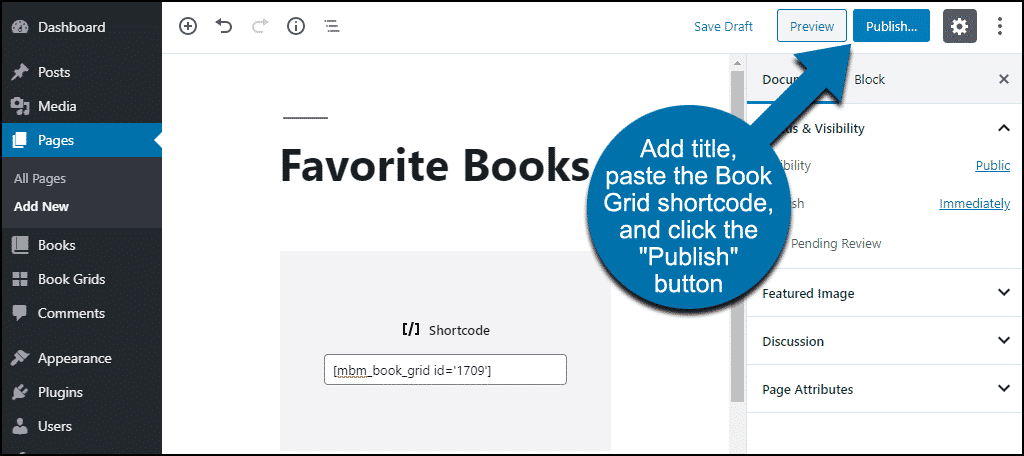
Create a new page, or edit an existing page or post. In the left column navigation, mouse over the “Pages” link and click the “Add New” link.
Give the page a title, paste the Book Grid shortcode into the page and click the “Publish” button.
At this point, there won’t be anything on the Book Grid page but a “Books not found” message.
Adding Books
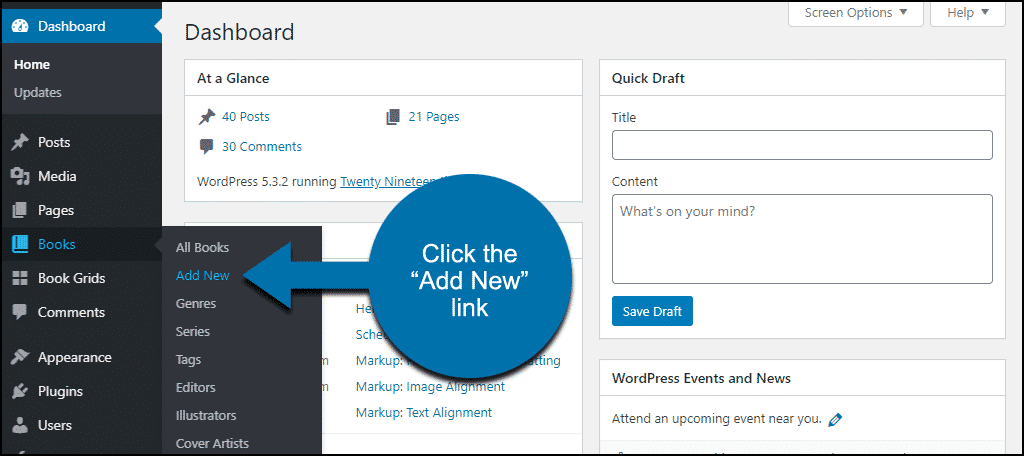
In the left column navigation, mouse over the “Books” link and click the “Add New” link.
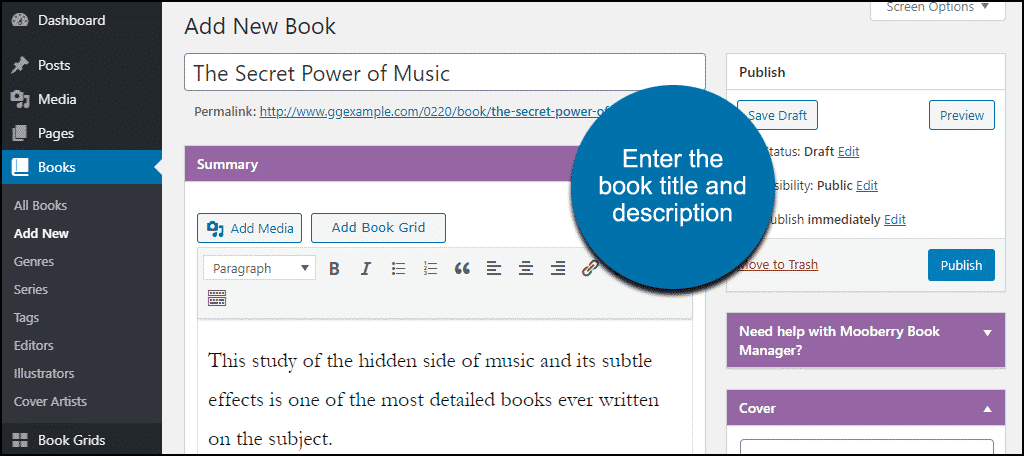
The only field required to add a book is the title. But we’re going to add a couple of other elements.
Enter the book title and description.
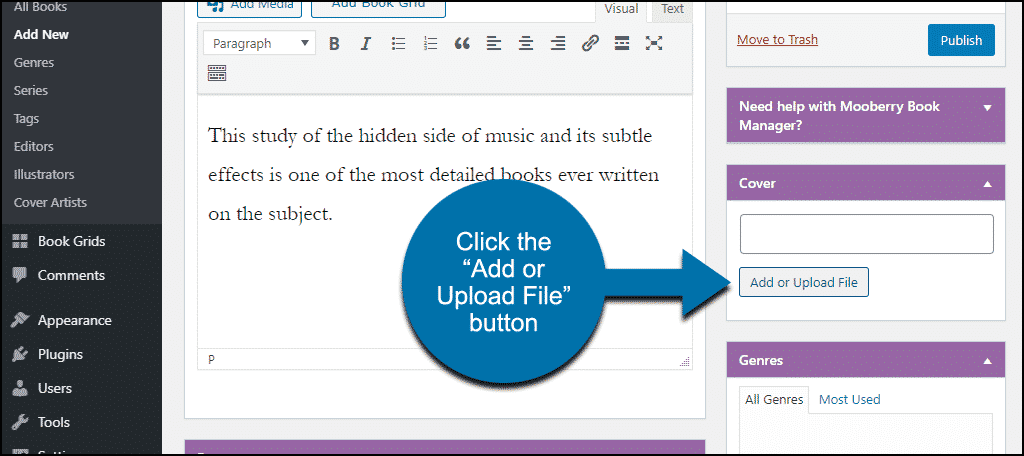
In the right column, there’s a “Cover” section. Click the “Add or Upload File” button to upload a cover image.
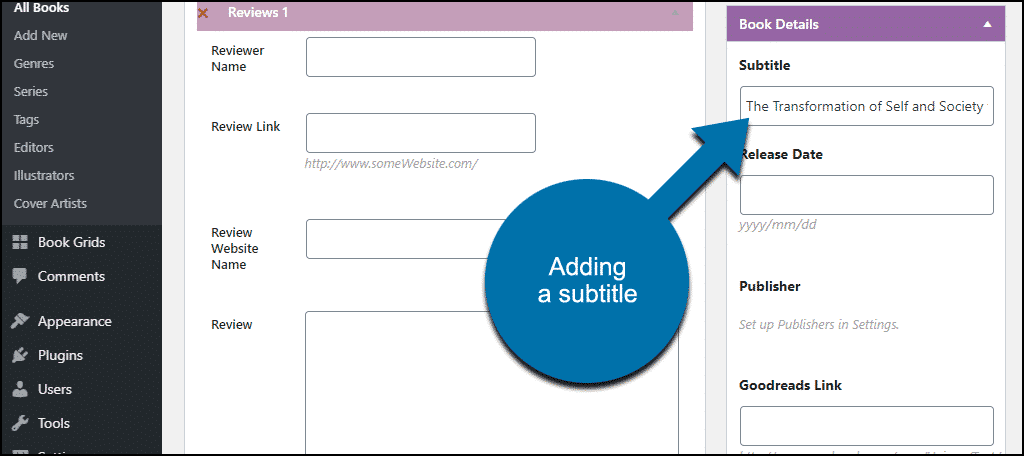
Scroll down to the “Book Details” section.
Since the book has a subtitle, I’ll add it here. There’s also a field for a Goodreads link, which you’ll want to add if you’re adding your own book.
Since I’m trying to sell books on Amazon, I’ll keep the other links to a minimum.
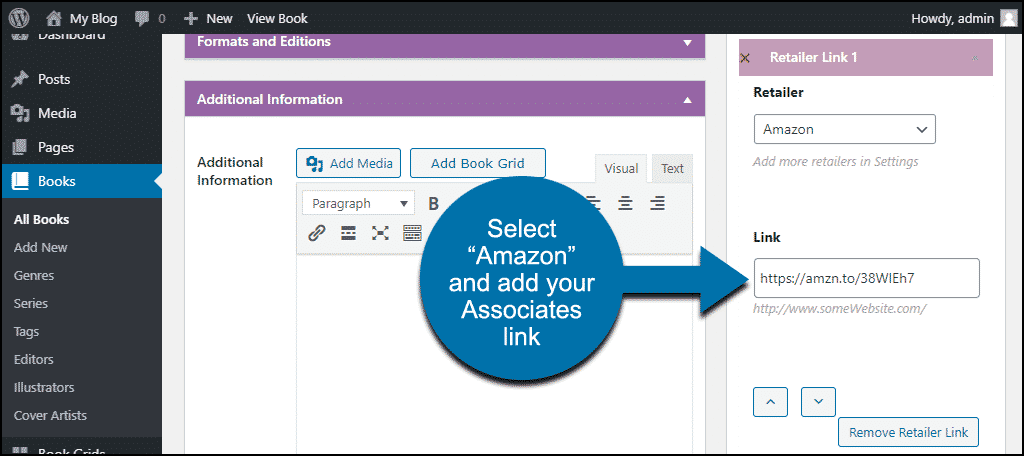
Now scroll down to the “Retailer Links” section. This is where you’ll add your Amazon Associates link to the book.
Select “Amazon” from the “Retailer” drop-down.
Paste your Associates link to the book in the “Link” field.
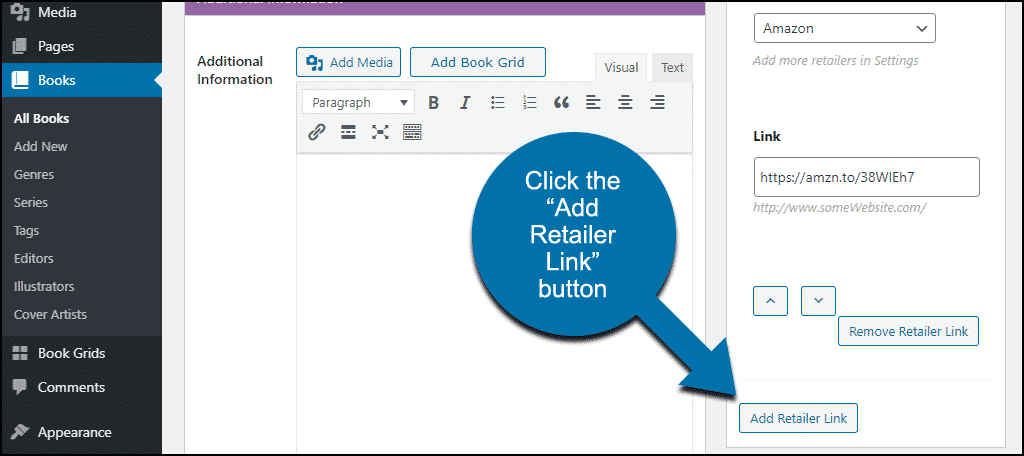
Click the “Add Retailer Link” button.
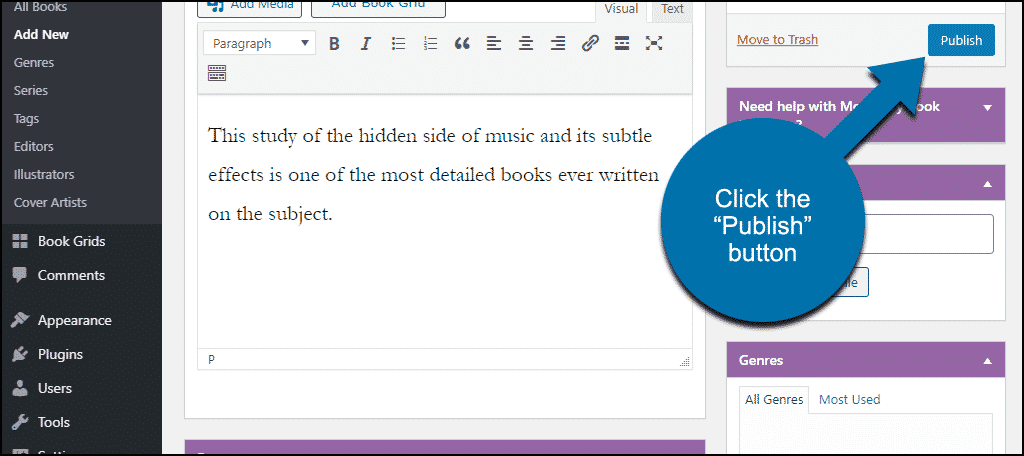
Scroll back up to the top of the page and click the “Publish” button.
When the book is saved you’ve done two things. Created a separate page for the book:
And added the book to your grid:
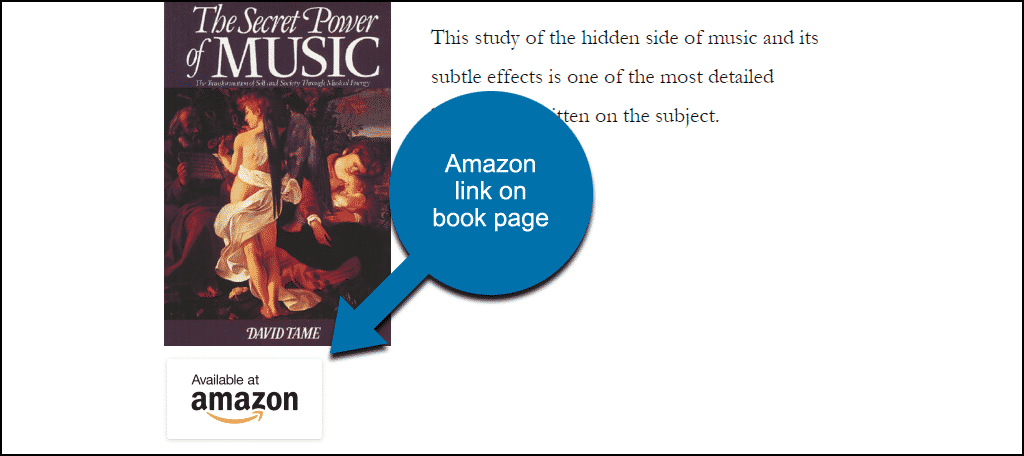
The book page is where the Amazon book sale link (with your Associates code) appears:
Wait, How Was the Book Added to the Grid?
The book was automatically added to our grid because we created the grid with the default “display all” setting.
Let’s go back to the “Book Grids” section and take a look.
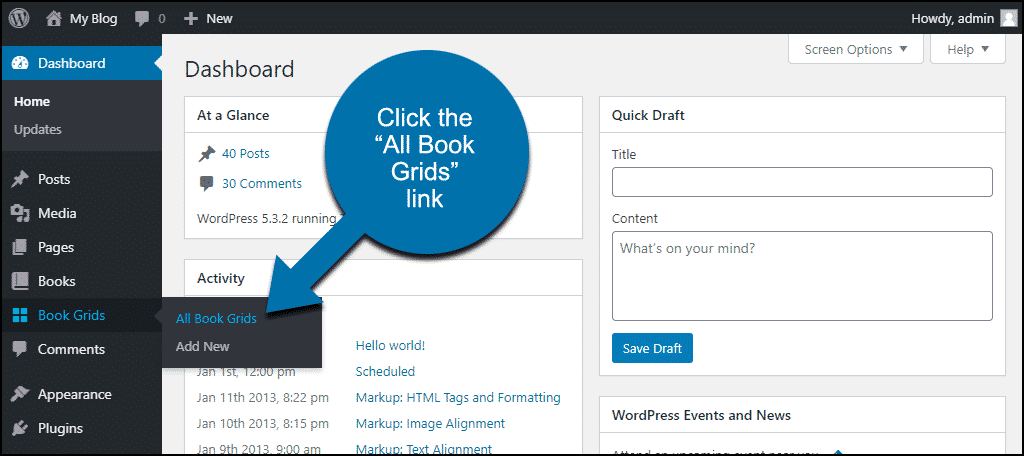
In the left column navigation, mouse over the “Book Grids” link and click the “All Book Grids” link.
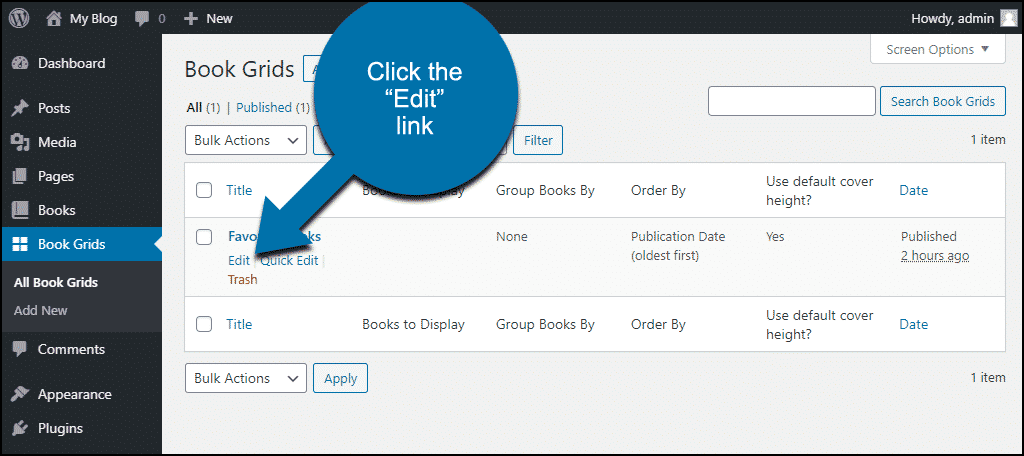
Now click the “Edit” link for the grid.
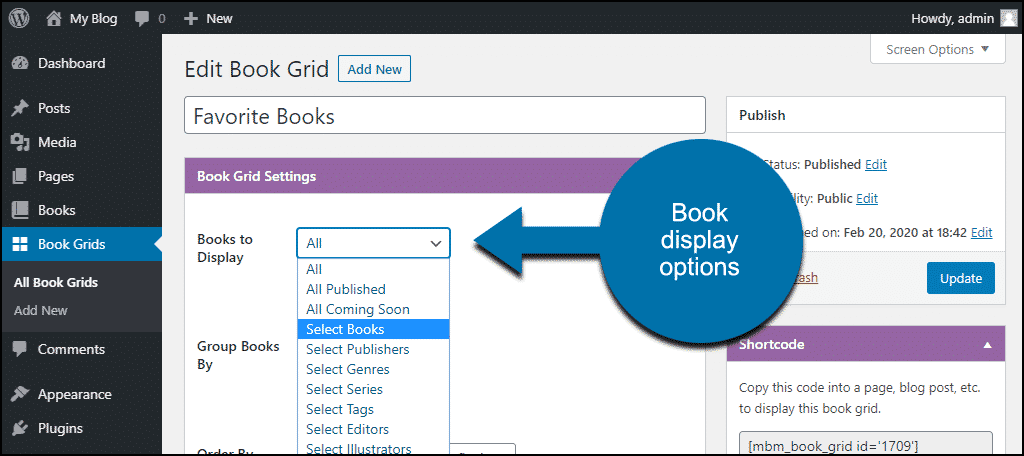
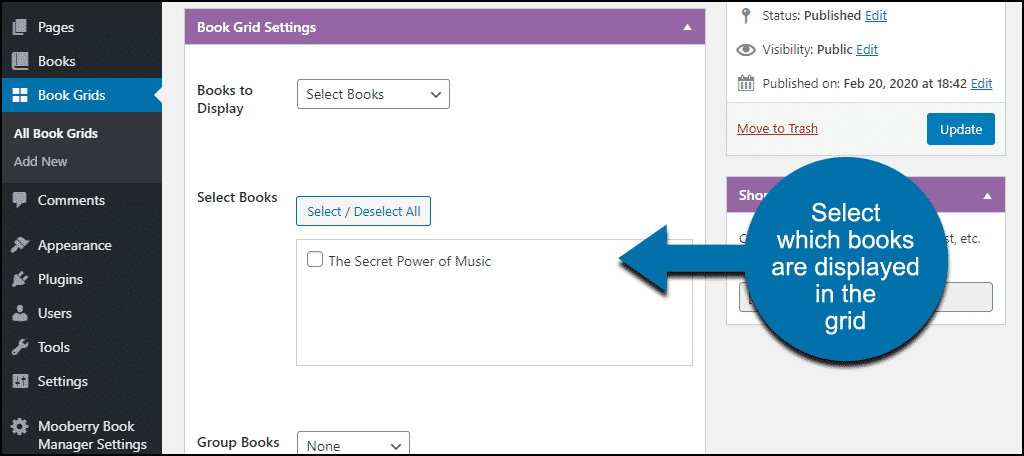
The first setting is a “Books to Display” drop-down. The default is “All,” but as you can see, there are many options.
You can choose which books to go onto the grid. If you create multiple grids, you’ll likely want to use this feature.
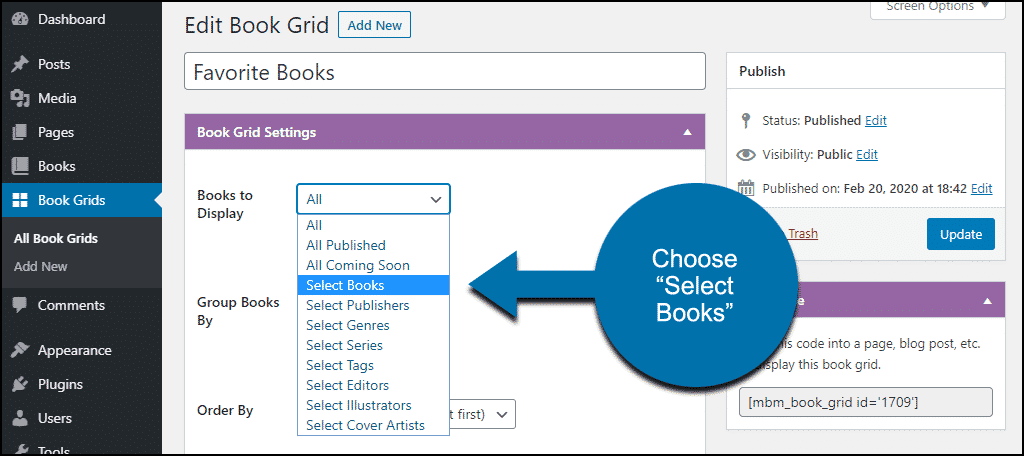
From the “Books to Display” drop-down, choose “Select Books.”
Now you can see that it’s possible to select which books appear on the grid. Since we’ve only added one book, it’s the only option. But when you’ve added multiple books, you’ll be able to select them here.
Additional Book-Entry Fields
I realize we’re bouncing back and forth here, but I want to address the sections as you might encounter them on your first use of the plugin. So let’s go back to the book entry page.
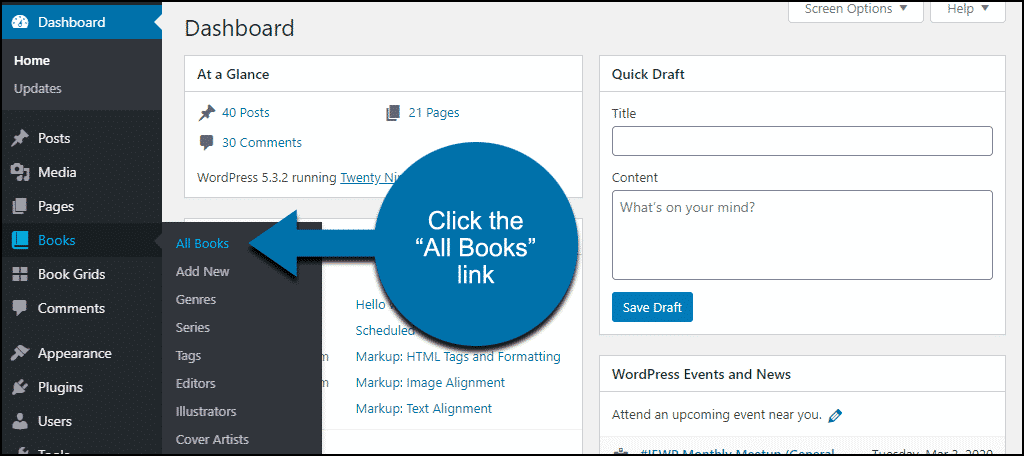
In the left column navigation, mouse over the “Books” link and click the “All Books” link.
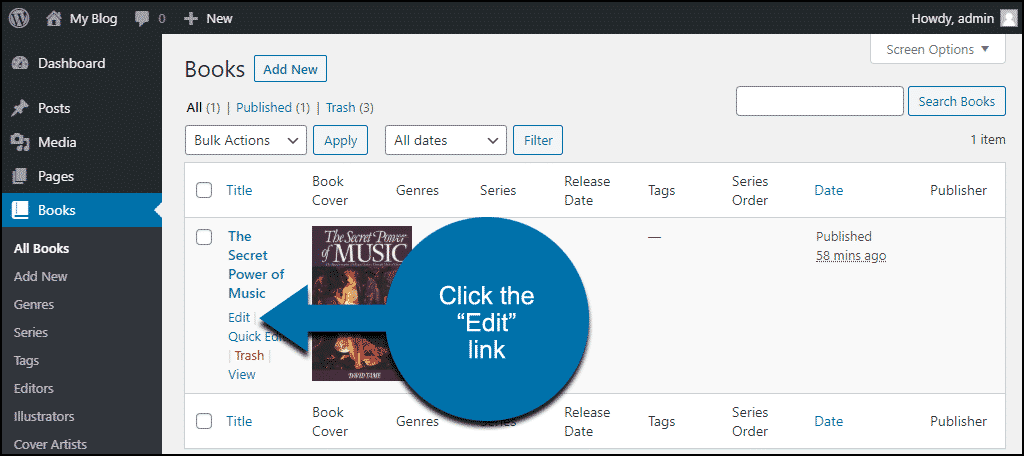
Now click the “Edit” link for a book.
Since we’re only covering the basics, we didn’t complete many of the available fields when we added our first book. Here’s a rundown of what the sections that we didn’t previously touch on do.
In the left column:
In the Excerpt section, you can add your own excerpt or select the Kindle preview. The Kindle preview is only available for books that you have published on Amazon.
You can add multiple Reviews for each book. Each review has to include the review text and one or more of the other fields:
- The “Reviewer Name” is the name or username of the person who reviewed the book.
- “Review Link” is the (valid) URL where the review can be found.
- “Review Website Name” is the name of the website where the review appears (e.g., Amazon, Goodreads, etc.)
Formats and Editions is where you enter the data specific to each edition of a book. So if you have a paperback version, a hardcover, epub, Kindle – each of those is its own edition.
Additional Information is a freeform field where you can add anything that isn’t covered by the predefined fields. It appears at the bottom of the book page.
In the right column:
Genres, Series, Tags. These all work the same way tags do in Posts and Pages. So you can add multiple genres, series, or tags to each book. Multiple books can be in each genre, series, or tags, and a book does not have to belong to genres, series, or tags. New genres, series, and tags can be added to Book Manager by adding them here on the book page.
Tags may seem redundant when you can already assign genres, but tags are a good way to identify characteristics of a book that aren’t genres. Like “Strong female lead,” or “Takes place in Iceland.”
Download Links can be added if you are letting readers download your book for free.
You can add one download link per format for each book. Download links have to specify the “Format” and the “Link.” Which should be a direct link to download the book in the specified format.
Cover Artists, Illustrators, and Editors work the same way the genres, series, and tags sections do, like regular WordPress tags. They can belong to multiple books or no books.
If you want to dig deeper into these sections, the Mooberry developers have written excellent plugin documentation. A tip of the hat for that, because it isn’t always the case with WordPress plugins.
If You Use a Caching Plugin for WordPress
Mooberry Book Manager works with both W3C Total Cache and WP Super Cache, but there are things you should be aware of.
If you use W3C Total Cache, you have to activate “Object Caching” in the W3C Total Cache settings for Mooberry Book Manager data to be cached. Book data cache is automatically cleared when a book is updated, added, or deleted so your book pages and grids will stay up-to-date.
If you use WP Super Cache, the cache for the entire site is cleared when a book is updated, added, or deleted. WP Super Cache does not seem to have an option for selectively clearing part of the cache rather than all of it.
What Happens if You Uninstall the Plugin
If you uninstall the Mooberry Book Manager plugin, pages and posts that used the plugin grid or widget will be affected.
- Book Grids created by the plugin will be deleted.
- Book pages created by the plugin will be deleted.
- Plugin-related pages that you created yourself (like the “Favorite Books” page in this tutorial) will have to be deleted manually.
- The plugin shortcodes will stop working, so the shortcodes themselves will be displayed anywhere they were used. This creates a bit of an unsightly appearance on those pieces of content.
It Makes Sense to Sell Books on Amazon Through Your Website
For authors, the ability to sell your book in WordPress is a no-brainer. The largest book retailer on earth, check. Get paid twice for each book sale, check. Get paid even if your referral doesn’t buy your book, double-check.
For non-authors, the benefits are all the same, minus the book sales, of course. And the worldwide acclaim and glory that you achieve when your book becomes a bestseller.
But for a book site in general, the Mooberry Book Manager plugin is a great way to organize and control the book data on your site.
Have you ever used a book plugin on your WordPress site? What about a plugin that adds affiliate links? Let me know in the comments!

