As of 2022, 92% of the United States population used emails at one point or another. As you might expect, there could be some bad apples in there, thus you may need to know how to blacklist an email address using cPanel.
Alternatively, sometimes an email may get mistaken for spam or something malicious and get blocked. In these cases, you may need to whitelist them. Both cases can be accomplished using the spam filters found in cPanel.
You can use this tool to block an individual email or an entire domain. Doing so can help reduce the amount of spam you receive and only takes a few minutes to set up.
Apache SpamAssassin is the most commonly used spam control in cPanel configurations. But the spam filtering application used in your cPanel account may differ. The instructions below should apply regardless of the spam filtering application you use.
What Does it Mean to Blacklist or Whitelist Email?
If you blacklist an email address in cPanel, it means you are blocking it from sending emails to your inbox. Essentially, the system immediately throws those messages away.
The goal of blacklisting is to block email addresses or domains that only send you unwanted messages or have a tendency to send out malicious content. Doing so can help prevent spam build-up.
On the flip side, when you whitelist an email address, it means that spam filters will never prevent it from entering your inbox. This just means that no matter what is contained in an email, you will get the message delivered.
Whitelisting can be necessary for some automated messages or emails that may trigger your anti-spam tools. In either case, you need to really think about the email address you are whitelisting or blacklisting.
If a mistake is made, you can easily revert the changes, but you could be missing valuable information and not realize it.
How to Blacklist & Whitelist Email in cPanel
Both blacklisting and whitelisting are done from the same area of cPanel. They are located in the Spam Filters area and are pretty intuitive to use. They can be changed at any time if necessary, but it’s important to be careful.
If you mistakenly blacklist someone you only communicate with by email, well, you probably won’t notice for quite some time.
Step 1: Enter the Spam Filters Section
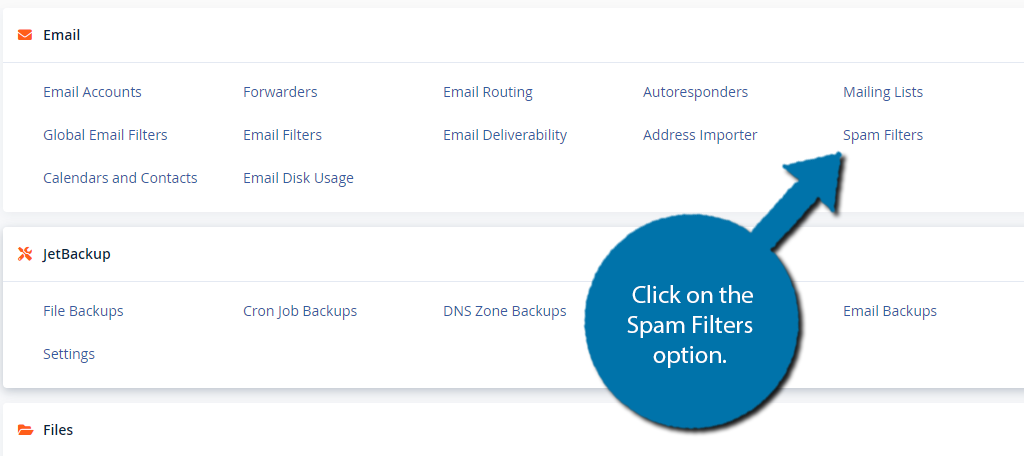
Begin by logging into your web hosting account and accessing the cPanel. Locate the Email section and click on the Spam Filters option.
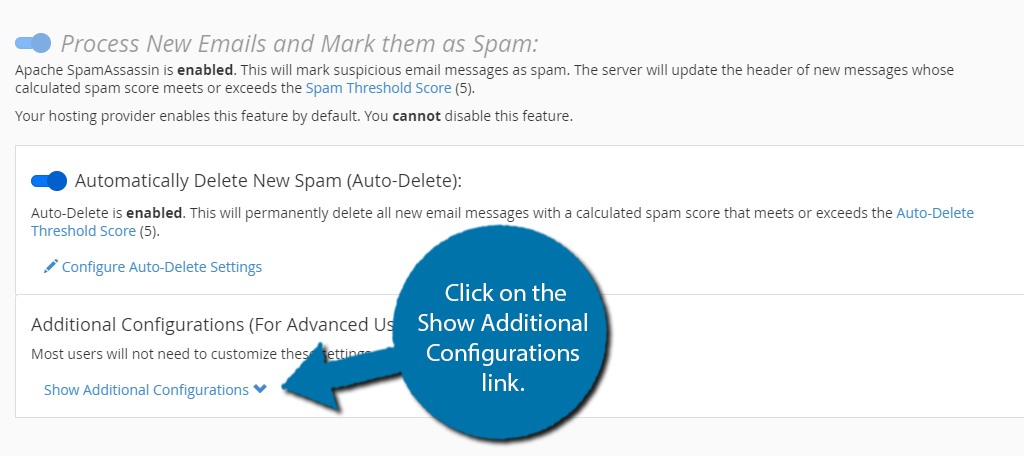
By default, the anti-spam tool is enabled and cannot be disabled. It will also automatically delete spam by default, but you can choose to change this if you wish.
Below this is the Additional Configurations (For Advanced Users) section.
Click on the Show Additional Configurations link.
From here, you can either choose to Blacklist or Whitelist email addresses. Choose the one you want to do and go to the appropriate step.
Note: There is also an option to adjust the calculated spam score. This is a value that your spam filter uses to determine what is spam and what isn’t. Properly utilizing it can significantly help you receive less spam from certain types of emails, but you run the risk of marking non-spam emails as spam. Reconfiguring these controls should be used in tandem with whitelisting and blacklisting.
Step 2: Whitelist Email Addresses
Scroll down to the Whitelist (Emails Always Allowed) section and click on the Edit Spam Whitelist Settings link.
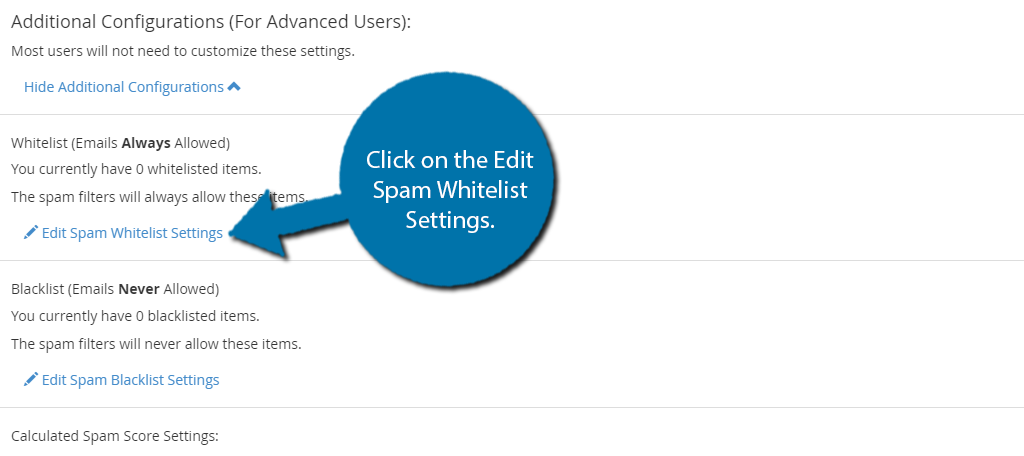
By default, there won’t be much here because you haven’t actually whitelisted any emails. But normally, you would just see a list of every email that has been whitelisted.
To begin whitelisting emails, click on the Add A New “whitelist_from” Item link.
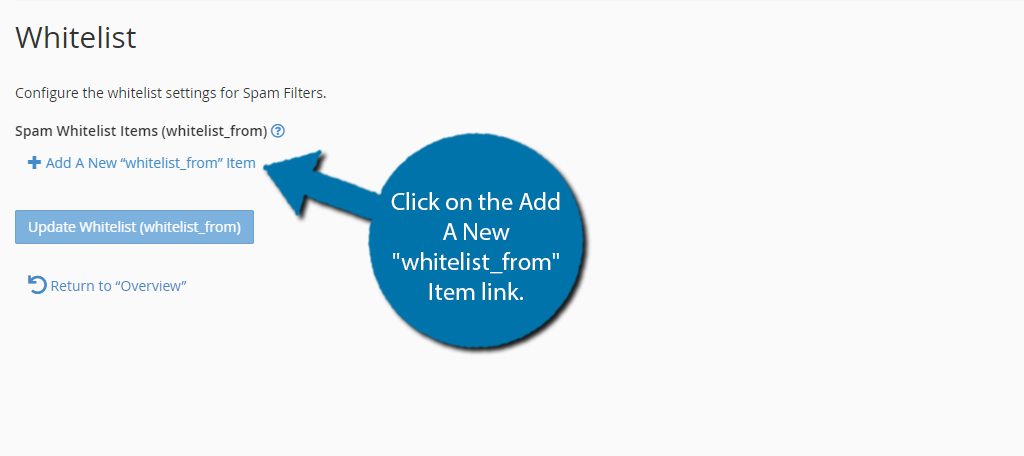
A textbox will appear where you can enter the email address or domain name that you wish to whitelist. The following options are available to enter into that box and you can add as many as you want (one email or domain per textbox).
Some of these are “wildcards” and can allow you to blanket an entire domain or a specific set of users from that domain.
- user@ggexample.com — To whitelist a single email address.
- *@ggexample.com — To whitelist all of the addresses at ggexample.com.
- ?[email protected] — To whitelist a single character in an address at ggexample.com (i.e., [email protected], but not [email protected]).
Enter the information and click on the “Update Whitelist “whitelist_from” button.
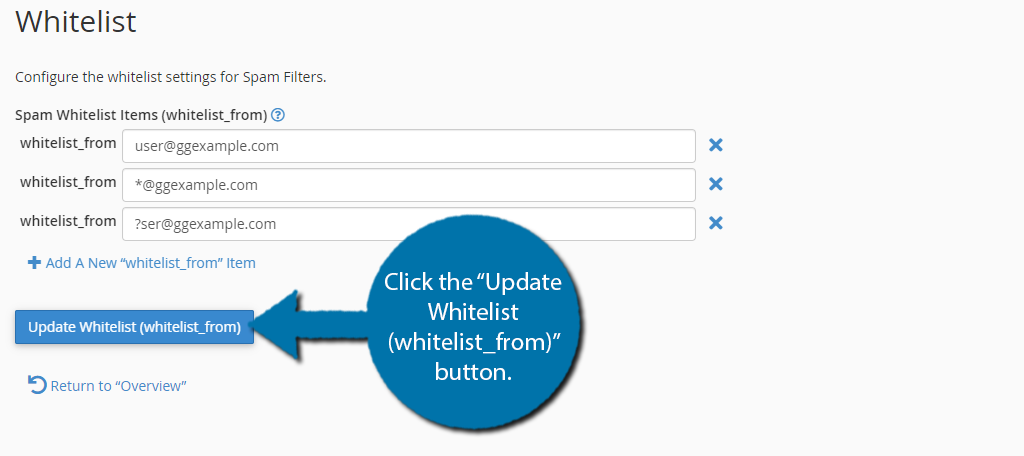
And that’s it. The email address or domain you entered has now been whitelisted. You can edit it at any time by coming back to this section and changing what is in that textbox.
Alternatively, you can add more by repeating this step.
Step 3: Blacklist Email Addresses
Scroll down to the Blacklist (Emails Never Allowed) section and click on the Edit Spam Blacklist Settings link.
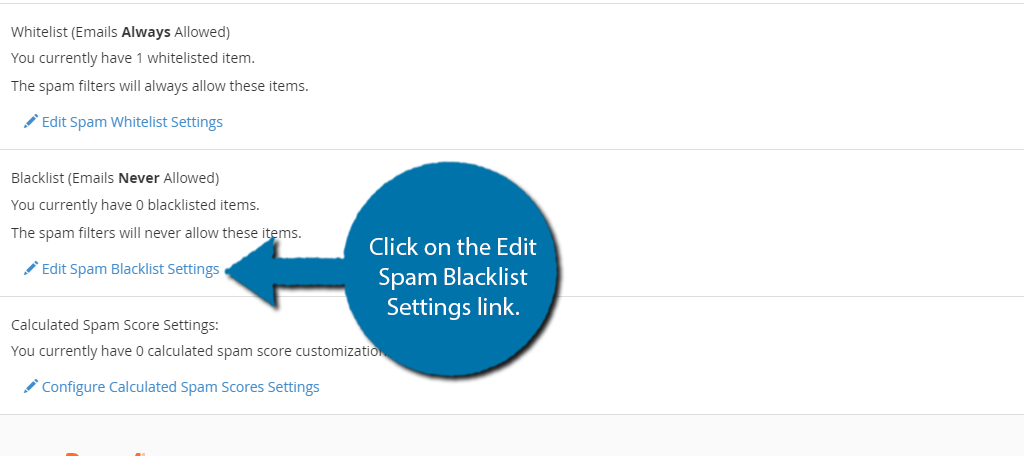
You will normally see a list of emails or domains you have blacklisted. But if this is your first time in this section, then there should be nothing here.
Click on the Add A New “blacklist_from” Item link.
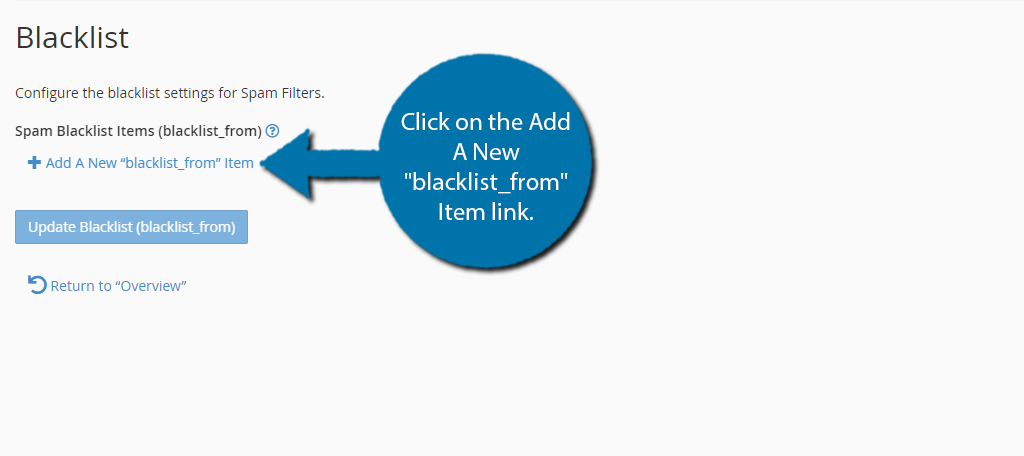
A textbox will now appear that allows you to enter an email address or domain that you wish to blacklist. The following options are available to enter into that box and you can add as many as you want (one email or domain per textbox).
As before, you can use wildcards for entire domains or specific users.
- user@ggexample.com — To blacklist a single email address.
- *@ggexample.com — To blacklist all of the addresses at ggexample.com.
- ?[email protected] — To blacklist a single character in an address at ggexample.com (i.e., [email protected], but not [email protected]).
Enter the email information you wish to blacklist and click the “Update Blacklist (blacklist_from)” button.
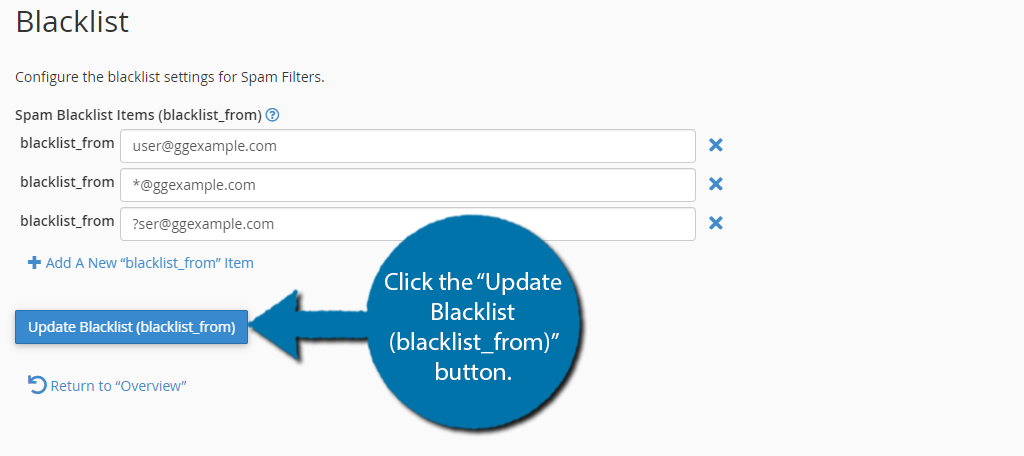
And that’s it. The email or domain you entered will be blacklisted, which means you will never receive an email from them again.
You can edit this section at any time, or if you want to add more, just repeat this step as many times as necessary.
Consider Using Email Filters
You might have noticed that there was also an option for Email Filters in cPanel. These filters allow you to organize your inbox by using specific filters, which can help push the most important messages to the top.
For example, you could create a filter that always puts emails from a certain address or domain at the beginning. This could be ideal if you are communicating a new business deal and want to ensure you respond promptly.
You could also be broader with your filters and create one that puts emails containing a certain phrase or term at the top. You have a lot of options, so it’s worth exploring to make your inbox easier to manage.
Keeping a Clean Inbox
As the popularity of email has skyrocketed, so too has the number of spam messages you receive. Businesses of all sizes are trying to fill your inbox with their offers and more nefarious players are trying to scam you.
When combined, checking your email can become a burden, which can lead to you missing some important information. Thus, by utilizing spam filtering tools, you can keep your inbox clean.
Of course, spam filters are not perfect, which is why whitelisting may be necessary as real emails can get blocked. As a result, it is a good policy to sometimes take a look in your spam folder to see if everything is working as intended.
Why did you blacklist or whitelist an email in cPanel? Have blacklisting emails helped reduce the amount of spam you receive?


Thank you so much for email blocking, but can we block IPs as well instead of emails? I’m receiving spam emails from different emails with the same IP address to my website hwtc.com.pk emails.
Yes…you can. You can use the IP Blocker tool in cPanel to block an address or a range of addresses. Just make sure you’re blocking the right ones. 🙂