Do you want to add an HTML page to your WordPress website? Most WordPress themes come with built-in page templates that you can use, but sometimes they are not what you are looking for.
Instead, you can add HTML pages to your WordPress website to help create the page with the look you want. Unfortunately, WordPress does not have a built-in HTML page upload feature.
It is not very difficult to upload an HTML page to WordPress, but it is hard to figure out without a guide. The biggest problem is that you can make a mistake and cause a 404-page error in WordPress.
Today, I will demonstrate how to add HTML pages in WordPress using two different methods that will avoid 404 errors.
Why Add an HTML Page in WordPress
You might still be wondering why exactly would you want to add an HTML page in WordPress when you can create your own custom page template. The answer is simple, it saves a lot of time and you might just be more comfortable with that page template.
Making custom page templates is great, but it will take development time away from your website, while simply uploading an HTML page will only take a few minutes.
It’s also worth pointing out that creating your own HTML pages can actually speed up your website. At least if they are coded efficiently. One of the biggest complaints about WordPress is that the code isn’t very clean, creating your own pages is a way to get around this shortcoming.
Since there are no downsides to using HTML pages if done correctly, why not just use them in WordPress?
Method 1: Add an HTML Page in cPanel
The first method is using the cPanel. You will not need any additional plugins to accomplish this task. You will need access to your website’s cPanel.
The login information is provided to you when you create an account with various web hosting plans. This process is not hard to perform and is beginner-friendly.
Since you will be making changes on the backend of your website, it is a great idea to create a backup of your website. This will ensure that if anything goes wrong, you can use the backup to revert your website to before the mistake was made.
Step 1: Zip The Folder
The first thing you need to do is change some files. Locate the “index.html” file and rename it “index.php”. If you do not do this, you will have problems later on. After the file has been renamed, it is time to zip the file. Gather all of the files needed for the page, including CSS, and zip the file.
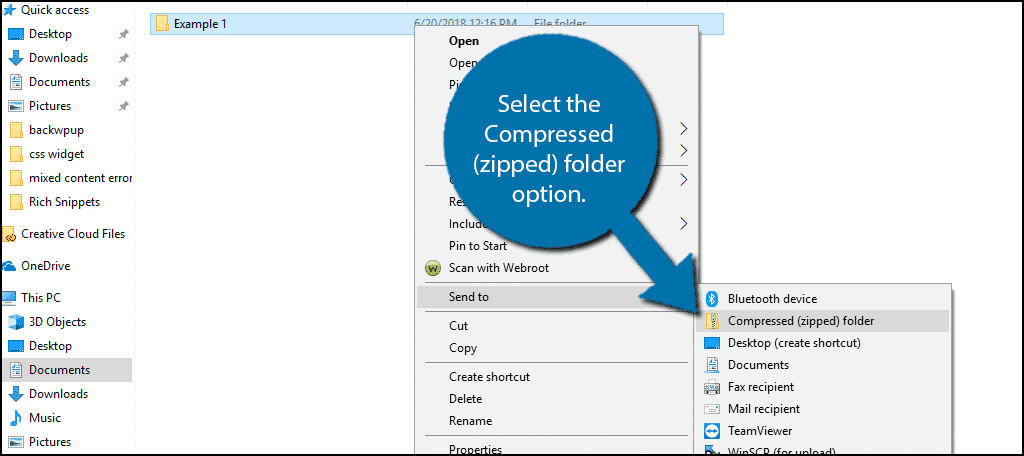
This process is slightly different depending on whether you are using Windows or Mac. For Windows users, right-click the folder. Hover over the Send to option and select the Compressed (zipped) folder option. If you are on MAC, right-click and select the Compress “filename” option.
Step 2: Create A New Folder
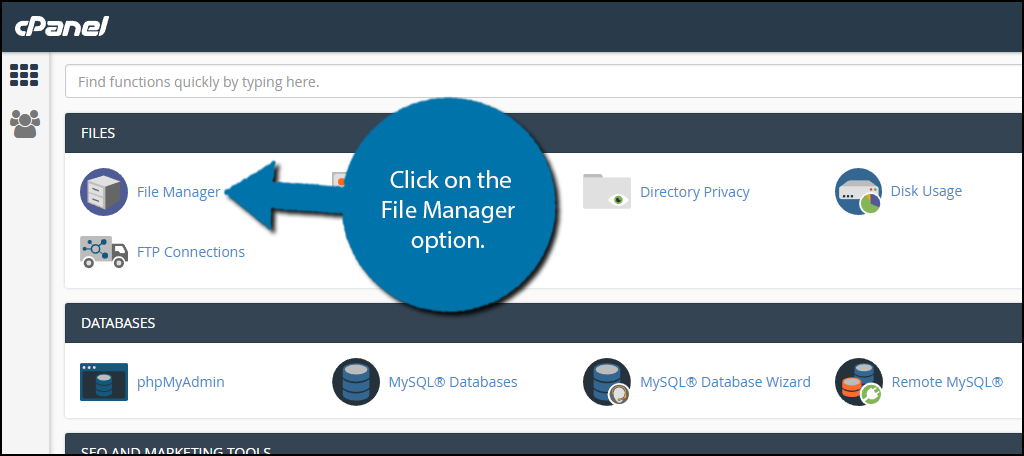
Once the file has been zipped, you’re ready to begin uploading. Login to your website’s cPanel. Click on the File Manager option. The File Manager will allow you to access all of the files related to your website and upload them.
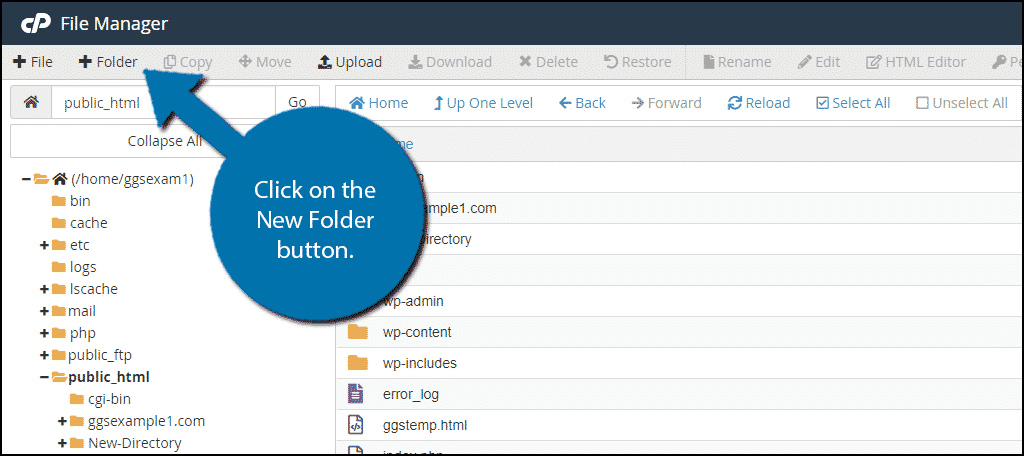
Enter the public_html folder. Click on the New Folder button at the top of the screen.
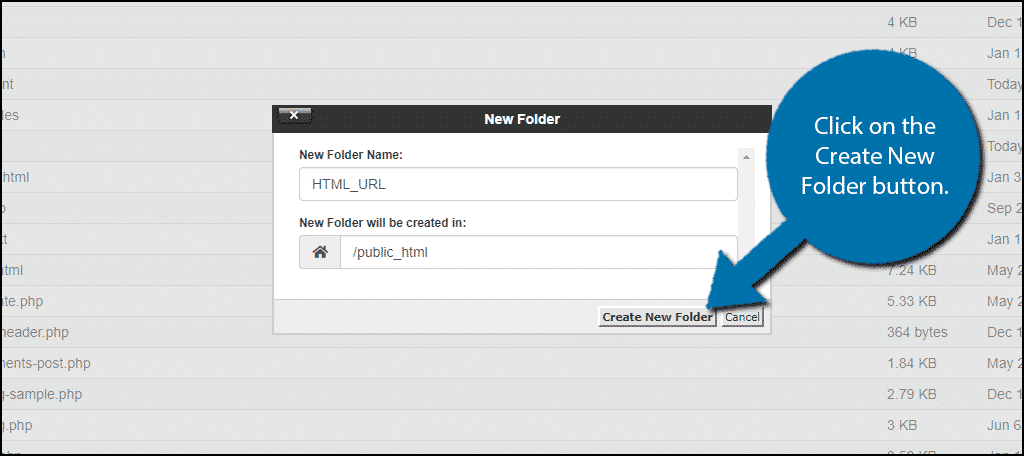
Now you need to name the folder you are creating. The name of the folder will be the URL of the HTML page you are uploading. You can change this later if a mistake is made, but it’s best to get it right the first time. Click on the Create New Folder button when you are done.
Step3: Add the HTML Page Files to WordPress
With the folder in place, all you need to do is fill it with the zipped files, and then, unzip those files and your page will be ready to go.
Click on the folder you just created to enter it. Now it is time to upload your HTML page. Click on the Upload button at the top of the screen.
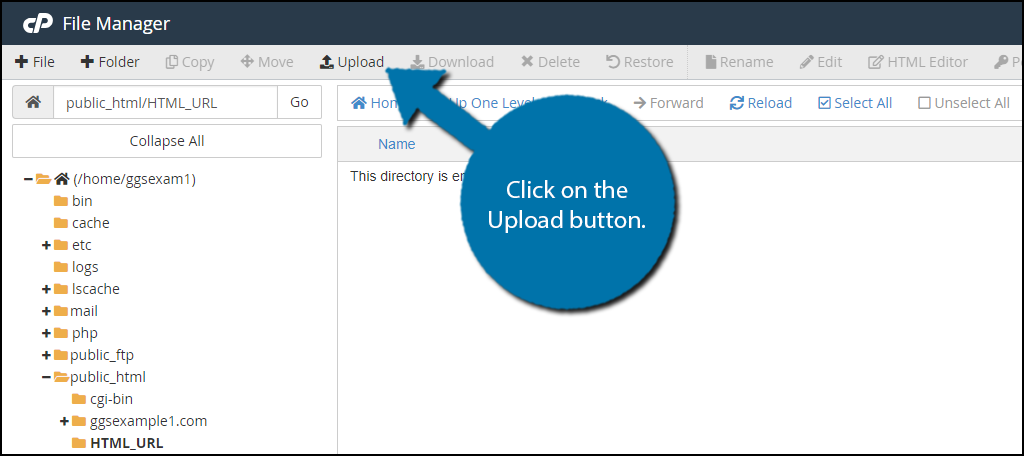
Select the Zipped folder you created at the beginning and upload it. There is a file size limit, but you should not be close to reaching it with a zip file. Once the file is uploaded, you need to extract it. Select the zip file and click on the Extract button.
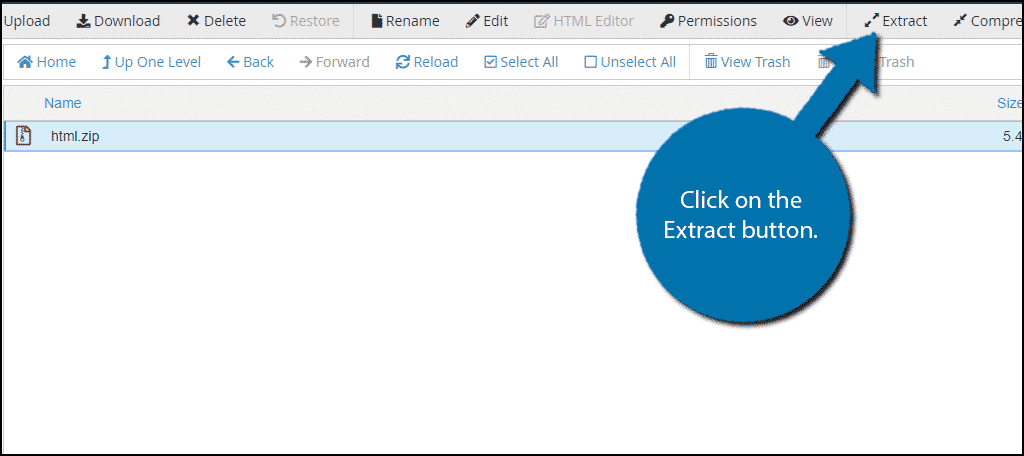
You can now delete the zip file if you wish to. It will not impact your page at all if you leave it there. Your page should now be visible on your website. Now if you try to access the page and see a 404 error, it means one of two things.
First, it probably means you did not rename your file from index.html to index.php. Make sure that the file is named properly. If that wasn’t the case, then you have to make a simple code edit. Locate your website’s .htacces file and paste the following code:
RewriteRule ^(.*)index\.(php|html?)$ /$1 [R=301,NC,L]
Congratulations, you have successfully uploaded an HTML page in WordPress and learned how to fix any potential 404 error pages that might occur. You can repeat this process as many times as you like to add more HTML pages to WordPress.
Method 2: Add HTML Pages in WordPress with Gutenberg
The second method is just using the Gutenberg editor. While this is technically easier to do, many find it much easier to write HTML outside of WordPress. Thus, uploading a file when there is a lot of it is preferable for many.
That said, you can easily add HTML to any page by using the HTML block in Gutenberg. In fact, this isn’t exclusive to pages; you can also do it for posts on your website.
Step 1: Open A Page
There’s not much to this method. Simply open up an existing page in WordPress to which you want to add HTML. Alternatively, create a new page for testing purposes.
If this is your first time, I strongly recommend creating a test page. This allows you to save the work if you don’t finish in one sitting, which could be the case if you are adding a lot.
Even if you plan to edit a live page, starting with a draft, and copying it over would be a better choice.
Step 2: Add the HTML Block
HTML is an essential part of any website, and WordPress provides a dedicated HTML block to make it easier to add it to your pages and posts. Although this won’t create a dedicated HTML page, it is still worth covering.
Once on the page, add the Custom HTML block to it.
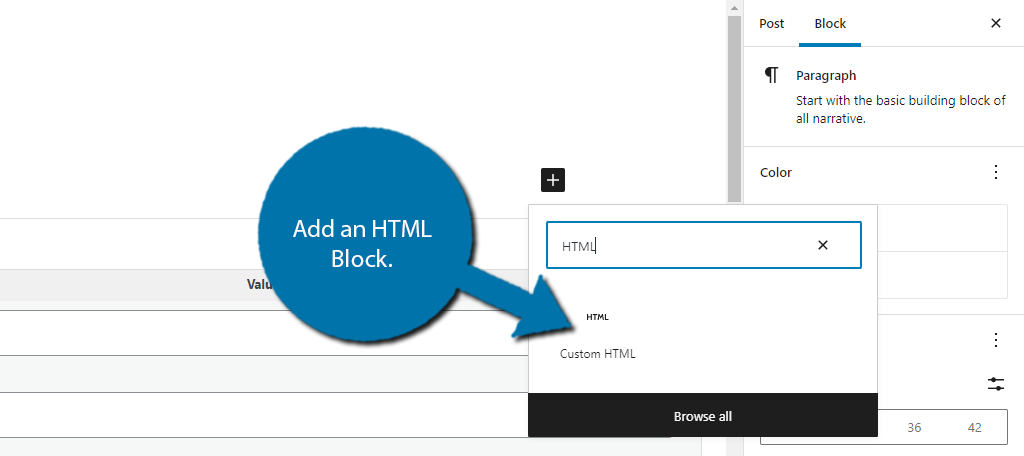
Step 3: Add HTML Cod to the Page
The HTML block is very easy to understand and just consists of two options. By default, you will start out in the HTML editor, which just looks like a line you can write in. And truthfully, that’s all it is, so type out the HTML you want to add.
After that, you can click on the Preview option to view what that HTML will look like directly in the Gutenberg editor. That makes it a nifty tool when you want to add a specific element via HTML.
This is perhaps one of the easiest ways to add HTML code to a WordPress page or post. It’s perfect for adding snippets from third-party sources, such as Google AdSense or widgets from social media sites.
Unfortunately, what this block will not do is help you troubleshoot. If something isn’t working right, it won’t give you any advice. Thus, this tool isn’t very handy for beginners, but it can be a powerful addition to any website.
Use the Pages You Want to Use
WordPress is the world’s most popular website-building platform and for a good reason. It has so many customization options to choose from like creating your own custom page templates or uploading HTML pages instead.
Odds are if you want to do something in WordPress, there is a way or a few ways to do it. Always look to see if you can do it, but also be aware of any errors that you are doing may cause before starting. If you are aware they may happen, you will be able to quickly fix them.
Alternatively, you can try using a page-building plugin like Elementor. This gives you access to more tools than the default editor in WordPress.
How easy do you find this process? Why do you want to add an HTML page to WordPress instead of creating your own?

