There are many ways to build content in WordPress with Gutenberg, but you are not limited to using it. WordPress comes with a variety of page builder plugins you can use, and today we will be looking at the Post and Page Builder by BoldGrid.
Like most page builders in WordPress, it utilizes a drag-and-drop interface where users can select an element and use their mouse to place it. As such, it is rather simple to use, but there are a lot of options, which may create a learning curve.
One issue that most page builders face is compatibility with themes, but with BoldGrid, you don’t have to worry. The plugin is designed to work with the vast majority of these. You can also consider using the dedicated BoldGrid theme if that interests you.
This tutorial is for:WordPress 6.6.2Plugin: Post and Page Builder by BoldGrid v1.27.2
Why Use a Page Builder in WordPress?
The Gutenberg editor in WordPress is great, but many users either find it more difficult to use than a drag-and-drop page builder, or like the additional options most page builders offer.
Naturally, most page builders deliver more options. This is to ensure that the tool offers more than the default WordPress editor.
In most cases, this is true. It is worth highlighting that with plugins installed, Gutenberg can do just about anything you want it to. However, that can take some work and it is not intuitive for most beginners.
One thing that really simplifies content creation in a page builder is that everything you need is already there. You don’t need to look for additional add-ons or anything like that, although they do exist in some cases.
Users have more options from the get-go and can incorporate them to make the best content possible.
How to Use Post and Page Builder by BoldGrid
BoldGrid utilizes a What You See IS What You Get (WYSIWYG) editor that allows users to drag and drop elements in any location. It also comes with a variety of pre-made elements and templates you can utilize to get a head start.
Like most page builders, BoldGrid does have a learning curve because of the number of options available. That said, I think it is a small one that most users will overcome within an hour of using the plugin.
Let’s take a look at how to use one of the best page builders for WordPress.
Step 1: Install BoldGrid
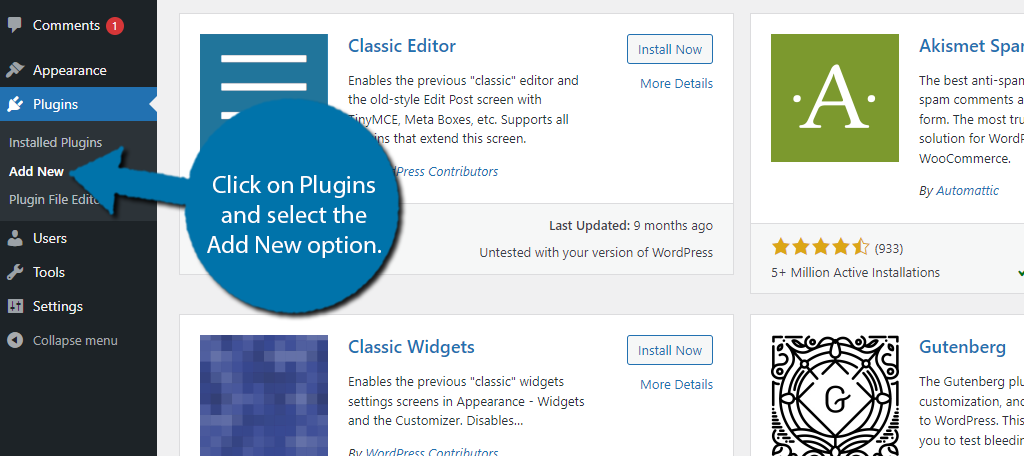
Let’s start by clicking on Plugins and selecting the Add New option on the left-hand admin panel.
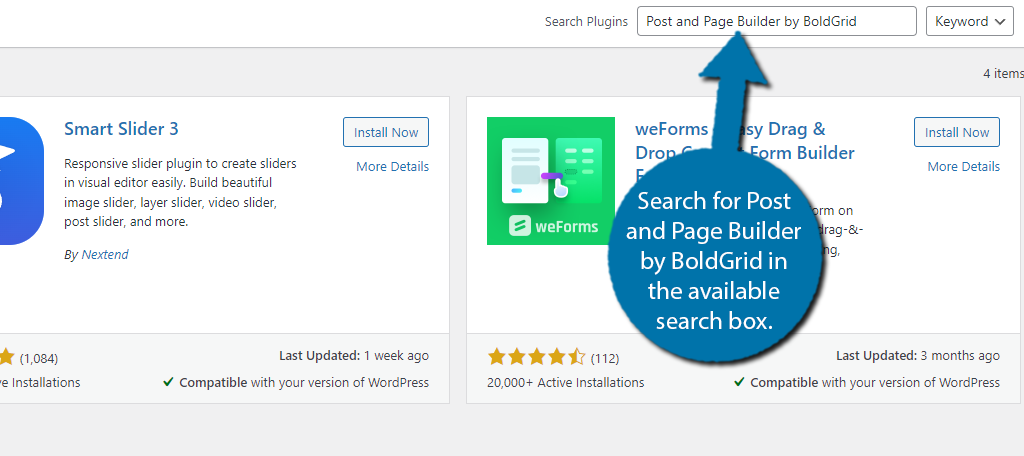
Search for Post and Page Builder by BoldGrid in the available search box. This will pull up additional plugins that you may find helpful.
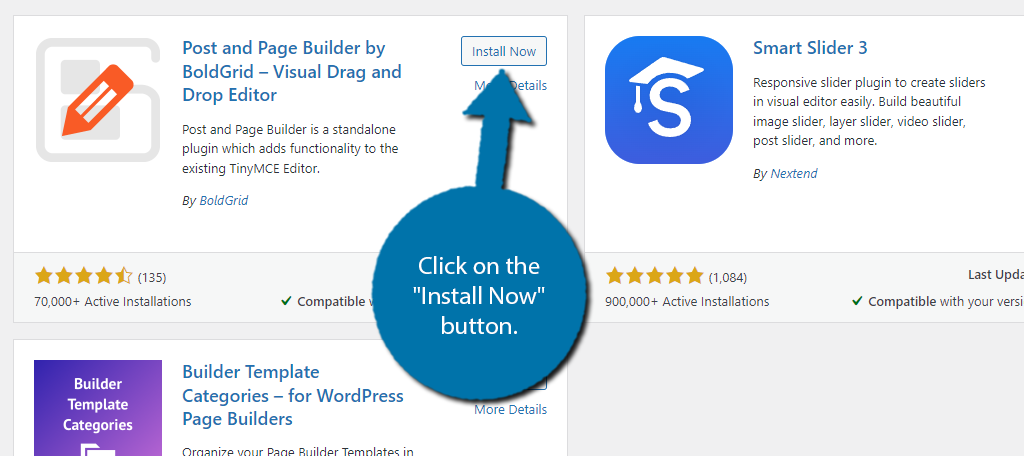
Find the Post and Page Builder by BoldGrid plugin and click on the “Install Now” button and activate the plugin for use.
Step 2: Obtain a BoldGrid Key
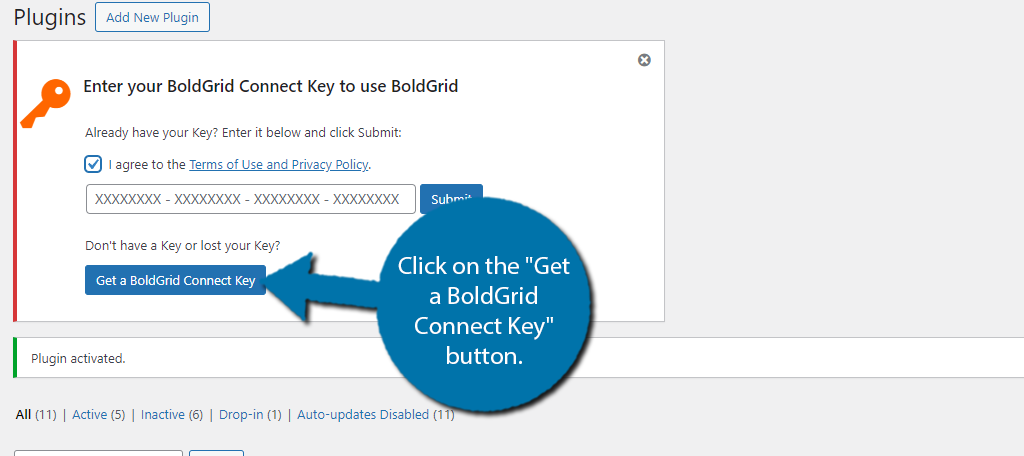
The first thing you will notice when you install the plugin is a message stating that you need a BoldGrid Connect Key. There are two types of keys. The first is the Premium key which gives you access to everything. The second is the free key, which is what we will use today.
Click on the “Get a BoldGrid Connect Key” button.
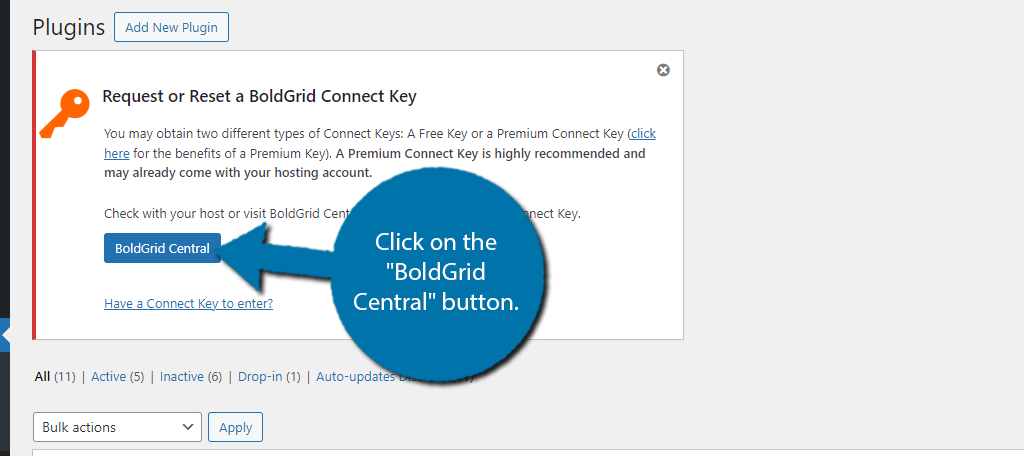
The next message will inform you about the two different keys. Click on the “BoldGrid Central” button.
Next, you will go through the process of creating a BoldGrid account and obtaining your key. First, you will need to provide a valid email address. It will then ask you to sign up if you do not already have an account.
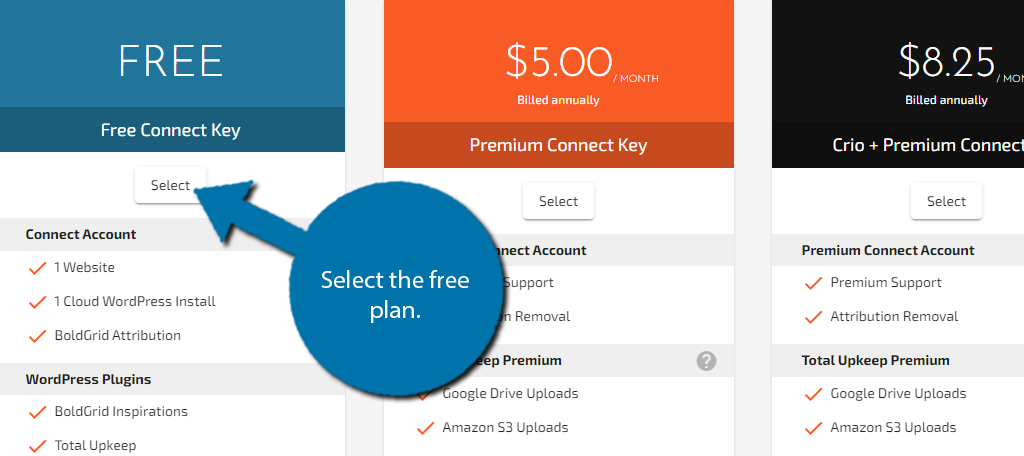
This will bring you to the plan selection screen. Select the free plan.
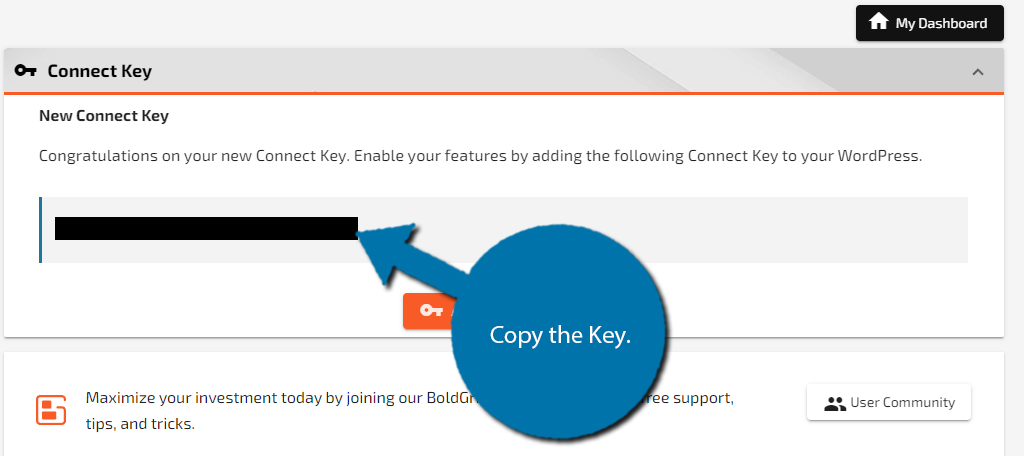
You should immediately see your Connect Key on the next page. Copy it.
Note: There is an “Add to My WordPress” button that did not work for me. You may want to try that instead.
Return to WordPress and paste the key into the box. Finally, click on the “Submit” button.
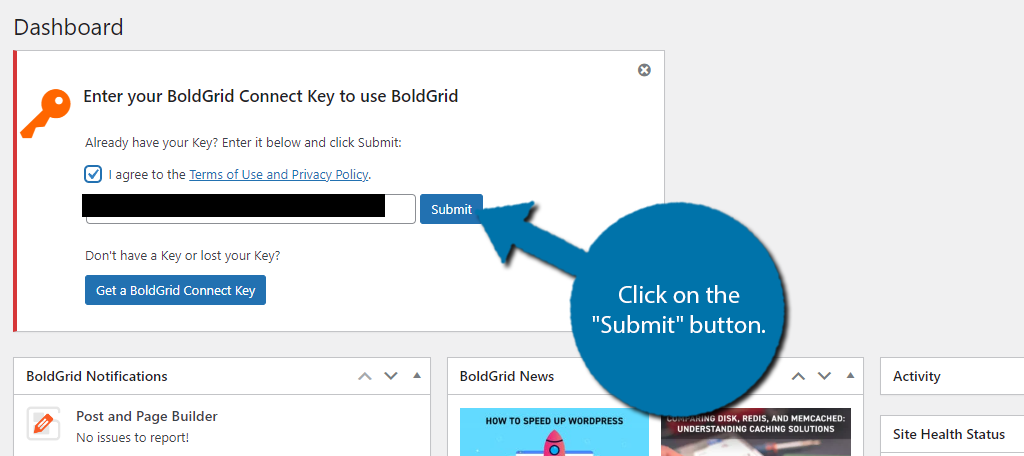
With that out of the way, you are now ready to start using the plugin.
Step 3: Create Blocks
A good starting point for this plugin would be the block creator. This allows you to create your own block using the template material of the plugin. For example, you can use the default price tables to create your own price table block.
This way, if you need to place the pricing table in multiple locations throughout your site, you’ll just need to add the block.
To begin, click on Post and Page Builder and select the Add New Block option.
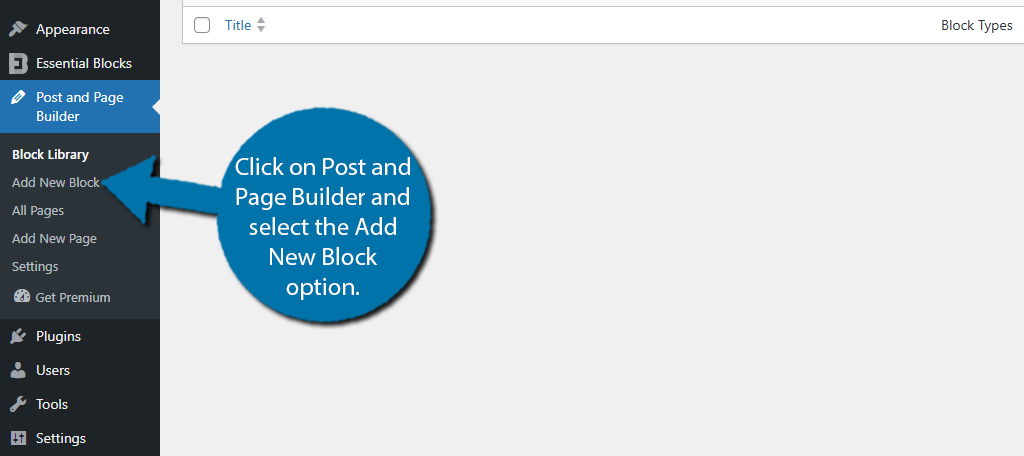
Here, you have two options. The first is to start with a blank page. This allows you to build your own block from scratch using everything the page builder has to offer. We are going to cover these tools in the next section. Instead, let’s use the pre-made content.
Click on the “Add Block” button.
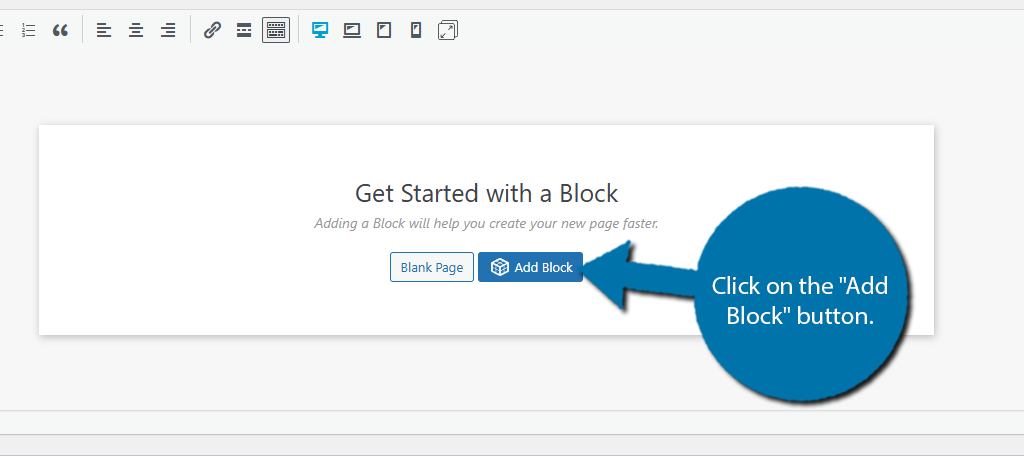
This will open up the template section of the page builder. It has a variety of content to choose from. The first thing you want to do is select what kind of content you want to use. In my case, I am going to select Pricing Tables.
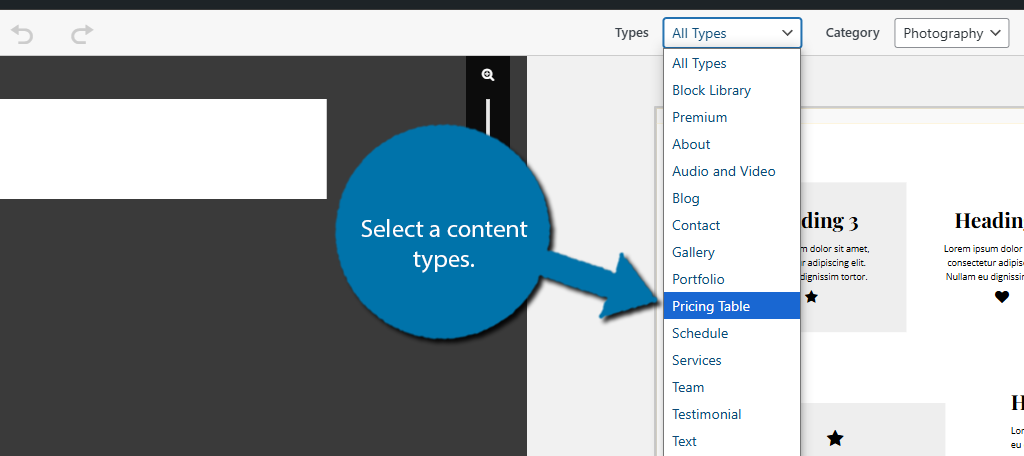
Next to this drop-down is a Category selector. This will determine the designs that the pricing table uses. Pick whichever one suits your site. Take your time and explore all of the options, and remember, you can change the template.
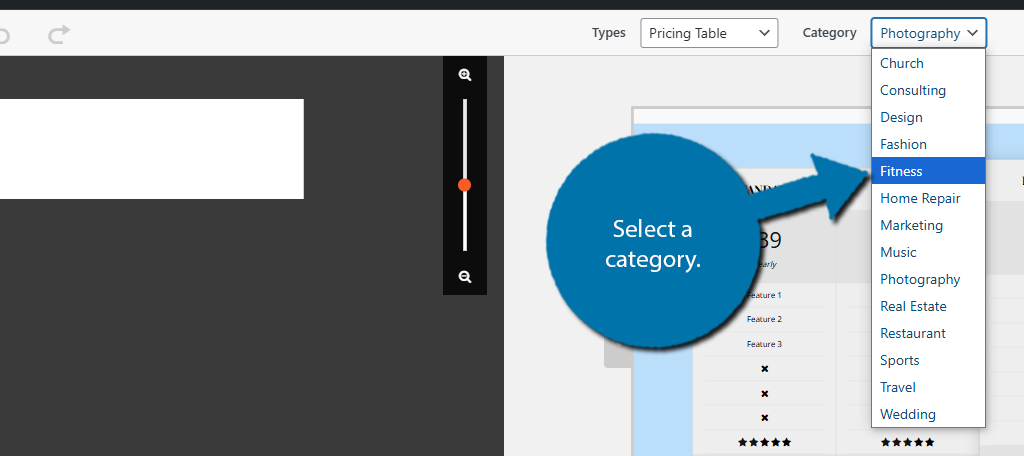
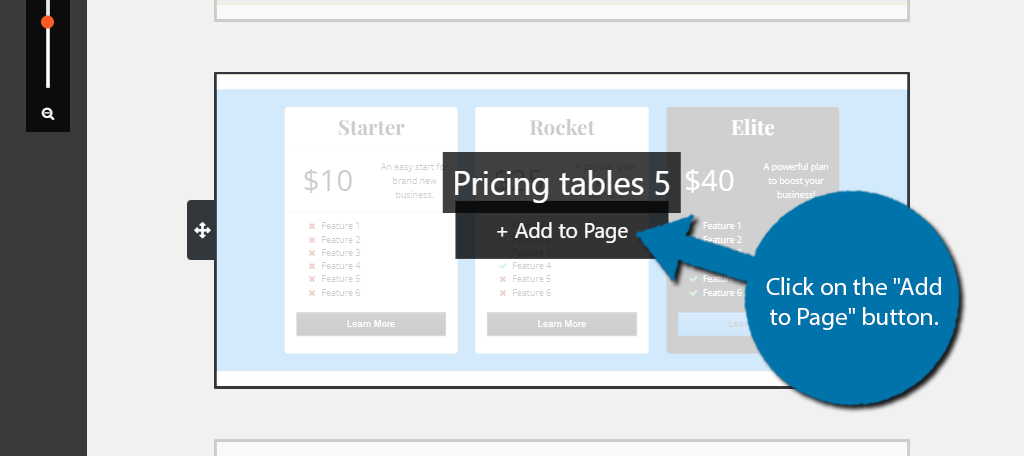
Once you have found one you like, hover your mouse over it and click on the “Add to Page” button. This will add it to the block we are creating. If you see a “Get Premium” button, that means the particular template is exclusive to the premium version of the plugin.
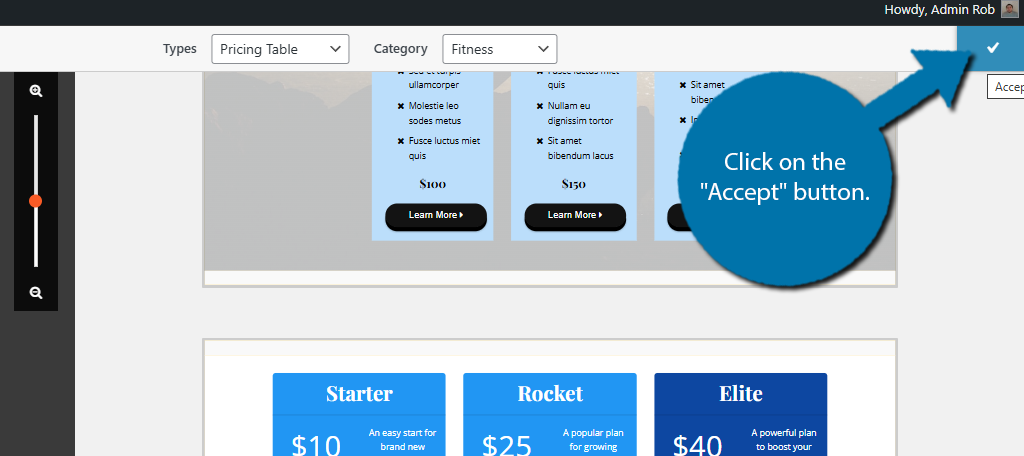
You should now see the template you have selected appear on the left side. Now, click the “Accept” button (represented by a checkmark) at the top right of the screen.
This will bring you back to the editor screen. Now it is time to edit the template. First, you should replace all of the text with your site’s information. In the case of the Pricing Table, that means changing the plan names, adding the benefits of each plan, and the prices.
Simply click on the text you wish to edit and do so as you normally would. You can change the green checkmarks or red X’s to a different icon by clicking on them. The plugin has a huge selection of icons to choose from.
If you click on the buttons, you can choose a URL to send the user when clicked. Naturally, this should be to a product or service page where the user can purchase the plan they clicked on.
Once you are done editing the block, be sure to add a title for it at the top. This is how you will find it when you want to add it to a post or page. And remember, this is just one example of what you can create.
If you ever find yourself creating the same content over and over, turn it into a block so you can easily add it.
Step 4: Page Builder Tools
The block builder we just went over is a small sample of what the page builder is like. They are identical to work with, but instead of using a template to start, we are going to cover some of the tools you can use to build your own content.
Once you start a new page, click on the “Blank Page” button to begin without using the templates. That said, the templates are great, so feel free to use them alongside your own creations.
Since there are so many possibilities, I cannot possibly show everything the plugin can do. So, I will just cover some of the basics and explain the possibilities that you can make.
Let’s start by making a stylized header for a page.
First, start off by entering what you want the header to say. You should then change it from a paragraph to a header by using the drop-down menu in the toolbar.

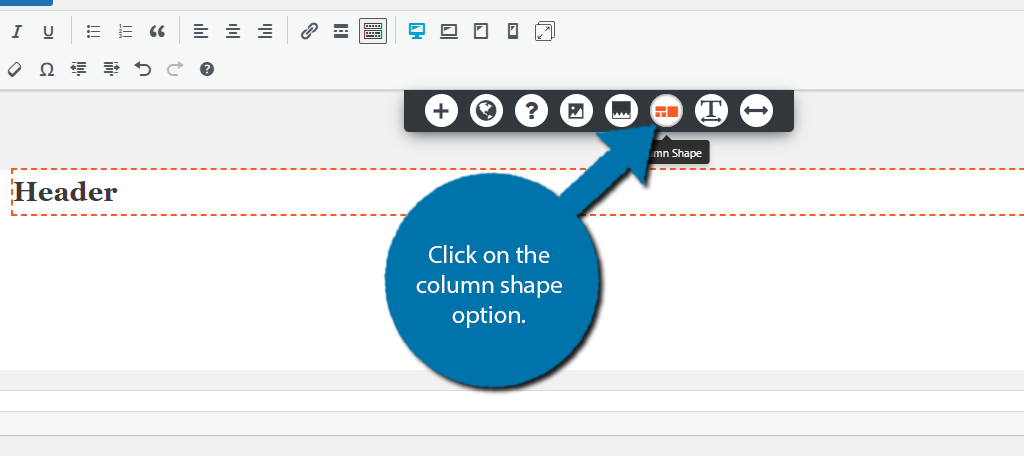
Next, let’s add a column shape so it stands out as a new section. To do this, make sure you have your cursor on the header, and then click on the column shape option.
This will open up the Column Shape options box. Here you can select the shape and customize it. First, choose a shape to use.
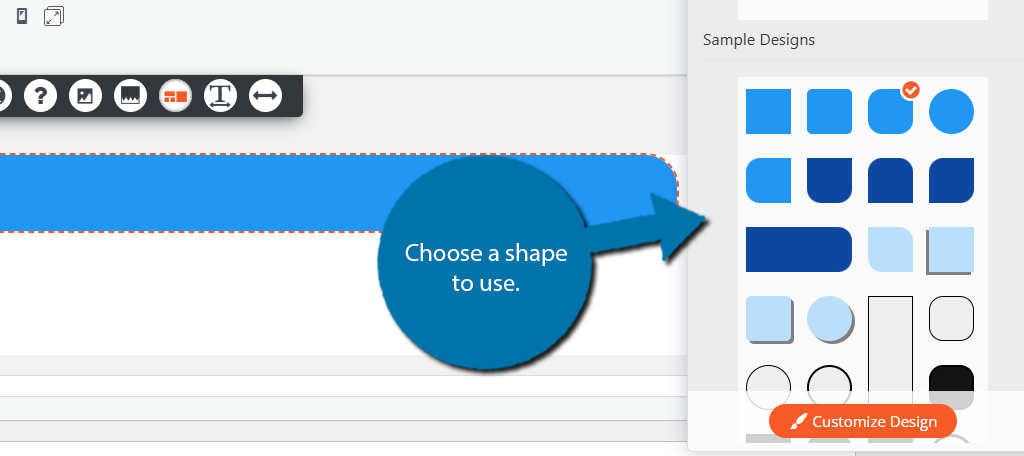
Now, click on the “Customize Design” button. This will open up an additional box that you can use to change every aspect of the shape. This includes the color, margins, border, shadow, animations, and even a spot to add your own CSS.
Simply go through the options and adjust them as you see fit. You will be able to see the changes you make in real-time as the editor is fully visible. Once you are happy with the shape, you may want to change the font to better match what you made.
To do this, click on the Font option.
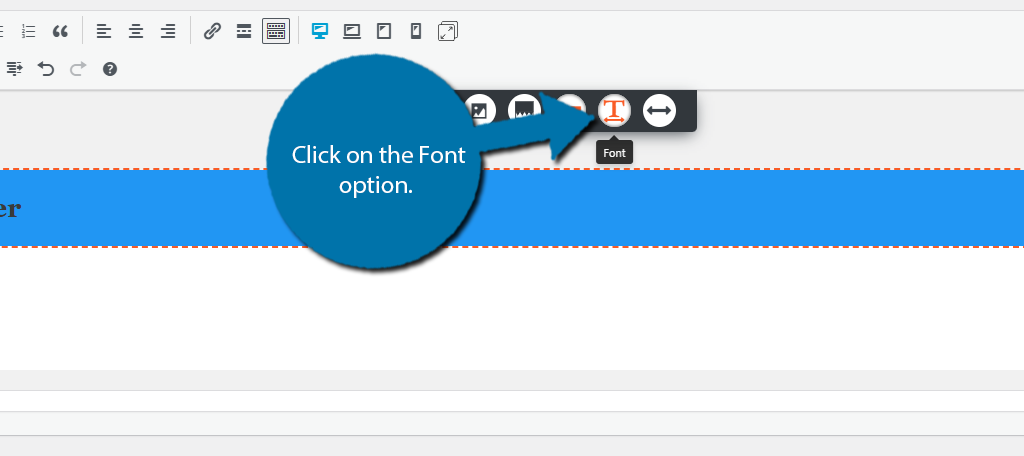
This will open up the font options box. Here, you can adjust the size of the font, the type of font, the color of the font, and virtually every other aspect related to fonts. Just be mindful that using non-standard fonts can slow down your website.
These options exist for virtually every element you add to the page. You can drag any element you create to a different position at any time. Now, let’s take a look at the blocks.
Step 5: Using Blocks
Now that you know the basics of the editor, the real meat and potatoes of this plugin are the blocks. While we covered how to make our own block, the plugin comes with several that you can add to your post or page content.
It works similarly to Gutenberg, but they use the drag-and-drop interface. To add a block, click on the “+” button.
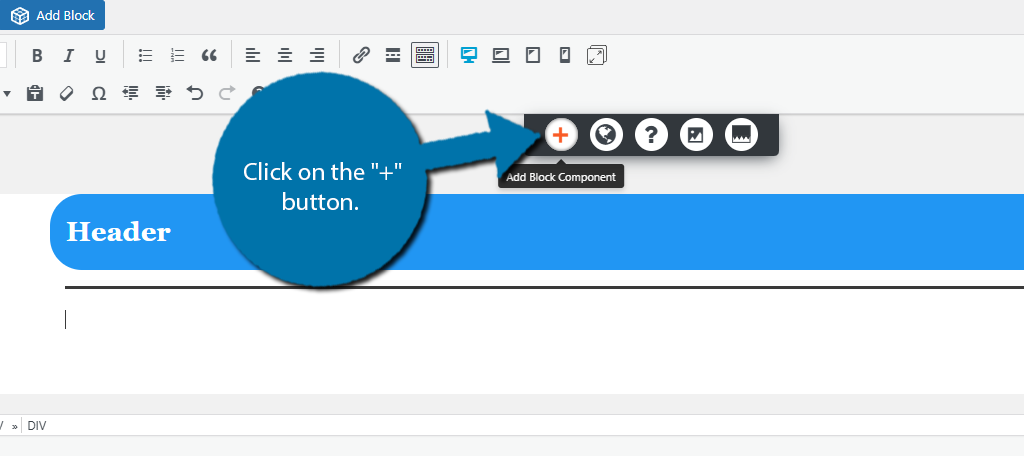
This will open up the Add Block Component box. Here you can select to add blocks, layout designs, media, and even widgets. All you need to do is select the option you want to use. For example, let’s use the Layout option.
Note: If an option in here is all black, that is because it is only available in the Premium version of the plugin.

You will then be prompted to choose a layout, which is a series of columns and rows that you can choose from.
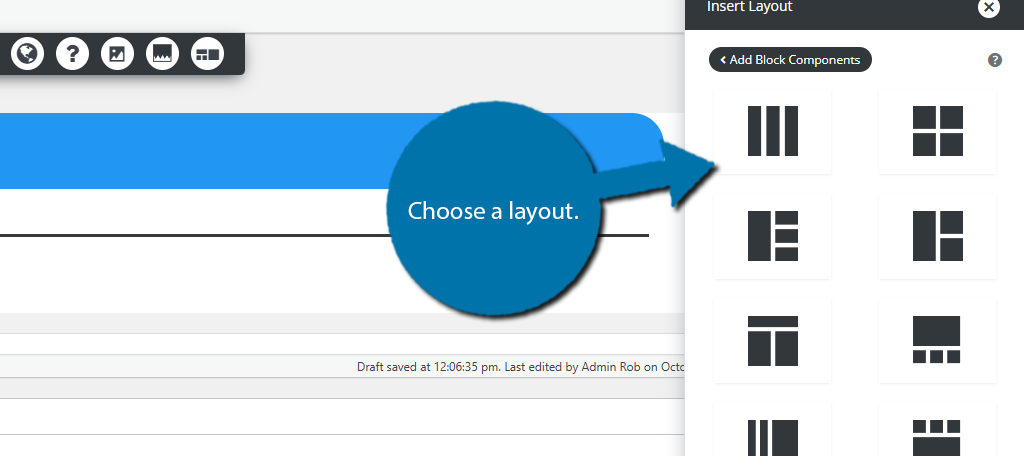
The layout will appear within the editor. It will consist of filler text, so be sure to edit it as you see fit. There are a lot of layouts, so be sure to check each one to see which is your favorite.
The rest of the blocks are pretty much identical to how they work in WordPress. You can add images, video content, audio files, and more. If you already understand WordPress a little, this tool should be easy to get the hang of.
And that about covers the basics of what you can do with BoldGrid. While there is a lot more, it really depends on what you are trying to make. I highly recommend checking out the BoldGrid support area for additional help.
Is Premium Worth It?
Premium is quite cheap as it only costs $5 per month ($60 for the year). The extra features it adds can be very valuable to some developers, and to others, not so much. It really depends on your needs. When using the free version, be on the lookout for premium features.
If they sound useful, consider upgrading to the Premium version to use it. Some of the key features include:
- Premium Support Access
- Ability to Upload to Google Drive
- Creating Tabbed Content
- More Templates, Layouts, and Designs
- Sliders
- Post Snippets
If these features sound useful to you and the price tag is acceptable, it is a good purchase. But you can do a lot with the free version if you are looking to save a few dollars. You can also install other plugins to help.
For example, if you need to use a slider, you can just install a slider plugin that is free but you will have to use Gutenberg to use it. This can add to the complexity of using the page builder.
Start Building Pages with BoldGrid Today
As you can see, the BoldGrid page builder for WordPress is full of great features and tools. However, it can take a bit to get used to as it has a slightly higher learning curve compared to other page builders like Elementor.
That said, if you learn how to use the plugin, it can do a lot of things that others can’t. Thus, there is a lot to look forward to. Just be sure to take your time and practice using each tool to make the most out of it.
I hope you found this tutorial helpful in learning how to use the BoldGrid page builder.
How easy did you find BoldGrid to use compared to other page builders? What is your favorite tool in BoldGrid?


