As a GreenGeeks reseller, the name servers for your customer’s domains will be our name servers on the websitehostserver.net domain (like chi-ns1.websitehostserver.net).
If you prefer to use name servers on your own domain (like ns1.ggexample.com), you can set the default name servers in WebHost Manager (WHM).
To be used as a name server, a domain must first be registered as a name server using an IP address. You can find the GreenGeeks nameserver IPs in the Private Nameserver support article.
If you registered the domain name that you want to use for private name servers through GreenGeeks, this article will show you how to register the domain as a name server.
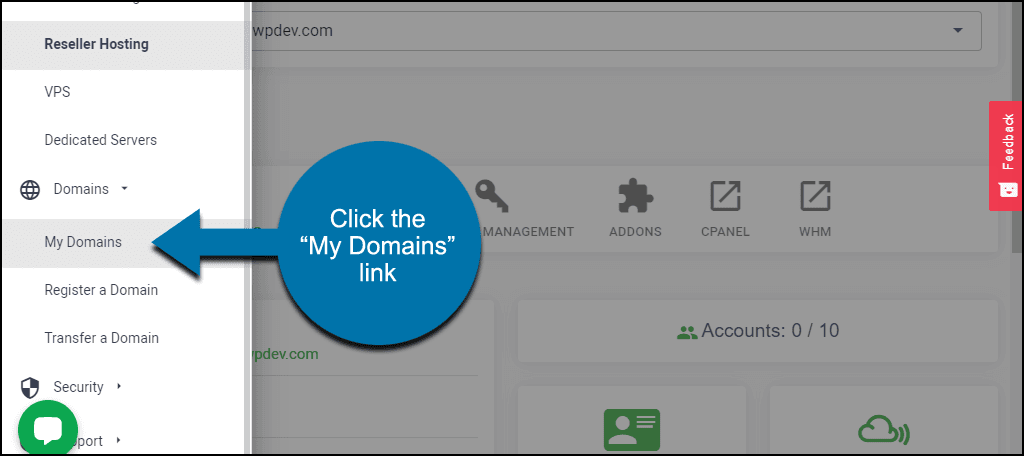
In the navigation, click “Domains” then “My Domains.”
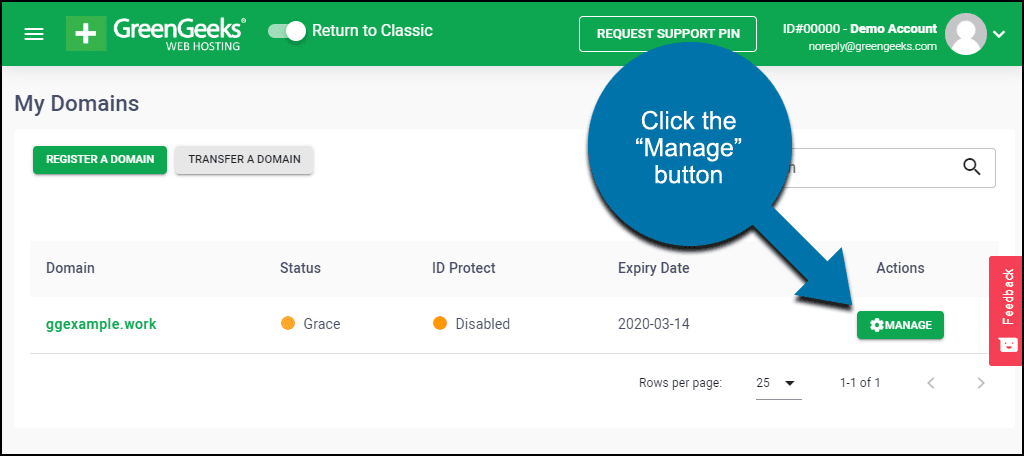
Click the “Manage” button for the domain you are working with.
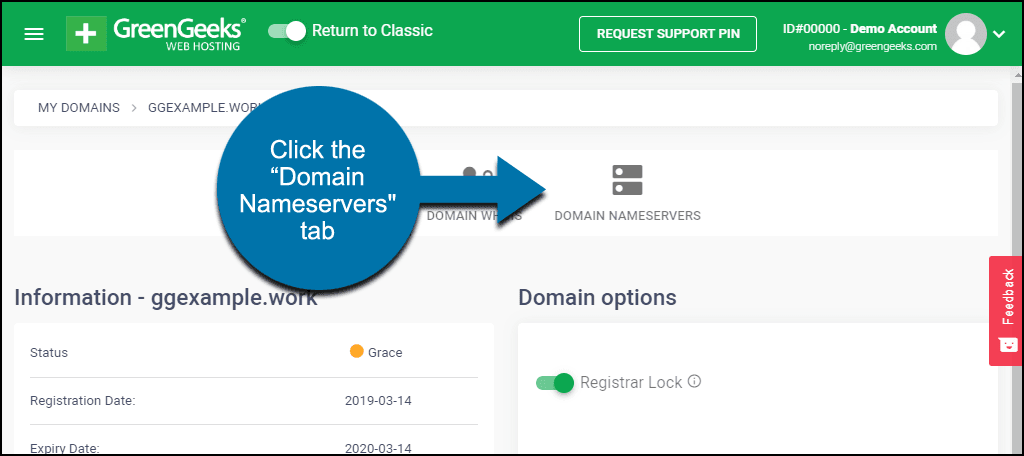
Click the “Domain Nameservers” tab.
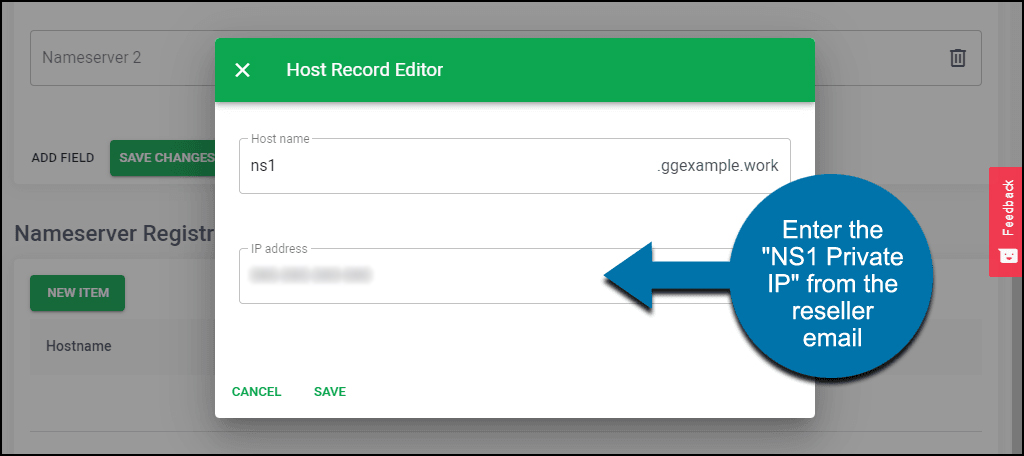
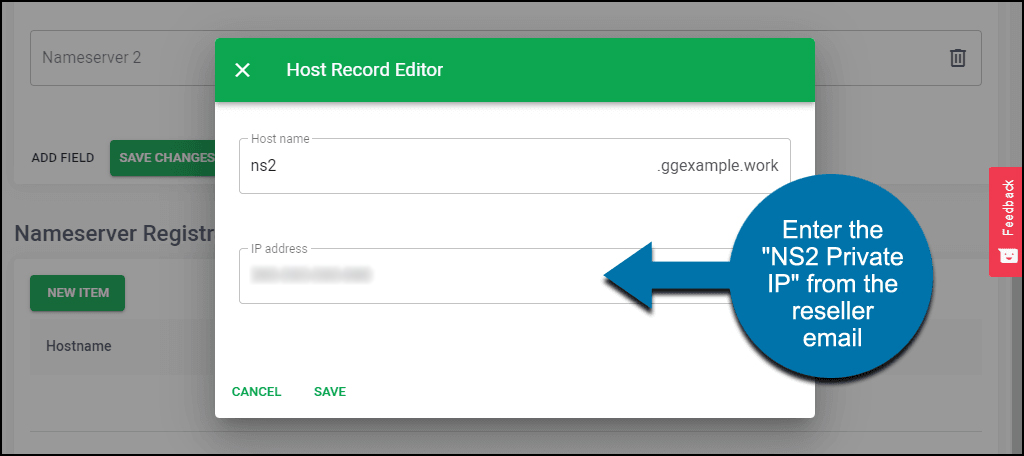
Scroll down to the “Nameserver Registration” section and click the “New Item” button.
- Enter ns1 in the first box, and the “Nameserver 1 IP address” from the private nameserver article into the second field.
- Click the “Save” link.
- Enter ns2 in the first box, and the “Nameserver 2 IP address” from the private nameserver article into the second field.
- Click the “Save” link.
Like any DNS changes, these may take several hours to propagate. You can ping the new ns entries to determine when they have propagated.
Once the name servers have propagated, you can use your new private name servers as the default name servers in WebHost Manager (WHM).

